
What changed in this revision (2026-11-05): screenshots and text were re-recorded against the current code (2.0.0). The behaviours below differ from 1.x; reading them first avoids the common pitfalls.
- “Unlimited” can be selected in the builder: it stays unlimited after saving and reloading, and preview and export both follow the actual page count instead of being squeezed into one page.
- “Maximum length” applies to six formats: of the seven export formats, all but JSON — PDF / Word / HTML / Markdown / plain text / image (PNG) — are trimmed to the same limit, and the export states which block was the first to be left out.
- Image (PNG) is now an export format: pages are converted from the same PDF (300 dpi), a single page downloads directly and multiple pages are packed into a zip. For applications, PDF is still the better choice: its layout and pagination are the most stable.
- Bilingual versions are available: the same resume can have an English version, compared field by field and adopted item by item; names, organisations, dates and numbers are fact-locked and are not translated or rewritten.
- The generation dialog now lists all 12 built-in sections: publications, research projects, patents and certifications can be ordered into the body, and custom sections appear in the same list.
- Profile fields can be hidden: both custom and default fields have a hide switch; hidden and private fields never appear in global search or in generation candidates.
- Basic information gained five fields that can go in the header: preferred city, portfolio link, political affiliation, driving license and availability.
- Two definitions changed: Word export now draws the header rule, skill-tag background and bullet glyph; the ATS score is recalculated from keyword coverage, so the same resume scores lower than before — a correction of the definition, not a decline in quality.
Three steps to get started
-
Download and unzip
Download the archive for your platform (Windows:
ResumeForge-2.0.0-windows.zip; macOS:ResumeForge-2.0.0-macos.zip— program files only, no personal data) and extract it to any directory. If GitHub is reachable,git cloneworks too. -
Double-click the launcher
On Windows double-click
start.cmd; on macOS double-clickstart.command. The launcher prepares Python and Node.js, installs dependencies, starts the backend and frontend and opens the page (defaulthttp://127.0.0.1:5173). The first run needs a network connection and usually takes a few minutes. macOS blocks the first launch once — see section 1. -
Configure an LLM if you need one
If you want AI resume generation, requirement reading, the assistant or anything interview-related, open Settings → AI model, enter the endpoint and API key, and test the connection. If you only maintain your profile, manage jobs, write resumes by hand and export, you can skip this step.
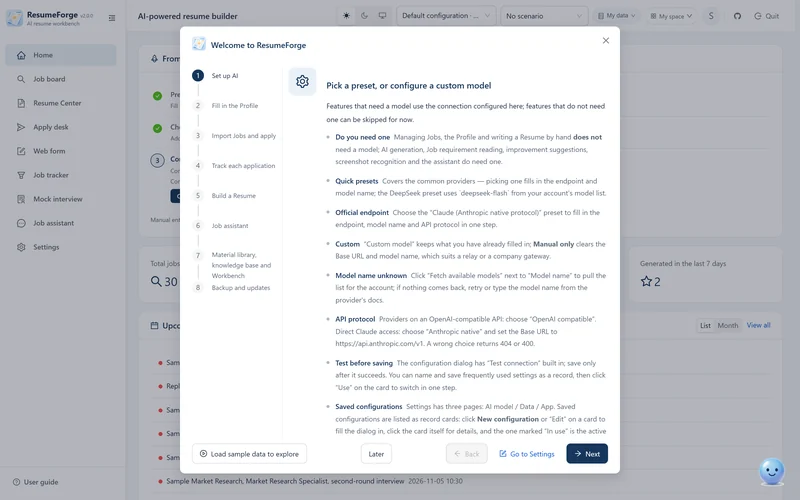
Not comfortable with GitHub or the Releases page? Hand the link to an AI. Give the link — or the archive you already downloaded — to any assistant (ChatGPT, DeepSeek, Doubao, Claude all work) and ask it to walk you through downloading, unzipping and which file to double-click. You can also hand it the zip and ask what is inside and which file to start.
For example, say this to an AI and it will answer with step-by-step instructions:
I want to use https://github.com/magicapple123/ResumeForge — please walk me through installing it and opening it, step by step.Importing the demo dataset is the fastest way to get oriented. Go to Settings → Data and export → Import backup as a new dataset and import the demo package from this site (exported by 2.0.0 and matching the 2.0.0 download; 2.0 does not import 1.x backups). Switch to it and you will see 31 jobs, 15 resumes (including a finished A4 with a portrait photo and real layout-diagnosis and fabrication-check records), 21 claims, 20 tracker entries, 13 application records across 6 batches with failure diagnostics, 4 match analyses with the five verdict types and their evidence, 14 web-form profile entries, 12 web-form fill records, 6 referrals, 20 reminders, 17 knowledge notes and 18 material-library items, plus 7 assistant conversations, 2 mock interviews, 2 completed interview deep dives (with review and re-practice queue), 2 question-bank histories and 3 background generation tasks. Importing only adds a dataset; your existing data is untouched. The demo package carries no API key, so add your own before using AI features.
Interface tour: home and sidebar
The app opens on the home page. It does not perform any task itself; it answers two questions: where things stand, and what to do next.
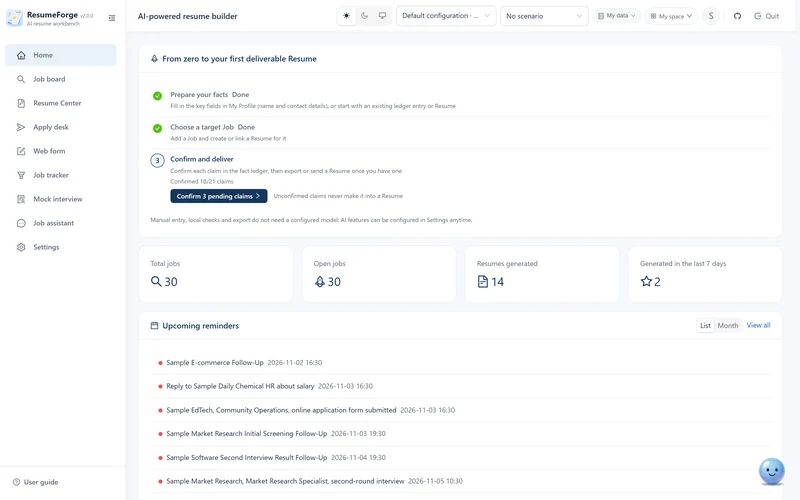
Four stat cards and the first-delivery progress
- Stat cards: total jobs, open jobs, resumes generated, generated in the last 7 days. Overview only; they are not clickable.
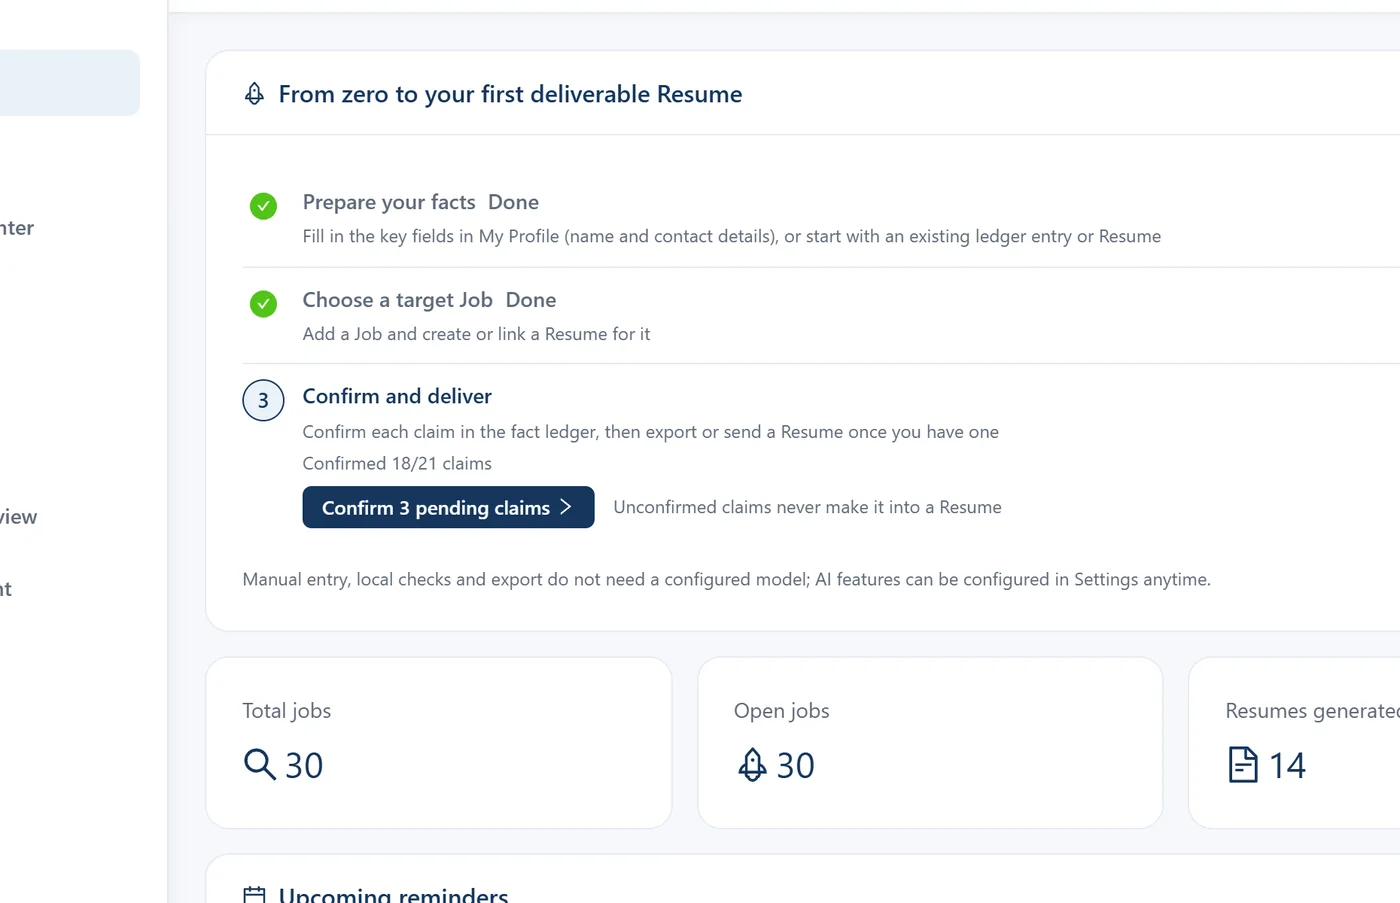
- “From zero to a first deliverable resume”: three stages point to the next step — prepare the facts (fill in name and contact details, or already have ledger / resume facts), choose a target job, then verify and deliver (work through the claims in the ledger and export or send once a resume exists). Each stage has its own entry and is marked Done when complete; once all three are done the panel disappears.
- A fixed note at the bottom of the panel: hand-written resumes, local checks and export need no model configuration; AI features can be configured in settings at any time.
Shortcuts, search and recent activity
- Shortcuts: by default the job board, resume centre, apply desk, tracker, mock interview, analytics and settings; the top-right of the card lets you choose which entries to show, at least one is kept, and the choice is stored locally.
- Global search: type a keyword and press Enter; results are grouped by kind and work with keyboard and mouse (see section 30).
- Three recent-activity cards: recent jobs, recently generated resumes and recent applications, each with “View all” or “View progress”.
- Upcoming reminders: list and calendar views, color-coded by urgency (see section 19).
Sidebar and startup dialogs
- The sidebar order is fixed: Home → Job board → Resume centre → Apply desk → Web form → Tracker → Mock interview → Assistant → Settings. The bottom-left holds “User guide”; the GitHub repository sits in the top-right of the header, next to “Exit”.
- Collapsible: collapsing gives the width back to the page, and the state is remembered.
- Chinese / English switch: Settings → Appearance and interaction → Language; in the English interface, enum values and labels pushed by the server use the same translation set.
- Startup reminder dialog: when enabled in settings and unfinished reminders exist, the app shows “Upcoming reminders” first, once per session; if the user guide is still open it waits behind it, so the two dialogs never stack.
Try it online first, no install
Before deciding whether to download, you can click around the live demo page: it embeds a demo instance running in the browser where the interface, navigation, lists and detail drawers are real and only the data is fictional. The fullscreen toggle at the top right of the screen area fills the window (press it again or hit Esc to leave), which helps on small laptops and tablets.
The demo is not connected to a real model. AI output (assistant replies, generated resumes) is a pre-recorded replay — whatever you type, you get the same answers. It exists to let you learn the interface and the flow, not to do real work in a browser.
What the demo can do
- Click through every page: workbench, job board, requirement reading, fact ledger, resume generation, job tracker, analytics, interview prep, assistant, material library, knowledge base, trash, settings…
- Open the detail drawer for any job, resume or apply record and see what each field looks like and how the pieces connect.
- See what AI output looks like (a replayed assistant analysis and a replayed resume draft, streamed character by character exactly as in the real version).
- Click through the six-step tour at the top left of the demo page and the embedded instance jumps to the matching page.
What the demo cannot do
- You cannot really use AI. No model endpoint is connected; replies are pre-recorded.
- You cannot change anything. It is a read-only snapshot: creating, editing and deleting are refused with a pointer to the full version.
- You cannot export files. You can look at the layout but not get a PDF / Word / Markdown / JSON.
- The apply desk is unavailable. That path drives a browser on your own machine and only works in a local install.
- Do not enter real information. Everything on the page is fictional and nothing you type is saved.
Ready for the real thing? Download the full version
The full version runs on your own machine: it streams from your own model endpoint, keeps data locally, exports PDF / Word / Markdown / plain text / JSON with one-click redaction, and the apply desk really submits applications and diagnoses failures by category. It is free and Apache-2.0 licensed as well; the only cost is what your model provider charges.
When you are done, grab the latest build from the download section, or read the full capability comparison at the download area of the demo page.
The project is actively developed
This project is under active development: features, interface and documentation keep changing, and the demo snapshot follows. If a step feels awkward, if you want a feature, or if you hit an error, open an issue; if the tool is useful to you, a Star on the GitHub repository is the most direct support.
1. Install and launch
System requirements
- Operating system: the one-click launcher supports Windows 10 / 11 and macOS. Linux still needs the manual backend and frontend start described at the end of this section.
- Runtime: no preinstalled Python or Node.js is required — the launcher prepares its own under
runtime/, leaving the system untouched. macOS needs no Homebrew either, writes nothing to/usr/localand asks for no admin rights. - Disk: the program itself is small; the runtime and dependencies take a few hundred MB. Data (database, photos, attachments) is on top of that.
- Network: the first launch needs a connection to download the runtime and dependencies; day to day, only the AI calls you trigger, online search and job site operations reach the network.
- Ports: the backend listens on
8005and the frontend dev server uses5173. Change them with launch arguments when they are taken.
Option zero: desktop installer (Windows exe / macOS dmg, least effort)
Go to the Releases page (or the download section of this site) and download ResumeForge-Setup-2.0.0.exe (Windows) or ResumeForge-2.0.0-x64.dmg / ResumeForge-2.0.0-arm64.dmg (macOS, available since v1.0.1; choose arm64 for Apple Silicon, x64 for Intel — x64 also runs under Rosetta 2). Install it, then open ResumeForge from the desktop or Applications:
- Nothing to preinstall: portable Python and Node.js runtimes are prepared on first launch and never written into system directories.
- The data location is fixed and separate:
%APPDATA%\ResumeForge\dataholds the database, attachments, backups and browser sessions, and upgrading, uninstalling or reinstalling the program never touches it. - Upgrading from 0.18.0 keeps your data: the 1.0.0 installer includes an old-data rescue — before upgrading it copies the data from the old install directory and verifies every file, hands it back to the app afterwards, and the app confirms in a dialog, takes a backup and then migrates it into the user directory. If it detects the app running or a verification mismatch, it aborts the install and leaves the original data in place.
- In-app updates: Settings → Updates and help → Software update checks, downloads and restarts in place; the downloaded package is verified against the publisher's SHA-256.
- macOS installer (dmg): the package is unsigned, so if the first open says the developer cannot be verified, right-click → Open (or run
xattr -dr com.apple.quarantine /Applications/ResumeForge.app). User data lives in~/Library/Application Support/ResumeForge/and survives an overwrite install; the first launch assembles the Python runtime online (a few minutes, needs a connection).
One-click launcher (portable bundle or source: Windows and macOS)
- Windows: unzip, enter the directory and double-click
start.cmd. macOS: double-clickstart.commandin Finder. - The first run goes through: prepare Python → create the virtual environment → install backend dependencies → prepare Node.js → install frontend dependencies → start both → open the browser. Progress is reported at every step.
- Success looks like the browser opening by itself. Leave the window open — it is the application process.
When the first install fails, the message tells you what to do instead of dropping a raw English error. The most common case is a blocked network that prevents dependencies from installing; the launcher then prints a mirror command you can paste directly, for example:
backend\.venv\Scripts\python.exe -m pip install -i https://mirrors.aliyun.com/pypi/simple -r backend\requirements.txtThe prompt also states a check you can run yourself, such as “if this address will not open, the network is being blocked”.
Still stuck after following it? Ask in the QQ group 922830167; the installers are also mirrored in the group files.
macOS blocks the first launch once
macOS blocks any program downloaded from the internet that is not signed by Apple, and this project is one of them. So the first time you double-click start.command you may see "cannot be opened because Apple cannot check it for malicious software" — the program is fine; this is the download quarantine. Pick any one of the fixes below; you only need it once:
- In Finder, right-click
start.command→ Open and click Open once more in the dialog; - Or open Terminal, change into the project directory and run
xattr -dr com.apple.quarantine .once, then double-click again.
If double-clicking does nothing at all (some unzip tools drop the executable bit), open Terminal, change into the project directory and run the line below; it does exactly the same thing:
bash start.commandThe macOS launcher bootstraps itself the same way: Python and Node.js are downloaded as portable builds into runtime/tools/. No Homebrew, no admin password, nothing written to /usr/local. The supported Python versions are 3.11–3.13, and Node.js must be 20.19.0 or newer.
Launch arguments
| Parameter | Effect | Example |
|---|---|---|
-BackendPort | Set the backend port (8005 by default) | start.cmd -BackendPort 8010 |
-NoBrowser | Do not open a browser automatically after starting | start.cmd -NoBrowser |
-Reinstall | Force a rebuild of the runtime and dependencies (for troubleshooting) | start.cmd -Reinstall |
The table above uses the Windows spelling. macOS takes the same switches in hyphenated form, for example bash start.command --backend-port 8010 or bash start.command --no-browser. Double-clicking in Finder cannot pass arguments, so use the terminal once when you need a different port or do not want a browser window. --help lists every option on the macOS side.
Stopping the service
On Windows double-click stop.cmd, on macOS stop.command; you can also press Ctrl + C in the launcher window. Closing the window works too, but the stop script shuts the backend down cleanly and avoids a leftover process holding the port.
Manual start (development, troubleshooting, or Linux)
The backend lives in backend:
python -m venv .venv
.venv\Scripts\python.exe -m pip install -r requirements.txt   # macOS/Linux: use .venv/bin/python
.venv\Scripts\python.exe -m uvicorn app.main:app --port 8005
The frontend lives in frontend:
npm install
npm run dev            # dev mode, 5173 by default
npm run build          # production build
When you start it manually the frontend needs to know where the backend is: set VITE_BACKEND_URL=http://127.0.0.1:8005 before running npm run dev. The default is http://127.0.0.1:8000, which differs from the one-click launcher's 8005 — this is the easiest one to get wrong.
2. Configure an LLM (optional)
Open Settings → AI model. You can pick a built-in preset or enter any OpenAI-compatible endpoint.
Use a built-in preset
The dropdown lists 16 common services: DeepSeek, Claude (native Anthropic protocol), Doubao, Kimi, Qwen, Zhipu, MiniMax, SiliconFlow, OpenRouter, OpenAI, Gemini, Grok, Groq, Mistral, Ollama and LM Studio. Picking a preset fills in the base URL, model name and wire protocol.
The wire protocol is not optional; it has to match the service. Choosing Claude's native preset switches the protocol to native Anthropic. Keep the default while pointing at a different address and you will send Chat Completions requests wrapped in the Messages protocol — and all the error says is "the endpoint returned 404", which gives no hint that the protocol is wrong.
Fill in the parameters
- Wire protocol: OpenAI-compatible (most services) or native Anthropic (supports extended thinking and a separate system field).
- Base URL / model name: a preset fills them in; for a custom endpoint follow the provider's documentation, and note that some require
/v1in the base URL. - API key: may be left empty for local services that need no auth (Ollama, for example).
- Temperature: 0.1 by default. Resume generation cares about factual stability, so raising it is not recommended.
- Output limit: unlimited by default, meaning the provider's and model's own limit, so a hand-written 4096 cannot quietly truncate the output.
- Advanced parameters (expand as needed): top_p, frequency penalty, presence penalty, random seed, top_k, repetition penalty, stop sequences (up to 4), the Anthropic extended-thinking budget, and an extra request body field for the long-tail parameters individual providers add.
Fill everything in, click Test connection, and once it passes click New configuration to save. List available models shows what the current key can actually use, which beats guessing model names.
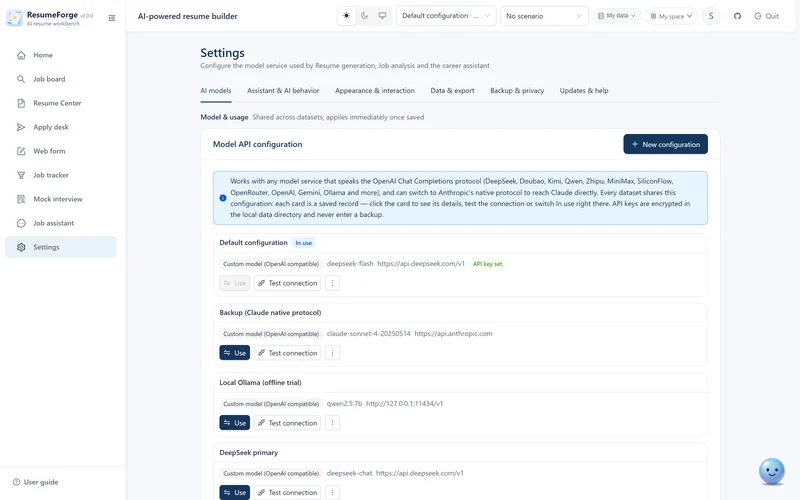
Keep several saved configurations
New configuration saves under a name, and reusing a name overwrites it. Configurations are listed as cards showing model name, base URL and status; click Use to switch to one. The model dropdown in the page header switches too, and double-clicking it tests the connection in place. The usual setup is one hosted model plus a local Ollama — switch when you are offline or do not want to spend.
Usage and cost estimate
The Usage card counts tokens separately for cache hits, cache misses and output, then converts each at its per-million-token price. They are kept apart because a cache hit is typically an order of magnitude cheaper; blended into one number the figure means nothing. It is only a rough sense of cost; your provider's invoice is authoritative.
How the API key is stored
The key is stored in the local application settings (a SQLite database) and is never uploaded. On Windows it is encrypted with DPAPI before storage (the ciphertext is bound to the current user and machine); other platforms keep it in plain text. Dataset export includes the global model configuration and API key by default (the switch “Include global model configuration and API key in backup (all saved records)” is on by default); clear it and the key stays out of the package. Use “Re-enter” whenever you need to replace it.
What still works without a model
- Manual entry, editing, filtering, batch operations and source labelling for jobs;
- Local rule-based parsing of job text (skill tags, field splitting);
- Local degradation of match analysis: no model is called, every requirement is honestly marked "to confirm" with a note that no AI comparison was made; the reference score is still computed by local rules but must not be read as an AI verdict;
- layout rendering, six built-in styles, layout presets, A4 preview and layout diagnosis;
- Every export format (HTML / PDF / Word / Markdown / plain text / JSON / image PNG);
- Resume version comparison and the local ATS check;
- All management operations for the profile, ledger, material library, knowledge base, reminders, referrals, trash and dataset backups.
Features that need a model: AI resume generation, requirement reading, the five match verdicts, the four writing enhancers, the exaggeration and deep-dive risk checks in quality, the assistant, mock interviews, the question bank, interview review and interview deep dives. The reference score is not on that list — local rules always compute it.
3. Profile and photo
My Profile is the source of everything a resume is built from. Fill it in once and every resume and every generation reuses it.
The default section order is: Education → Internships / work → Projects → Skills → Campus → Awards → Summary → Publications → Research projects → Intellectual property → Certifications → Languages; basic information is fixed in the header and does not take part in ordering. The order follows what recruiters usually look at first: what you do now and what you have built, with education kept to verifiable facts. To change it, drag the section handles in My Profile (or move up / down); the order is saved. Custom sections always come last.
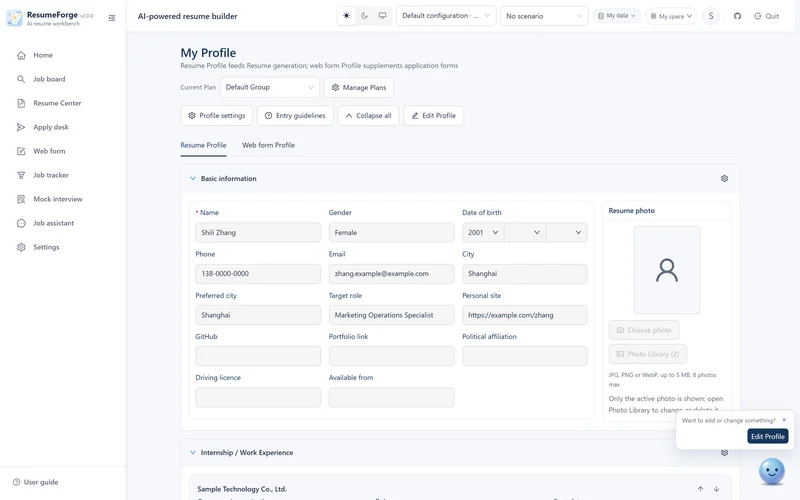
Basic information
Name, gender, date of birth, phone, email, city, preferred city, job objective, personal site, GitHub profile, portfolio link, political affiliation, driving license and availability, plus a summary. These fields go straight into the resume header and feed the completeness check at export; five of them stay out of the header by default (preferred city, portfolio link, political affiliation, driving license, availability). To show them in the header, add the field from the header in the builder after generation — it brings the current value with it. Where a field sits on the page by default is decided by Field settings → paper position. Personal site and GitHub profile are also passed to the model as candidate material (see section 8).
Education, work, projects, research and certificates
- Each kind of experience is a set of structured fields (organisation, role, start and end, description and so on), added with Add entry.
- Campus experience (student union, societies, competitions) is a separate kind, and for new graduates it carries most of the resume.
- Every experience can carry a Markdown / TXT reference file: the closing report, notes on the data screenshots, a retrospective. Generation reads it. The file name and length are shown next to the field, and View content lets you check it.
Custom Sections, custom Fields and hiding
- Custom Sections: create them in the Section manager in My Profile. Once created they can be dragged in the same order, appear in the Section order list in the generation dialog, and can appear in the resume body.
- Custom fields: every Section can have its own fields (job source, for example). Each row has a hide switch matching the one on default fields.
- A whole Section can be hidden too: each Section can be shown or hidden, and a hidden Section takes no part in generation or search; on wide screens fields lay themselves out in a multi-column grid so you do not have to scroll a long way.
- Hidden is not deleted: the data is still there, it just stops appearing in global search and in generation candidates. Collapse all only affects the expanded state — the two are not the same thing.
- Header fields: five basic-information fields stay out of the header by default (preferred city / portfolio link / political affiliation / driving license / availability); add them from the header in the builder when needed — the current value comes with them.
- Join job filters: a custom Section can choose on its own whether it takes part in job filtering. Only when it is on does it appear among the filter conditions; with it off, the Job board does not gain a filter nobody uses.
Profile plans: a plan only lists which sections take part
A profile plan solves “one set of profile data, drawn on differently per use”: a technical application needs only projects and skills, a research application needs publications and research projects along with it. A plan is a name plus which sections take part, and it copies nothing — a change made under any plan is visible in every plan at once. That keeps it light, and it never forks into “the same experience worded differently in two plans”.
The entry sits in the header of the Profile page: the Current Plan dropdown switches plans, and Manage Plans opens the same dialog, whose top has two tabs, “Plans” and “Sections and Fields”. There are not many rules, but each one is explicit: a Plan name is 1–40 characters and there are up to 20 Plans; the Default Plan always exists and cannot be deleted; a new Plan shows only basic information to begin with and you turn the other sections on one by one; deleting the current Plan falls back to the Default Plan and says so; and you cannot switch Plans while the profile is being edited — save or cancel first.
Switching a Plan affects only what is created after it: new resumes, AI generation and web-form data are drawn under the new Plan, while resumes already saved and the draft you are editing are untouched — they froze their tabs and visible fields when they were created, and later Plan changes only touch the new ones.
Resume photo
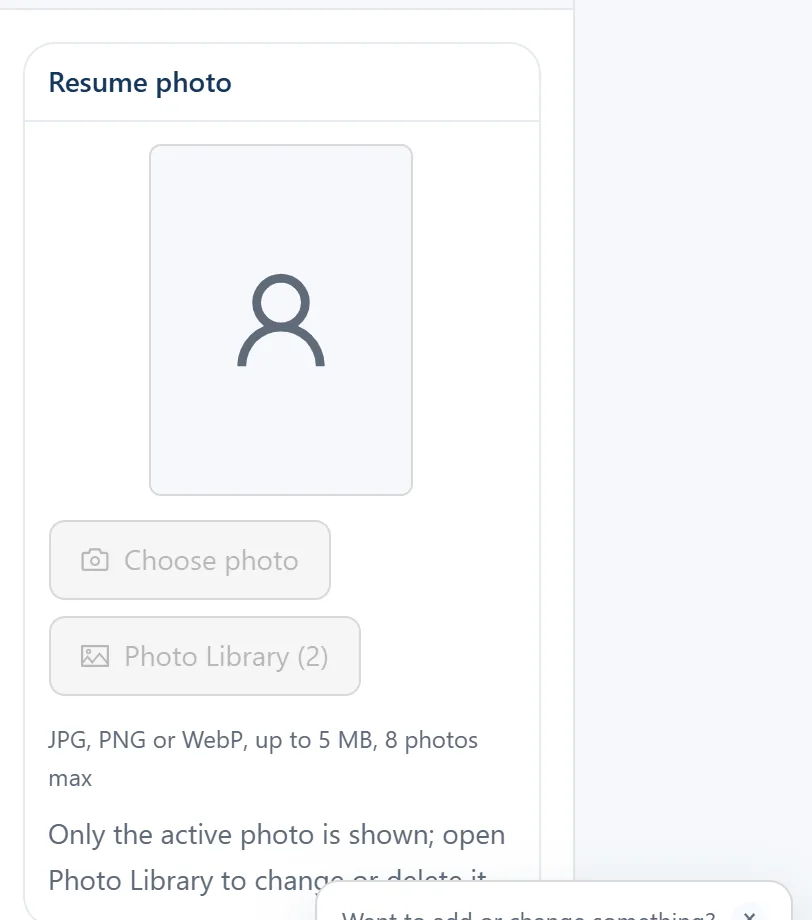
Choose photo opens the photo library, which holds up to 8 images; click a thumbnail to switch which one is in use. Photos stay in the local database and are never sent to the model. HTML / PDF / Word exports include the photo; JSON and plain text cannot carry it, which is a limitation of those formats.
Photo cropping is a non-destructive framing. Cropping stores a set of framing parameters and keeps the original intact, so changing template or aspect ratio just re-frames the same image — no re-upload.
Paste a whole block and extract
Do not want to type every field? Paste an existing resume in full (or drop in screenshots, or a pdf/docx) and the extraction fills an editable draft. Always check the result line by line — dates, numbers and full company names are where extraction goes wrong most often.
General resumes are created elsewhere now
Since October 2026, My Profile no longer offers a generation entry at the bottom. General resumes that target no job are created from Resume centre → AI generate, which reads the sections in the current plan and does not filter by job (see section 8). Resume centre → New resume is the hand-written route pre-filled from the current plan (see section 9).
Career scenario: changes guidance, not data
The page header has a Career scenario dropdown that reads “No scenario” when nothing is chosen. A scenario describes where you are for a stretch of time: a final-year campus recruit, employed and looking, changing careers, looking for an internship. When creating one you can apply a built-in quick scenario or fill it in yourself: scenario name, career stage, purpose, engagement type, content language, current employment status, target industries (up to 5), target function, target region, preferred Sections and wording preferences.
Switching a scenario changes only the guidance and suggestions in this window: it does not change your profile, your jobs, existing resumes or apply settings, and does not touch background tasks already running. It is a layer of “what register to talk to you in right now”, not a piece of data.
For a scenario to affect generation at all, you have to turn on “Use the career scenario for this generation” explicitly in the generation dialog (off by default). Once on, the server sends only the expression dimensions it is allowed to and freezes a snapshot; name and contact details are not sent, and employment status is not sent by default — the scenario has a separate “Allow employment status in this generation”, also off by default. While it is off, the request is exactly what it was before the feature existed.
4. Screenshot and document extraction
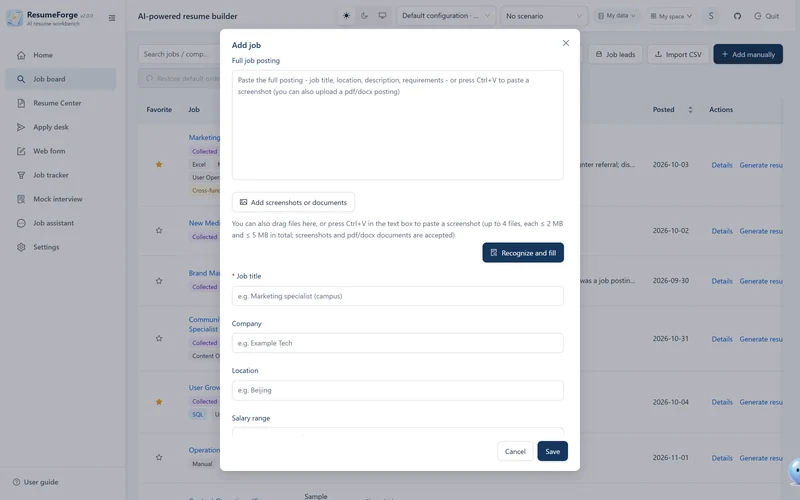
Job entry and profile entry share one extraction engine. Wherever you see paste / extract you get the three inputs below, and you can mix them.
How to feed content in
- Paste text: copy the posting and paste it straight into the box.
- Screenshots: paste an image with Ctrl + V, or click Add screenshot or document to pick files. Pasted images show as thumbnails first, and you can delete them one by one before extracting.
- Documents: pick a local
pdfordocxfile. - Drag and drop: job extraction, candidate screenshots, profile attachments, the personal photo, assistant attachments, experience reference files, skill packages, template HTML and dataset backups all accept files dragged in from your file manager.
Supported formats and limits
| Type | Format | Limit |
|---|---|---|
| Images | png / jpg / webp / gif / bmp / tiff | Up to 4 at a time, 2 MB each, 5 MB in total; bmp and tiff are converted to png automatically |
| Documents | pdf / docx | Text is extracted on this machine; a scanned PDF (images only) yields no text and has to be supplied as images. Up to 4 files, counted against the same 5 MB total |
| Text | Plain text | Takes part in the same extraction as images and documents |
A mismatched extension is tolerated. Renaming .docx to .pdf will not fail outright; the app detects the real type from the content. The reverse is rejected: if neither the content nor the extension looks like an image, you get "the content does not match the extension" instead of sending unparsable bytes to the model.
How the two extraction paths differ
- With a model configured: images and documents go to the model for multimodal extraction, which splits fields more accurately and handles long, complex job screenshots.
- Without a model: text is parsed by local rules that pick out part of the fields (the common title / company / city / salary structure). Image extraction without a multimodal model reports "the current model does not support image input" — an honest failure rather than a pretended success with an empty draft.
What to check after extraction
- Dates: start and end dates are the field most often confused with a neighbouring number.
- Numbers: check salary, headcount and percentages against the original.
- Proper nouns: full company names, project names, technical terms.
- Field assignment: was the pasted block split into the right fields (responsibilities versus requirements).
When a job is saved, the note records where it came from (pasted text / image / document extraction), so you can tell later whether the content was extracted or typed by hand.
5. Job board and capture
Filling in by hand
On the Job board, click Add manually: you can fill in only a title and company, or paste a whole job posting and let it split into description / requirements / other information. When you paste several postings at once, the app splits them into separate drafts and has you confirm each one before saving — the worst outcome in a bulk import is two jobs glued into one.
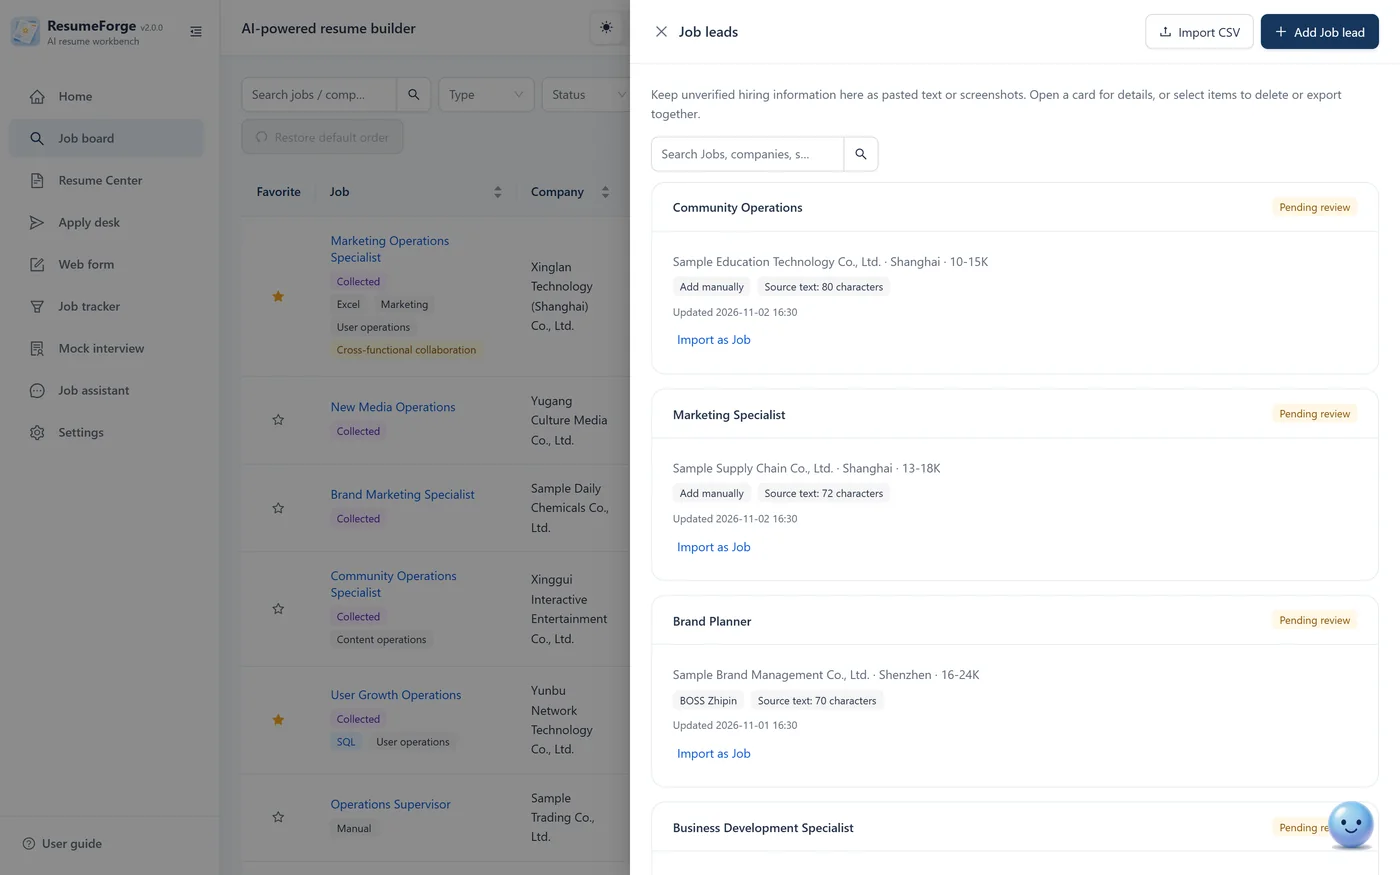
Candidate jobs (staging area)
Postings you have not verified go to Candidate jobs first: paste text or drop a screenshot. Automatic capture lands here too, and you tick the ones you want before importing them into the Job board, rather than dumping everything a broad keyword returned into your real list. Imported rows are marked "imported" and remember which job they became.
Drag and drop: routed by file type
Job extraction, candidate screenshots, profile attachments, the personal photo, assistant attachments, experience reference files, skill packages, template HTML and dataset backups all accept files dropped straight from your file manager onto the matching area: drop on the job form and it becomes an attachment or a screenshot, drop on the photo area and it becomes the photo. Those drop targets decide where a file lands, and each one handles the files it knows.
On top of that, dropping a file anywhere on the window first brings up a full-screen “Drop to import” overlay and routes it by extension: a .zip goes to dataset import, which after confirmation adds a dataset and leaves the one in use untouched, ready to switch to at any time; a .csv says “Import CSV from the Jobs page” and takes you to Import CSV on the Job board, which previews every row before importing; a .json creates a new hand-written resume with its body filled in from the file. Every other extension still goes wherever the drop target says.
The reason for the routing: the same drag-and-drop gesture means different things on different pages, and judging by what the file is misfiles less often than judging by where it landed.
Two boundaries: one file at a time (a job CSV is the exception — it takes several, and you import them on the Job board with Import CSV); an unsupported extension states plainly which three it does accept instead of quietly ignoring the drop. Parsing the CSV, previewing it row by row and submitting it in batches all happen on the Job board page — the global drop only points the way and does not implement a second parser.
List and filters
- Search by keyword (title, company, city, description, note), filter by status and job type, and sort by column.
- Skill tags are extracted on save and take part in later search and match analysis. Hovering the title cell shows when the job was imported.
- Inline actions (Details / Generate resume / Write it myself / Related resumes / Edit / Delete) sit at the end of the row, keeping rows compact; long text is hard-truncated instead of forcing a horizontal scrollbar.
- Import CSV: pick several files at once, or paste table content straight into the import box; both the Job board and Candidate jobs support it.
Bulk status changes and bulk delete
To move a batch of jobs at once, enter selection mode first: right-click any row → Select multiple. Once something is ticked, a toolbar appears above the list reading “N selected”. From there you can Set status in bulk (pick a status, then click Apply status; the application status is changed on the same path) or Delete selected; the Bulk actions menu also holds “Generate resumes with AI”, “Read job requirements”, “Match analysis” and “Add to apply queue”, and only the ticked rows are affected.
Deletion is a soft delete: entries go to the trash, where they can be restored (see section 29). Ticked too many? Clear selection. Finished? Exit selection mode returns to the ordinary list — the inline row actions there are unchanged, and the batch buttons never appear in normal use.
Completing job details
Older jobs may carry only a link with no JD body (early captures could not reach the detail page). Complete details does exactly one thing: reopen the detail page by job id and fetch the JD. It only fills gaps — rows that already have a description are skipped and your edits are never overwritten; rows in the trash are skipped; rows without an apply link are skipped. Once a body arrives, skill tags are recomputed. In selection mode only the ticked rows are processed, with a cap of 200 per batch (each one opens a page, so it is slow); above that it refuses and asks you to split the batch.
Favorites
Jobs and resumes can both be favorited. Favorites has one tab for each, with paging, detail links and unfavorite. Its relation to the job board: the board is the full set, while Favorites holds only what you picked out.
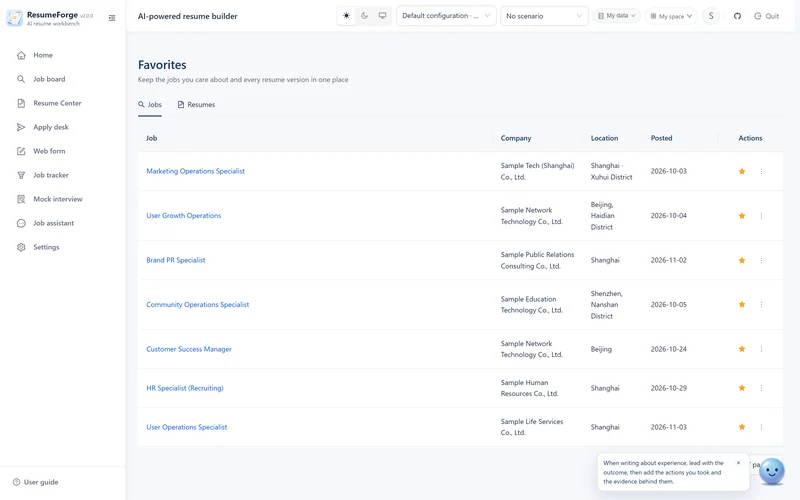
Jobs and resumes link both ways
One job can be linked to several resumes: for the same JD you may write one version per emphasis (technical depth / project management), or a draft first and a final version later. Related resumes in the job row lists every resume under that job, and clicking one opens it; from a resume detail you can jump back to the job it is linked to, so both directions work.
Linking records the relation and changes no content: it does not write the JD into the resume, and adding one more resume does not push the job's status forward a step. Resume centre reads the link the other way round too — the Job association dropdown offers “Has a target job” or “General Resume”, or lets you filter by one specific job; a list filtered by job carries ?job_id= in its address, so a bookmark goes straight there.
The resume with no linked job is a general resume, marked separately in the list (see “General resumes” in section 8).
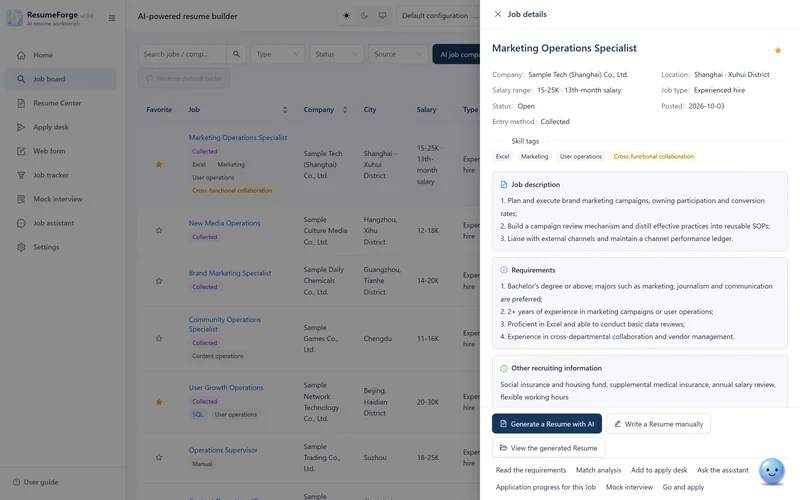
Jobs in the trash
Deleting a job is a soft delete: it goes to the trash, where you can restore it or delete it for good. See 29. Trash.
6. Requirement reading and match analysis
The two features look alike but serve different purposes; do not mix them up:
| Requirement reading | Match analysis | |
|---|---|---|
| What it reads | Only the job posting | Your profile, the resume and the fact ledger |
| What it gives | A structured summary of the requirements, quotes from the posting, and general preparation advice | A verdict per requirement, an application recommendation and a reference score |
| What it does not do | It never touches your profile and gives no match verdict | Verdicts carry no percentages (the reference score is shown as an aid and explicitly takes no part in the decision) |
| When to use it | You just got a JD and want to understand quickly what it asks for | Before applying, to decide whether to and where you fall short |
Job requirement reading: only the posting, not your profile
There are two entry points: Requirement reading in the job detail drawer, and the entry of the same name on the filter bar. Its input is one thing only — the job posting.
The output has three parts as well: a structured summary of the requirements (responsibilities, hard requirements, nice-to-haves), the posting evidence behind each item, and a piece of general preparation advice (what to prepare for this kind of role, not for you). It does not read your profile or resume, gives no match verdict and produces no percentages — to find where you fall short, use the match analysis in the next section.
To read several JDs at once, use Bulk actions → Read job requirements: tick the jobs and it runs as a background task, one after another. Cancel it at any time, or close the window and get on with something else; a notification arrives when it finishes (see “Keep working while generation runs” in section 8).
AI comparison across jobs
AI comparison on the filter bar does not produce one verdict per job in isolation; it analyses every job against the five verdicts and then ranks them side by side and explains why one comes first. Looked at one at a time, everything seems fine; only together do the differences show. It also produces no percentages: the ordering rests on verdicts and evidence, not on a score.
The five match verdicts
The analysis puts every requirement in the JD into one of five verdicts, each backed by a quote from the JD and your evidence:
- Matched: your profile contains the corresponding fact.
- Wording gap: the fact exists but the resume does not state it clearly.
- Insufficient evidence: the profile mentions it but offers nothing concrete to verify.
- Real gap: you genuinely do not have it.
- To confirm: there is not enough information and you have to judge.
The verdicts roll up into an application recommendation: apply / needs confirmation / do not apply. Any hard gate (degree, years, major and so on) that hits a real gap makes it a no; when the answer is unclear the app will not decide for you and marks it "needs confirmation".
The match reference score
After the five verdicts there is a 0–100 reference score with five components (skill coverage / years / project relevance / hard gates / JD keyword coverage), each with a readable rationale such as "18 core and bonus requirements, 6 matched". Three rules about it matter:
- It is derived by local rules on the spot, calls no model and stores nothing;
- It takes no part in the application decision — apply / needs confirmation / do not apply still rests on the five verdicts alone;
- It always carries the disclaimer: it does not represent a real ATS parse or a probability of success.
The score is drawn in a single hue and never changes color with the value, because the backend defines no bands; drawing a good/bad line in the frontend would invent a judgement that does not exist. It also sits after the verdicts for the same reason: it must never overshadow the application recommendation.
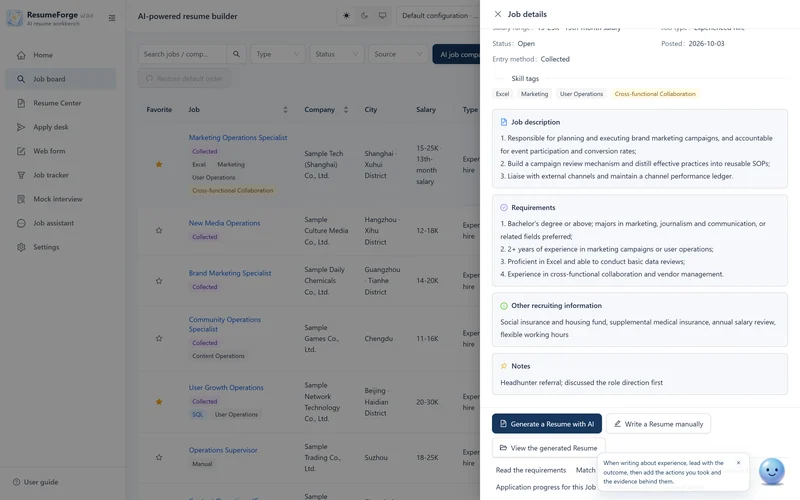
Batch match analysis: several jobs in one run
On the job board click Select multiple, tick several jobs, then choose Match analysis from Bulk actions. The panel states up front what the batch will do — “Each of the N selected jobs is analyzed one by one” — and the analysis runs in the background, job by job: cancel it at any time, or close the window and come back later, and a notification appears when it finishes.
“Re-analyze jobs that already have a verdict” is off by default: jobs that already have a fit verdict are skipped, so you do not rerun a whole batch just to fill in one or two. Turn it on and the old verdicts are recalculated as well.
Results are ordered by reference score, high to low, and every batch is saved to History — reopen the panel to see which batch it was, how many jobs it held, how many finished and how many failed. The definitions are exactly those of a single job: verdicts carry no percentages, the reference score only orders the list and takes no part in the application decision. Cancelling wastes nothing either — the results finished before the cancel are still saved.
7. Fact ledger
This is where ResumeForge differs most from other tools, and it is worth reading in full.
The ledger does not record "what experience I have" but one claim at a time that can be stated publicly. Every claim spells out four things:
| Field | What to write | Effect |
|---|---|---|
| The raw fact | Written plainly, without packaging. For example "12,400 sign-ups on the campaign backend, about 11,000 after deduplication, about 6,000 attended" | This is the only factual baseline; generation trusts nothing else |
| The resume wording | How you plan to phrase it. For example "led the quarterly themed campaign, 12k participants" | The model polishes without exceeding the strength of this wording |
| Ownership level | Participated / owned a module / led the plan or delivery / project owner | Constrains the strength of the wording: "participated" cannot be written as "led" |
| Personal boundary | What the team did versus what you did. For example "excludes on-site attendance" | You know where to stop when an interview probes |
Verification status decides use, not quality
- Confirmed: usable as fact in a formal resume, and the only part that enters the prompt during generation.
- To confirm: allowed only in drafts, and the body must keep placeholders such as [to add].
- Expired: content that changes over time (last year's pricing, say) is not treated as current fact until updated.
- Not used: kept with a reason for later review, never entering any outward material. "Presenting a team result as a personal one" is exactly the kind of entry worth keeping as a negative example.
How it connects to generation and export
- During generation: only confirmed entries enter the prompt as the factual baseline; unconfirmed claims are listed as forbidden; ownership level and personal boundaries constrain how strongly something is phrased. With an empty ledger, generation behaves exactly as before — adding the module changes nothing.
- At export time: a resume whose body still contains markers such as [to add], [to confirm], [to be completed] or [to verify] is blocked, with the exact location reported. Blocked is not a dead end — the dialog offers "export the draft anyway". The rule applies to all six layout formats (PDF / Word / HTML / Markdown / plain text / image PNG) and to browser printing; JSON is a data deliverable and is affected by neither the length cap nor the marker check.
- On the assistant side: it can read the ledger but cannot confirm entries for you — the write path never accepts a verification status, and anything it creates starts as "to confirm". Letting a model mark its own entries confirmed is letting it issue its own pass.
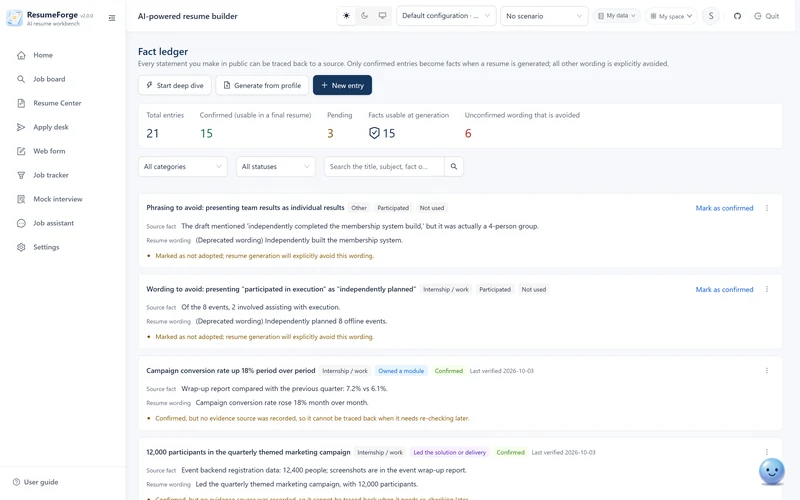
Source check: where did this claim come from
A ledger entry can carry a source: type, quoted location and an excerpt. Sources from older data that can no longer be located are marked "cannot be located" and kept rather than silently dropped — the point of source checking is that when someone asks "where does this line come from", there is something to point at.
Generate Entries from your profile
Do not want to retype what you already have? Click Generate from profile and the app reads your education / work / project history and drafts a batch of entries awaiting confirmation. They start as "unconfirmed" and you confirm them one by one.
8. AI resume generation
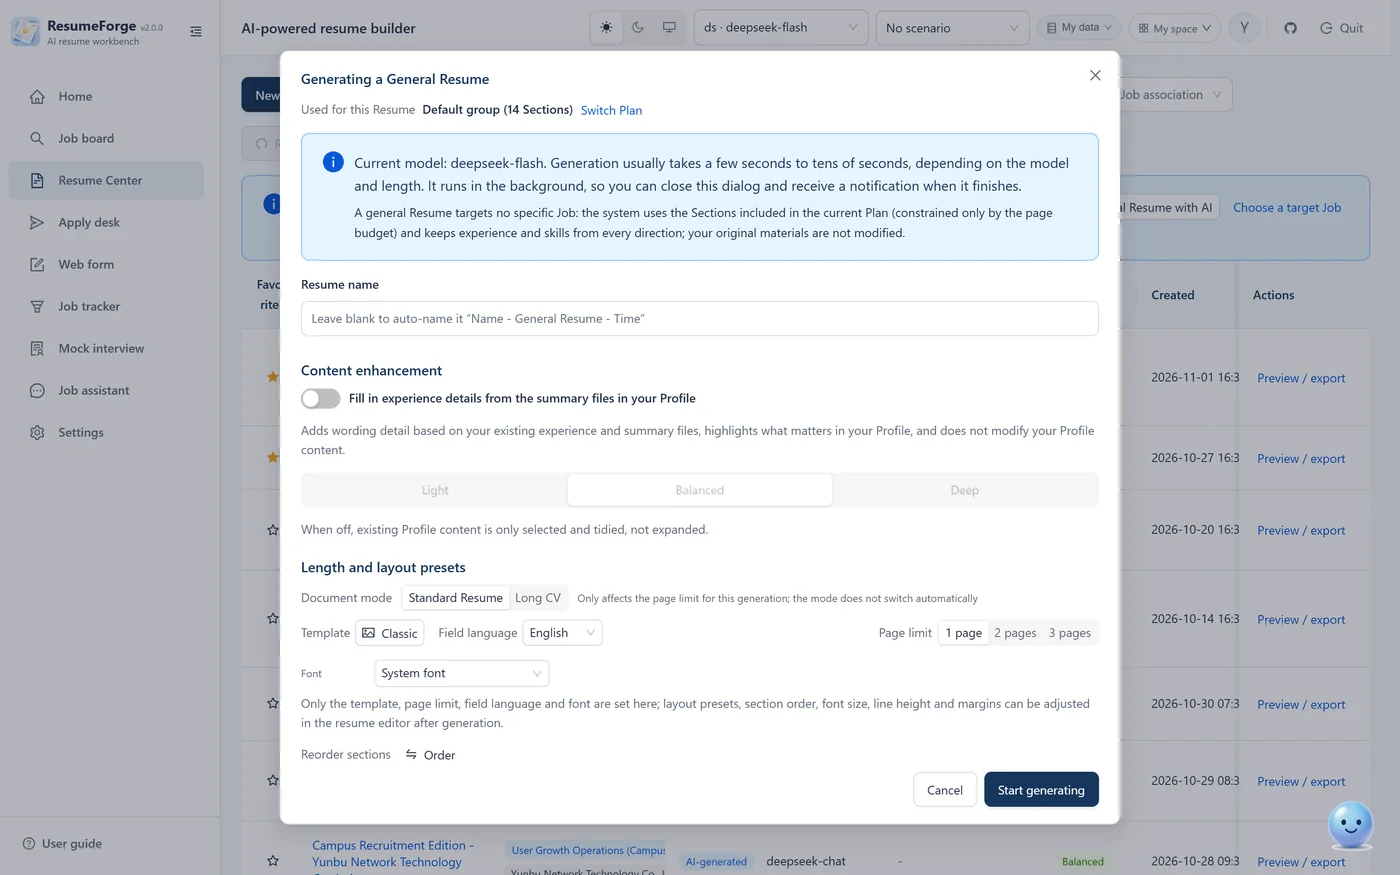
Click AI generate in Resume Center, or Generate resume on a job detail page, and the generation dialog opens. It reads the job JD, your profile, the confirmed entries in the fact ledger, and any custom instructions you add.
Keep working while generation runs
Generating a full resume takes a while. The waiting dialog offers Continue in background: close it and the task keeps running on the server, and you are told when it finishes or fails (a centred dialog with a sound; while the waiting dialog is still open you only get a card in the top-right corner, so nothing interrupts you). You can turn the sound off in Settings → Updates and help → Reminders and sounds.
- The header shows how many tasks are left: while tasks run, a background tasks entry appears in the header, and opening it shows what each task is doing, how many characters have arrived and which stage the backend is at.
- Cancel in place: cancelling tells the backend to stop the task and leaves no half-written resume.
- The same mechanism covers requirement reading, match analysis and apply and capture batches — all of them show up in the header task entry.
What you choose before generating
The dialog has three groups: “Job fit and content enhancement” (called “Content enhancement” for a general resume), “Length and layout”, and “Additional requirements”. Changes apply to this generation only and never alter your global defaults. Type size, line height, margins and layout presets are not in the dialog; adjust them in the builder after generating.
| Option | Value | How to choose |
|---|---|---|
| Content enhancement | Switch plus Light / Balanced / Deep | The switch label depends on the entry point: generating from a job reads “Enhance and expand experience against the job requirements”, while a general resume reads “Fill in experience detail from the summary in your profile”. Once on, pick a level: Light adjusts wording only and barely expands; Balanced completes expression and structure; Deep expands fully while staying inside the facts. None of the three goes beyond the facts and level of ownership recorded in the ledger. Hover any level for its specific description; with the switch off, only existing material is filtered and organized, and additional requirements cannot change the body text. |
| Document mode | Standard resume / Long CV | A standard resume is laid out over 1–3 pages; a long CV allows up to 10. Long CV is an explicit page-count choice and never switches automatically because the content grew. |
| Length cap | Standard resume 1 / 2 / 3 pages Long CV 1–10 pages |
Choose one page for a recent graduate or a short history, and relax it when there is more content. With little content the page is left with white space rather than stretched. The generation dialog has no “Unlimited”; if you need it, choose it in the builder after generating (see section 11). |
| Style template | Classic / Modern / Compact Elegant / Minimal / Scholar |
Sets the visual style; six are built in. The dialog only picks the template; accent color, line height and margins are adjusted in the builder after generation, where the preview is live. |
| Field language | Chinese / English | Changes section headings and field names only (Education / Skills and so on) and does not translate your text. To translate the body as well, use a bilingual version (see section 9). |
| Font | Follow template / a downloaded or imported font | Follows the template by default; to change it, make sure the font is downloaded or imported first. The bundled Source Han Sans must be downloaded in settings before use. |
| Section order | 12 built-in body sections plus your custom sections |
Sections can be dragged into order here, following the order set in My Profile by default. Publications, research projects, intellectual property and certifications are all in this list — 12 items when you have no custom sections; empty sections generate nothing. Basic information stays in the header and is not part of the ordering, so the “N sections” in the summary is one more than the list. |
| Additional requirements | Free text, optional | For example “lead with checkable numbers, no adjective stacking” or “write this experience in STAR order”. The text is appended to the prompt and only steers expression; fact anchoring, the page limit and the anti-fabrication rules stay unchanged. |
How generation runs: a background task with real stages
Generation is a background task, not a spinner that locks the interface:
- The dialog has a structured stage bar: gather material → filter material → call the model → verify and repair → done. Stages are mapped from the progress messages the backend sends; anything unmapped is shown verbatim rather than forced into a stage.
- Progress reads "N characters received" and deliberately shows no percentage — the model streams token by token and the backend cannot know the total, so any percentage would be a guess.
- Closing the dialog does not stop generation; it keeps running in the background and progress keeps polling.
- You can click Cancel. A cancelled run stores nothing and leaves no partial resume.
- When it finishes, a "resume generated" notification appears and the result preview opens directly.
- Starting another generation while one is running returns 409, so double-clicking cannot produce two resumes.
Known limitation: with the native Anthropic protocol, thinking effort enabled and multi-round tool calls, Anthropic requires the previous round's thinking blocks to be sent back verbatim. That is not implemented yet, so the second round of such a run may be rejected with HTTP 400. Set thinking effort back to off, or switch to an OpenAI-compatible protocol; answers that call no tools are unaffected.
Generate several at once (batch generation)
On the job board, select several jobs and choose “AI generate resumes” to create one resume per job. Defaults live in Settings → Appearance and interaction → Batch operations → Batch resume generation; the card shown when you start also lets you change them, and those changes apply to this batch only — your global defaults stay as they are. A global bar stays visible across pages while the batch runs, so you can see how many are left from anywhere.
General resumes: the one without a job
Use a general resume when the direction is not settled yet, or when you want one baseline that can go anywhere. The entry points are AI generate in Resume centre (with no job chosen), or New resume to write one by hand.
It uses the whole profile and does not filter by direction: experience and skills from every direction are kept, constrained only by the length budget, and the source profile is not changed. Generation still lets you choose a standard resume or a long CV — a long CV is an explicitly chosen page strategy and never switches itself on because there is more content.
A general resume's tabs and visible fields follow the current plan and are frozen when it is created: changing the plan afterwards only affects newly created resumes, and this one's skeleton stays as it is. It refreshes itself after the profile changes or the plan is switched; if there are unsaved edits, it asks first whether to overwrite or keep them. You can keep several, one per purpose.
Fabrication guard
Schools, companies and project names in the generated resume are compared against your profile entry by entry, and mismatches are flagged with a warning on the record. Together with the ledger's "confirmed only" rule, these two gates keep "the model made it up" out of your resume.
Generation notes and the "not included" list
The resume preview has a collapsible generation notes panel explaining why the resume looks the way it does: job signals, what the candidate material contained, and what was left out and why — all assembled from deterministic data, never written by the model. Content that exists in your profile but did not make it into this resume is separated from the "possibly fabricated" warnings and shown as a neutral not included list, collapsed by default with a count badge. Each entry can be handled in one of three ways: skills, languages and summaries get "ask AI to add this"; entries in custom Sections get "add to resume", which writes them in deterministically by entry id and trims the list; everything else becomes "add it in the editor", with a note that AI cannot invent entries.
Generation now also reads the GitHub profile and personal site from your profile: both are given to the model as candidate material and rendered as their own fields in the header contact area (you can also type them in the editor). They are display only and take no part in the fabrication check.
AI revision and regeneration
At the bottom of a resume there is AI revise / regenerate. With instructions it changes only what you asked for and keeps the rest word for word; left empty it regenerates the whole thing (same facts, reorganized expression and structure). A revision updates the current record in place and refreshes the preview. Name, photo and contact details never enter the model and are written back by code — the model can neither change nor see them.
Accept job optimisation suggestions one by one
Every suggestion in the Job optimisation dialog has an Accept and revise button: it applies that one suggestion (again touching only what it covers) and refreshes the preview immediately, with no need to redo the whole resume.
Resume centre: every resume is kept here
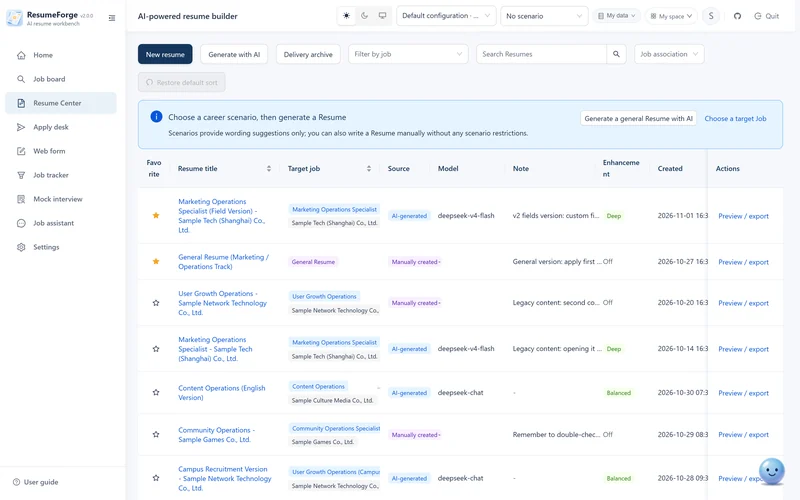
AI-generated, generated from a job, or written by hand — every resume stays in Resume centre automatically, with no save-as needed. Each row shows the name, the target job, the source (AI generated / written by you) and the last update; click it to open the detail or the preview.
The everyday actions live on the list itself: the Favorites column on the left marks the few that matter; the Job association dropdown filters by “Has a target job / General Resume”, or names one specific job; every row takes a note (which kind of role this one is for); Preview / export goes straight into the export flow; and with several ticked you can Batch export or Batch delete.
A draft that has never been saved is not in the list — that is what the builder's line “Not saved. Save to make it appear in Resume Center” is about. Deleting goes to the trash and can be restored.
9. Resume builder
Opening the builder: three columns, the top bar and the status bar
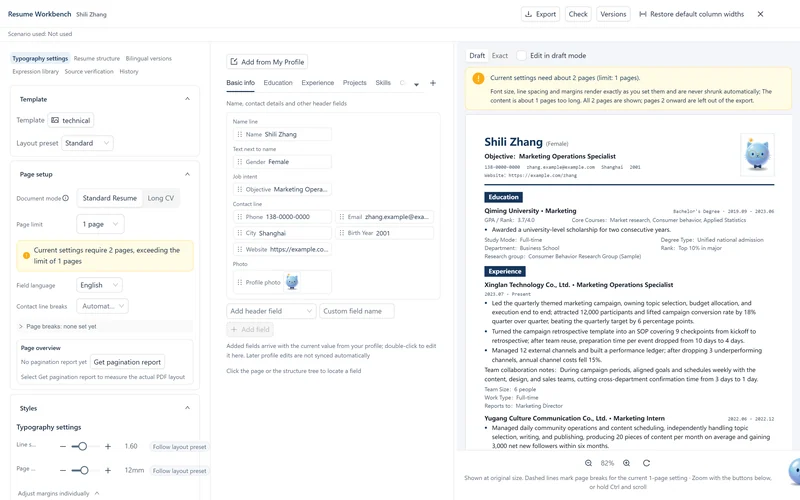
The builder is a full-window workspace split into three columns: the left column holds the settings and the structure of this resume, the middle column is where you fill in content section by section, and the right column is the canvas, where the page reflows as you edit. The canvas renders with the same template and the same layout as export, so what you see is what you get; in draft mode it does not draw real page breaks, so trust exact preview and export for those.
- Three tiers: wider than 1280 pixels all three columns sit side by side; below 1280 the middle column moves into a drawer and an Edit content button appears in the top bar; below 1000 the left column moves into a drawer too, and Typography settings appears in the top bar. Nothing is lost, it only moves.
- Resizable columns: the two splitters set the width of the left and middle columns — left 380 to 640 pixels (380 by default), middle 380 to 760 (448 by default), and the right column always keeps at least 420, with the ceiling lowered automatically when the window is not wide enough. During a drag only styles change; the width is persisted once, when you let go. Move the pointer out of the window, or release outside it, and the drag still ends cleanly instead of sticking half-way.
- Keyboard too: Tab to a splitter and press ← / → for 16 pixels a step; double-click either splitter and both columns reset. Widths are stored on this machine, so the next visit opens at the same width.
The top bar carries the title, the name of this resume and every action. Besides Save changes and Cancel changes — which appear only when something has changed, and become Save to Resume Center for a draft — the right-hand end always has these:
| Top bar button | What it does |
|---|---|
| Export | Opens the export panel, where format, watermark, masking and the photo are chosen (see section 12). Choosing Export first runs a check and asks before going ahead when something must be fixed. |
| Check | Opens the Check Resume panel and runs the content, layout and exported-file layers — see later in this section. |
| Versions | Named versions and job variants: immutable snapshots, derived variants, export per variant — see “Named versions and job variants” in this section. |
| Restore default column widths | Puts the left and middle columns back to their default widths in one click; the same action as double-clicking a splitter. |
| Close | The × on the right. With unsaved content or layout changes it asks in place — the card opens on the button you just pressed, offering Discard and close or keep editing; when everything is saved it simply closes. |
The name of this resume sits next to the title. When you came in from a job or a career scenario, a line reading “Scenario used: …” appears beside it, so you know which scenario this content was written for. A draft that has never been saved adds “Not saved. Save to make it appear in Resume Center” — otherwise you would assume it is already there.
Below the paper sits a status bar that sticks to the bottom as you scroll: on the left, the zoom reading (a percentage) with zoom out, zoom in and fit-to-page buttons, where Fit to page is the zoom reset; on the right, one line saying “Shown at original size. Dashed lines mark page breaks.” Hold Ctrl and scroll to zoom as well; when the paper is wider than the frame, it also tells you that you can drag sideways.
Six tabs in the left column, each with one job
The left column starts with a row of tabs. It is only 380 pixels wide by default, so six four-character labels do not fit on one line and the tab strip wraps by itself (two rows when narrow, one when wide); ← / → cycle through them and Home / End jump to the first and the last. Switching tabs scrolls back to the top — half a scroll position from the previous tab has no business carrying over.
| Tab | What it does | When to open it |
|---|---|---|
| Typography settings | What the whole resume looks like: template and layout preset, document mode and page limit, field language, contact line breaks, the pagination switch, page overview, and the styles (line spacing, page margins, font size, font, colours). | This is where the builder opens. To change the length, the font size or the margins, start here. |
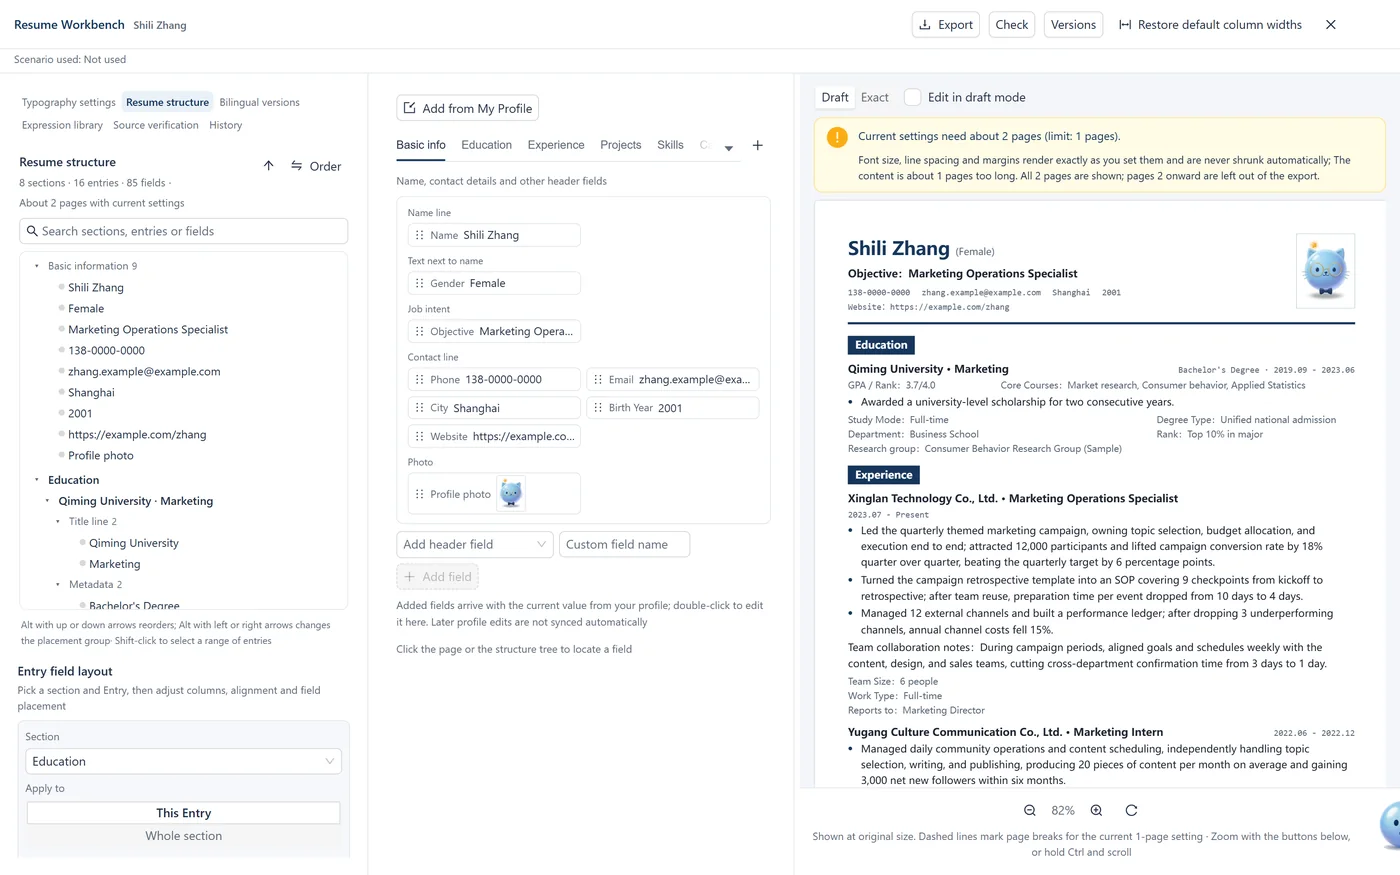
| Resume structure | The whole resume by page position: header / section → entry → position group → field, with reordering, hiding, locking and duplicating entries; entry and field layout hangs off the bottom of this tab. | Open it to change where a field sits, how one entry is laid out, or which entry stays off the page. Do not go hunting field by field in the middle column for structural work. |
| Bilingual versions | The Chinese and English versions of one resume: field-by-field comparison, per-item adoption of translations, plus fact locks and a glossary. | Open it for overseas or English-language roles. If you only want the section headings on the page in English, Field language is enough — you do not need this tab. |
| Expression library | Your saved sentences, searchable by type, language and job tags, inserted at the selected position in one click. | Open it to reuse a sentence you wrote before without digging through old resumes and copy-pasting. |
| Source verification | Whether this piece of content came from your profile, from the model or from your own typing, where it came from, its source chain (original sentence / current rewrite / latest source version) and how much of the resume is linked. | Open it before sending something out to check “can I actually claim this”, or after a source was updated to see which items are affected. |
| History | Every change since the builder was opened, plus undo and redo. | Open it when you broke something, or when you want to see what that last click actually did. |
The last four tabs appear only when you opened a saved resume. A draft and a read-only host have no second language version to compare against, no position to insert at and no history to record — better to hide them than to show a row of tabs that do nothing.
Typography settings: template, layout preset, document mode and page overview
The Typography settings tab is grouped into Template / Page setup / Styles. Each group collapses on its own and the collapsed state is remembered on this machine.
Template and layout preset: the template decides which layout you get and can be tried and compared from the gallery (see section 27); the layout preset is the preset slot under a template — with Follow template chosen, this resume sets no preset of its own and follows the template whenever it changes.
Document mode and length: a general resume is budgeted at 1–3 pages, a long CV at 10 at most, and the length limit can also be set to Unlimited. Switching modes makes the backend clamp the page count into the legal range and write the real value back to the slider — no more “the slider says 5 pages while the layout is done at 3”.
Field language only decides the language of the fixed strings on the page (section headings, field names); it does not translate your text. To switch the text as well, use Bilingual versions.
Contact line breaks: by default every contact field is kept whole and never split, and fields wrap between each other, so a long URL is never broken in the middle. Pick one or more fields in the dropdown and the line breaks before that field (to put your personal site on a line of its own, for example). The setting is saved with the resume, and HTML preview, exact preview, Word export and HTML export all read the same value — it does not wrap differently in one format.
Pagination: this group normally shows a single summary line — “Pagination: no section starts on a new page” when nothing is set, “Pagination: N sections start on a new page” when something is. Expanding it reveals the per-section Start on new page switches. Section-level and entry-level breaks are set in Typography settings and in Resume structure respectively, and breaks only take effect in exact preview and export.
Page overview and the pagination report: after you choose Get pagination report, the backend lays the resume out as a real PDF once more and reads the render log (it does not count pages in the browser — the draft lays out by different rules, so any page count measured there would disagree with export). It reports the actual page count, how full the last page is, whether anything overflows, and which piece of content is the first to overflow; click it to jump to that spot on the paper. Change the content or the layout and the report is out of date — fetch it again for fresh numbers.
Styles: line spacing, page margins (adjust all sides at once, then side by side for top / right / bottom / left), font size, font and colours. The cell at the end of each row says where the value comes from: untouched, it reads Follow template (or Follow layout preset when a layout preset is in use), meaning the value is inherited; once you change it, that cell turns into a ↺ button that restores the value you saw when this resume was opened. The two are not the same thing — to go back to the template default, double-click the parameter name, or focus it and press Enter.
Academic resumes and long CVs
Applying to a university, a research institute or a PhD programme uses the same builder, with a few more tabs to fill. The middle column has four: Academic achievements / Research Projects / Intellectual Property / Certifications — title, author order and the Me marker (selecting it shows your name in bold on the resume; the name text stays unchanged), DOI or link; intellectual property also records inventor order and patent status; certifications record the issuing organization, the dates and the status. A tab with nothing in it is not written into the resume — empty stays empty.
Publication status has six values: published / accepted / in press / under review / preprint / other. “Under review” is never written as “published”, and export follows the value you set here — describing a paper still under review as published is the one mistake an academic resume should never make.
Length is switched in Typography settings → Document mode between standard resume and long CV: standard 1–3 pages, long CV up to 10. Switching from a long CV back to standard clamps the pages above the limit and tells you, rather than silently cutting the body; the clamped real value is written back to the slider, so the slider never says 5 pages while the layout is done at 3. The generation dialog also lets you choose the document mode explicitly, and never switches it automatically with the amount of content.
Resume structure: see, reorder, hide and lock by position
This tab shows the whole resume as a tree, and its levels are the levels of the page: header (merged into a single Basic information row) / section → entry → position group (title line / metadata / gray fields before the body / body / gray fields after the body / hidden) → field. The panel header reads “N sections · N entries · N fields” and “about N pages at the current settings”.
- Every row shows its source and state: a dot separates From Profile from Added manually, and badges mark hidden, content locked, layout locked, material only (never printed, used only for AI generation and web-form filling) and page breaks. A field with no value yet shows its label from the field catalogue, and enum values show their translated labels, so you never see a raw English key.
- Reorder and move across groups: just drag, or use the keyboard — Alt plus ↑ / ↓ to reorder, Alt plus ← / → to change position group. While you drag, the page reflows to the new order; a history step is recorded only when you let go, and releasing outside the rows cancels.
- Show / hide, duplicate an entry, lock content, lock layout: hiding affects export only, the text stays in the editor and can come back at any time; a duplicated entry gets a new identity and is independent of the original; locking content stops AI and translation from rewriting the text while still allowing layout work, and locking layout lets you edit the text while keeping automation from changing the layout.
- Search and two-way selection: the search box matches sections, entries, fields and position names (header fields merged into Basic information can still be found by “contact”); ↑ / ↓ to pick, Enter to jump, Esc to clear. Selecting a row highlights that part of the page, and clicking the page selects the matching row.
- Range selection: hold Shift and click entries to select a range (or use Shift with ↑ / ↓), which is what you want when changing layout in bulk.
- Every change goes into history: each write from the structure tree is one step, and Ctrl + Z takes it back.
Structured editor
Click Write it myself in Resume Center, or use the matching entry point on a job detail page. A new resume lets you set the Section order up front, or clear everything and start from scratch; the left side of the editor is grouped by Section (basic information, education, internships and work, projects, publications, research, patents, certificates, skills, languages, campus, awards and your custom Sections), and the right side always shows the target job reference panel with responsibilities, requirements, skill tags and the rest, so you never have to switch windows while writing.
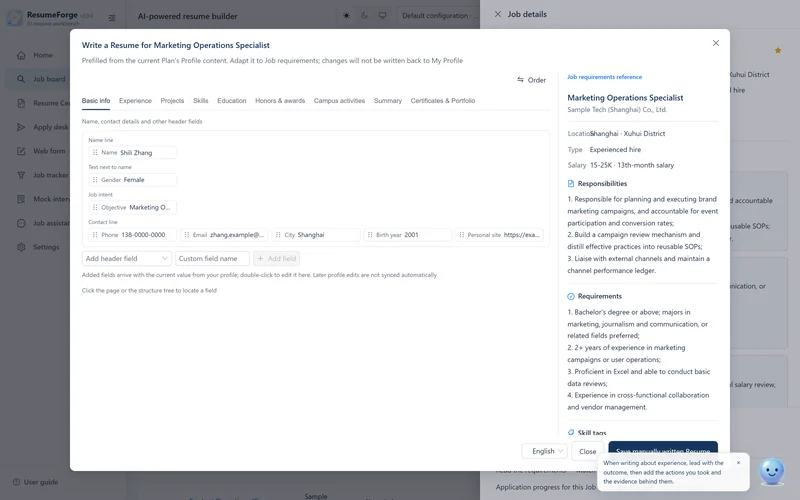
Two editing scopes: this one spot, or the whole resume
First, these two entry points are often confused, so be precise about them:
| Change only the selected spot | Manual adjustment (whole resume) | |
|---|---|---|
| How to get in | Switch the preview to Edit and click anything on the paper (a project bullet, the summary, a project name, a phone number…) | Manual adjustment at the bottom of the resume detail |
| What changes | Only the field you clicked: edit the text on the spot, or have AI rewrite it from one sentence | Every field of the whole resume, plus the writing enhancers (STAR / polish / translate / phrasing) and version comparison |
| How it saves | Save this field | Save and update the preview |
Both write the same data through the same save path; only the scope differs — “add a number to this bullet” should not require opening the whole editor and scrolling to the right tab.
Local rewriting has two routes: select a field in the builder and edit it in the middle column, or select text on the page and choose AI polish → Replace selection from the context menu. A click in the preview only selects the field; it does not open a separate editor window.
Four in-place transforms (writing enhancers)
Select a passage of an experience entry to run one of four transforms. All four take a piece of text and return a piece of text: the result appears in the panel first, and only Write back puts it into the selected passage; where editing is not available you can only copy the result.
| Feature | What it does | Watch out for |
|---|---|---|
| STAR quantified rewrite | Turns "responsible for executing marketing campaigns" into situation → task → action → result, quantified where possible. | It can attach a ledger claim as the factual boundary: the rewrite never exceeds the ownership and boundary you recorded. That is the biggest difference from ordinary polishing. |
| Phrasing generator | Turns one piece of fact into three expressions at once: resume version / STAR version / spoken interview version. | The spoken version doubles as your script when an interview probes. |
| Multi-style polish | Three styles: big-tech rigorous / concise and crisp / new-graduate campus. | Style changes tone and word choice only, never the facts. |
| Chinese-English translation | Translates faithfully, leaving numbers, dates and terminology untouched. | For English-language roles or resumes with several language versions. |
Selecting text in any input box adds AI polish to the context menu: the result is written back in place, the card can be dragged, you can keep rewriting, and you can undo it. It uses the same model path as the four transforms, but the entry point is not limited to the resume editor.
None of the four transforms falls back locally: with no model configured the endpoint returns a clear error instead of handing you a fabricated "rewrite". Better to say there is no model than to pretend AI did something.
The editor's v2 structure and field layout
The sections above cover page-level settings, which change the whole resume at once. This one covers entry- and field-level layout — how the fields inside one experience are arranged and how wide each block is. 2.0 separates the two completely: page-level settings live in Typography settings, entry-level layout lives under Entry and field layout inside the Resume structure tab. Check which level you are adjusting before you start.
- Entry header layout, three choices: side by side (title and metadata in separate columns) / stacked (title above, metadata below) / metadata first, chosen once per Section.
- Text level: one change sets a group of properties (size, bold, space before, space after), while the finer adjustments (color, italic, line height, indent, bullets, alignment, date position, letter spacing) live under More parameters — listing the same keys in both places would let them overwrite each other, so the split is fixed.
- Entry field layout: supplementary fields can sit two to a row, and can be tuned with per-column width and gap settings; each field states whether it inherits from the Section or is overridden on this entry, and a wrong override can be reset to inherit item by item.
- Supplementary fields can be hidden individually: hiding affects display only, the content stays and can be brought back at any time.
- Sections that belong to this resume only: the editor can create a Section that exists only in the current resume, and delete ones you created, without touching other resumes in My Profile.
- Use the structure tab for the level view: the read-only “Resume structure example” dialog has been removed — a row in Resume structure now is a block on the page, and selecting a row highlights exactly that block, which beats any diagram.
Undo, redo and history
Every change in the builder is recorded: the History tab in the left column lists what has been done and what can be restored, and the toolbar offers Undo and Redo, with Ctrl + Z and Ctrl + Shift + Z as shortcuts (rebindable in Settings → Keyboard shortcuts).
- What is recorded: body edits, layout changes, structural operations, entry-layout changes and bold formatting, each with its action name so you can tell at a glance which kind of change it was.
- Every step carries a plain-language summary: besides the action name, each row has a sentence picked by the priority section → entry → field → layout, such as “Experience: added the entry ByteDance” or “Page limit set to 2”. When one step changed several things, only the most telling change is kept and the rest is folded into “and N more” — history rows are one line wide, and three lines of detail would hide which step is which.
- 50 steps are kept: older entries are dropped so a long session does not grow without bound.
- Look before you jump: clicking a step shows the summary at that point (name · entries · pages), and “Go back to this step” applies it.
- It discards work, so it asks first: going back to an earlier step drops everything after it and asks for confirmation; “Back to current” returns to the latest state.
- When there is nothing to undo or redo the buttons are disabled with an explanation rather than silently doing nothing.
- Incomplete markers block export: while the text still has “to fill in” markers, the export panel stops once and lists the reasons the backend gives verbatim, offering Edit Resume first and Export draft anyway. It is not blocking export for its own sake — it blocks “assumed complete but actually not”, which is exactly how a third page silently goes missing.
Save conflicts: three choices, no silent overwrite
When two windows have opened the same resume, the later save should not simply overwrite what the other one changed. If a version conflict is detected while saving, a three-way choice appears above the content:
- Use latest: drop this local change and take the version the server has now;
- Compare changes: see “Your version” and “Latest saved version” side by side, and decide one spot at a time;
- Save a copy: store this local version as a new resume whose title carries “(copy)”, leaving the original as the other window left it.
The test is strict: only an explicit revision-conflict business code from the backend counts as a conflict and takes this path. A 409 without that code, a dropped connection or a timeout all go through ordinary error reporting — your changes stay where they are, the save button is the retry, and you do not have to work out which kind of failure you are looking at.
Expression library: keep the wording that works
The Expression library in the builder's left column stores wording you can reuse and inserts it directly into another resume, so you no longer copy and paste between files. It is a sentence library, not a profile library: it stores how you write, not what you have done.
- Save: select a bullet in the middle column and choose “Save this bullet”; if nothing is selected you are prompted to select first. Unsaved changes must be saved before saving an asset, so an old version is never stored.
- Find: filter by keyword (content or job tag), type, language and job tag, and sort by recently used, usage count or date saved; filters can be cleared in one click.
- Insert: select the target entry in the left column first, then insert; insertion creates a new object and selects it so you can keep editing. If the resume has been updated elsewhere, you are asked to reopen it rather than writing old content back.
- Deletion is undoable: deleted items go to the trash and the toast offers an immediate undo; they can also be restored from the trash (see section 29).
Bilingual versions: one resume, Chinese and English
When you are applying to a foreign company or an English-language role, you can give the same resume an English version: the two versions share material but are laid out independently, and the English version never overwrites the body text of the current language.
- Field comparison: Chinese and English side by side, marked "same / differs / empty on both sides", so you do not have to hunt for changes in the full text.
- Accept line by line: generate the translation, tick the lines you want and Accept selected to write them in; skip anything you do not want.
- Fact lock: names, institutions, dates and numbers are protected and are not translated or rewritten — a translation may change the phrasing but never the fact.
- Glossary: one term is translated the same way everywhere, so the same Chinese word does not become "project" in one place and "program" in another.
- The two language versions are previewed and exported separately, each with its own page count and layout.
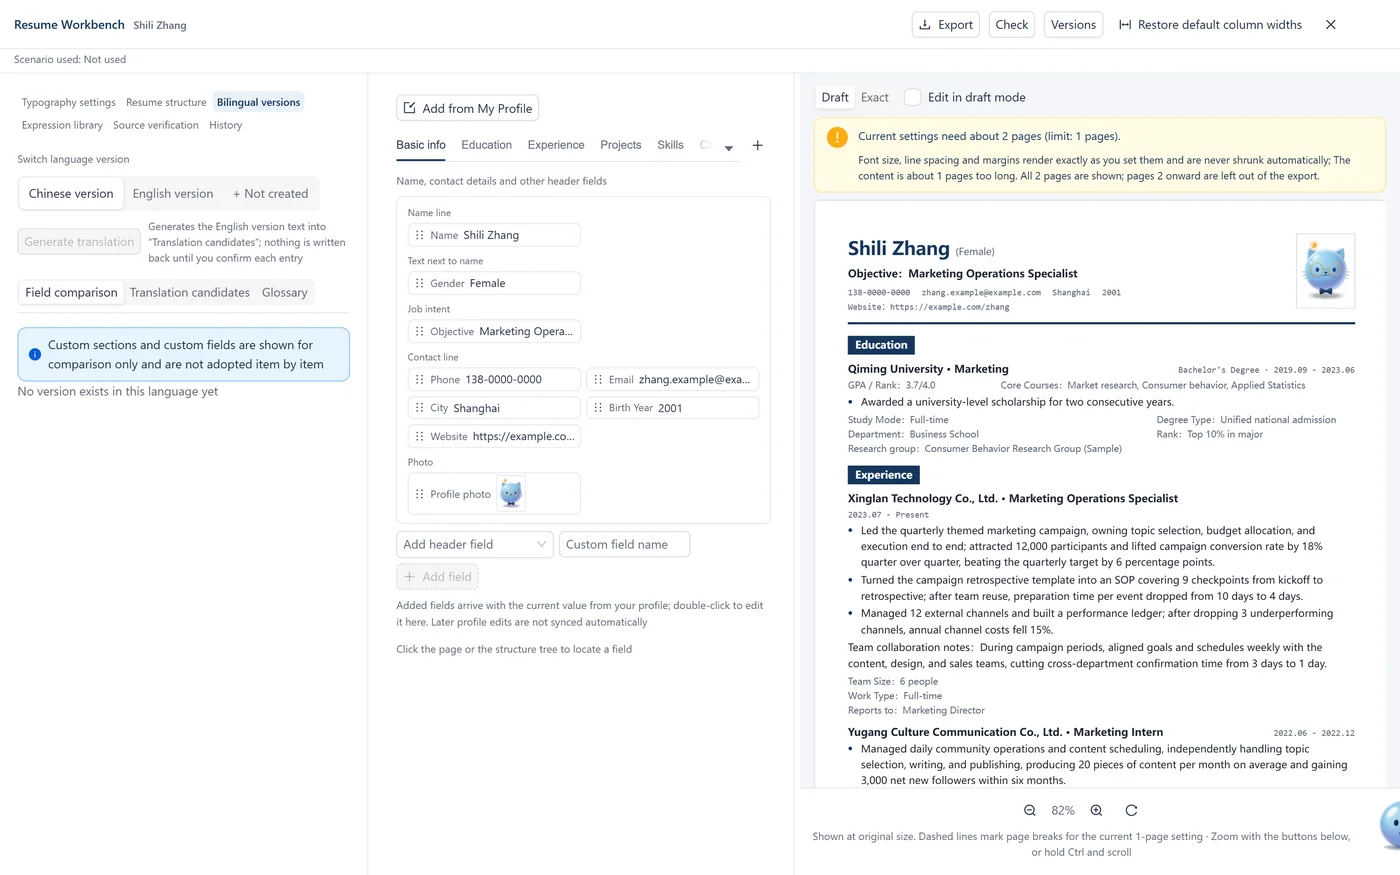
Named versions and job variants
- A named version is an immutable snapshot: it is named when saved and later edits do not touch it; restoring history produces a new current version rather than rewriting something you already sent out.
- Job variants: derive several resumes from one source for different roles, each with its own layout and each exportable on its own — no more swapping templates between a technical role and an operations role.
- Versions and variants hang off the same resume, and preview and export follow whichever you switch to.
Comparing versions
Pick any two resumes in Resume Center to compare them. The result is grouped by field and shows only the blocks that changed: strings get word-level highlighting, list entries get + / − markers, and photos appear as [image]. When you want the raw diff, expand View raw diff as a fallback. This comparison runs on a local algorithm and calls no model.
Check Resume: content, layout and exported files
The Check button in the top bar opens a read-only panel: it changes nothing in the resume and only answers “can this file go out as it stands”. The check runs in three layers:
- Content: whether incomplete markers remain, whether links are well formed, whether export needs masking, and which statements should be checked against the fact ledger.
- Layout: whether the current settings run over the page limit, whether the page is too dense or too empty, whether the font is missing glyphs, and whether bold is available.
- Exported files: it lays out a real PDF (plus Word when Word is selected) and checks for lost text, whether the reading order a reader sees matches the page, page overflow, hidden content leaking through, and outright render failures.
Every issue carries one of three severities: must fix / needs review / layout suggestion. Tick Show only required fixes to narrow the list; inside a layer, issues are sorted by severity and keep the backend order within the same severity, so an issue does not move between one check and the next — otherwise you lose the one you were just looking at. Each entry carries a location (section · field · page) and its evidence; where a fix exists you get one concrete action button (jump to this item, add a page, open layout diagnosis, open exact preview…), and where none exists it says “handle this by hand” instead of offering a meaningless OK button.
Results are tied to a snapshot fingerprint: change the content, the layout, the template, the page limit, the font size, the language or the document mode, and the old result is marked “Results use the previous version; check again to update them” instead of quietly telling you everything is fine. A recheck also compares against the previous run and reports how many issues were resolved and how many remain.
How this differs from section 10: the panel in section 10 is a content risk report — duplicate content, sensitive wording and ATS, exaggeration risk, interview deep-dive risks and compliance, all six in one place, answering “can I say this”. This panel answers “will the file lose glyphs, lose a block or run over the page”. Its content layer keeps only what bears on export (incomplete markers, links, masking, whether a statement needs checking against the fact ledger; the ATS and fact-check rules are the same ones section 10 uses, so the two never contradict each other), and it adds the layout and exported-file layers, which only a real layout run can produce and which section 10 does not do. The gate behind the top-bar Export button uses this result.
Constrained layout optimization: four knobs only
The layout diagnosis card (the card itself is covered in section 11) also holds Optimize layout under constraints next to Auto one page. It turns the same knobs, but lets you state your limits first:
| Knob / constraint | Meaning |
|---|---|
| Four knobs | Page margins, section spacing, line height and font size. Optimization touches only these four — not the template, the font, the structure or a single character of text. |
| Keep font size | With this on, no candidate may change the font size; only margins, section spacing and line height get tightened. |
| Minimum margin | A floor in millimetres that no candidate may go below; leave it unset for no limit. |
| Keep entries intact | Only spacing and font size are tightened, never pagination or entry structure — so no plan can buy space by splitting one experience in half. |
| Target length | How many pages to fit into; defaults to the page limit of this resume, and Unlimited skips the optimisation entirely. |
Every candidate is laid out and measured for real, not estimated: the card lists what changed (margins 14 → 12 mm), the expected page count, how much overflow it removed and the readability impact (barely noticeable / minor / noticeable), and only a candidate that actually reduces overflow counts as feasible. Applying one writes the numbers back into the left-column sliders, can be undone, and you can keep fine-tuning from there.
When no candidate is feasible under your constraints, it says why: the content already fits, the constraints ruled out every candidate, it still overflows after tightening, the settings are already as tight as they go, or the current layout has not been measured yet. It would rather tell you “shorten the content or allow more pages” than hand you a plan that is worse than what you have.
10. Quality and compliance checks
The quality panel on the resume page breaks “what could go wrong if I send this out” into six checks: duplicate content, sensitive wording and ATS checks run locally on deterministic rules; exaggeration risk, interview-probe risk and compliance need the model and consult the fact ledger. Anything that involves judgement carries an explicit disclaimer.
| Check | What it looks at | Uses a model |
|---|---|---|
| Duplication | Whether the same content appears more than once in the library | No, local rules |
| Sensitive wording | Phrasing that does not belong on a resume | No, local rules |
| Exaggeration risk | Whether the strength of a claim exceeds the ownership recorded in the ledger | Yes, reading the fact ledger |
| Interview deep-dive risk | Which statements would fall apart under a follow-up question | Yes, reading the fact ledger |
| Compliance | Red lines such as confidentiality duties, NDAs and prohibited phrasing | Yes |
| Local ATS check | The three static checks: format, keyword coverage and information placement | No, local rules |
The ATS check carries a clear disclaimer: it is not what a real applicant tracking system would extract. ATS implementations differ enormously, and any claim of "passes ATS screening" cannot be verified. This does only the three static checks that can be settled locally, and states their limits honestly.
How the ATS score is calculated (the definition changed)
The keyword component is now round(100 × coverage) − stuffing penalty, and quantified credit moved into the format component. The two used to be disconnected: missing one core keyword and missing twelve both cost a single medium finding, and a JD with no core keywords scored 100% coverage, so a resume that matched nothing could still score 92.
Scores for the same resume against the same JD will generally drop (a completely unrelated pairing goes from 92–95 to roughly 55). That is the score becoming discriminating again, not a regression. When core keywords are empty the denominator falls back to core plus supplementary; only when both are empty does it say "no comparable keywords found" instead of pretending 100%.
11. Layout diagnosis and auto one-page
Above the resume preview there is a layout diagnosis panel. It turns vague feelings like "looks empty" or "looks cramped" into numbers you can act on.
How the diagnosis is defined
- One-page resumes: a body filling 82%–96% of the page reads as right; above 96% is flagged as too full (close to overflow) and below 82% as too empty.
- Multi-page resumes also look at the last page: below 70% and the final sheet is nearly blank, which reads as "not enough content".
- Heights come from real measurement in the browser (a layout only exists once it is laid out), but the rules live in the backend: what counts as full, which knob to turn first, and when to stop are judgements that can be tested one by one.
The suggested order is itself a rule
The diagnosis produces a set of suggestions in a fixed order:
- Reorder: change the order of content (bring the most relevant experience forward).
- Structure: merge or split blocks.
- Spacing / font size: adjust layout parameters.
- Trim content: cut text.
- Add pages: relax the page limit.
The order matters: asking you to tighten spacing first and delete content second wastes a round of edits; leading with “cut content” may make you delete experience that would have fit.
Auto one-page
When content overflows, an Auto one-page button appears. It steps through settings and stops as soon as it fits rather than shrinking the font to the minimum in one go: margin → block spacing → line height → font size, a dozen or so steps, each one injecting a little CSS into the preview and measuring again (no network round trip).
- Font size has an absolute floor: never below 11px (about 8pt). It is computed in pixels rather than proportionally — the same factor bites harder at small sizes, and watching only the ratio would shrink the small preset below 10px.
- When it runs out of room it says plainly that only trimming content or adding pages will help; it never pretends to have succeeded.
- A plan's purpose is to override the layout for one resume: results are written to this resume only, never to a named layout preset, which would change every resume that references it.
- Preview, HTML export and server-side PDF all go through the same parsing function, so “the preview tightened but the exported PDF did not” cannot happen after download.
Page control
Pagination rules are set in the builder's Typography settings tab: the section-level Start on a new page sits in the Page setup group, entry-level breaks are set in Resume structure by selecting the entry, and the breaks already set are summarised at the top of the Pagination group so they can be cleared in one go. Breaks only take effect in exact preview and export.
- Start on a new page: settable for Sections and entries, with separate switches for whether the title comes along, whether an entry may be split, and whether long links break automatically.
- Page overview and the pagination report: after Get pagination report the server lays the resume out as a real PDF once more and reports the actual page count, how full the last page is, whether anything overflows, and which piece of content is the first to overflow (see Typography settings in section 9). Change the content or the layout and the report is out of date — fetch it again for fresh numbers.
- Check before export: the pre-export check and the preview read the same pagination snapshot, so one cannot say "exactly one page" while the other exports two.
The professional view
- The preview toolbar: the preview switches between full page / fit width / 100%, with page navigation, guides and a grayscale proof; a command palette and workspace presets gather common layout actions in one place for repeated fine-tuning.
- Photo cropping: changes the framing only, the original image is kept intact and can be restored at any time; these parameters are saved with this resume (see “Resume photo” in section 3).
12. Preview, export and redaction
Preview
Click Preview / export in Resume Center to open the preview. The key points:
- The A4 layout renders live, with button and wheel zoom, and scrolling once zoomed in.
- When content exceeds the chosen page count it is no longer cut off out of sight; instead it unfolds to the right as a second, third… A4 sheet, each boundary drawn as a dashed line labelled "page N of M (approximate)". All sheets share one zoom factor, so page 2 has the same type size and margins as page 1 by construction.
- The screen always labels this as approximate pagination split at A4 height; real pagination comes from browser printing or the downloaded PDF. Browsers do not expose the printed page count to JavaScript, so the app cannot compute it and states the difference honestly.
- Multiple pages are display only: they never change your saved page setting and do not affect export.
- View full size: opens the preview at its original size in a dialog (the inline preview shrinks it to fit the list), with pagination lines matching the current page setting; clicking a field there also opens "change only this", and you can jump straight to export.
- Exact preview: switching to exact renders real pagination on the server, the same result as the PDF export; draft mode is faster and exact mode is more accurate, and neither changes your saved page setting.
- Export page count matches the preview: the export dialog uses the page count you set, so "two pages in the preview, one in the export" no longer happens. Note that on-screen pagination is an approximation by A4 height; real pagination comes from browser printing or the downloaded PDF, and the two can differ by a line right at the boundary.
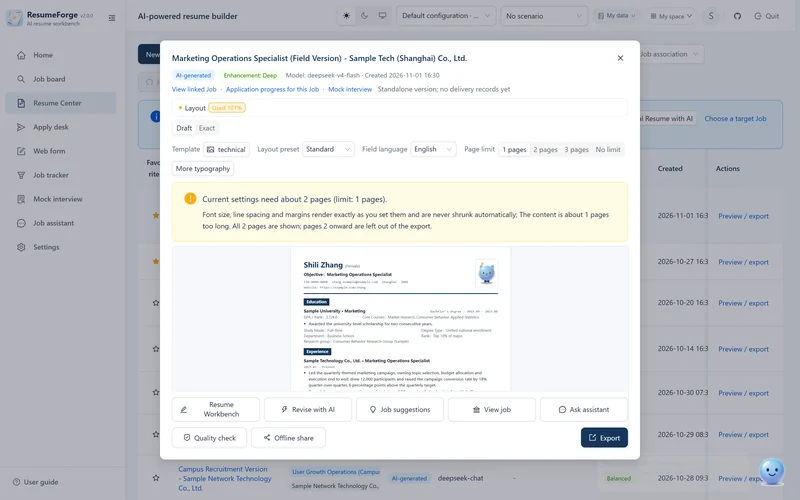
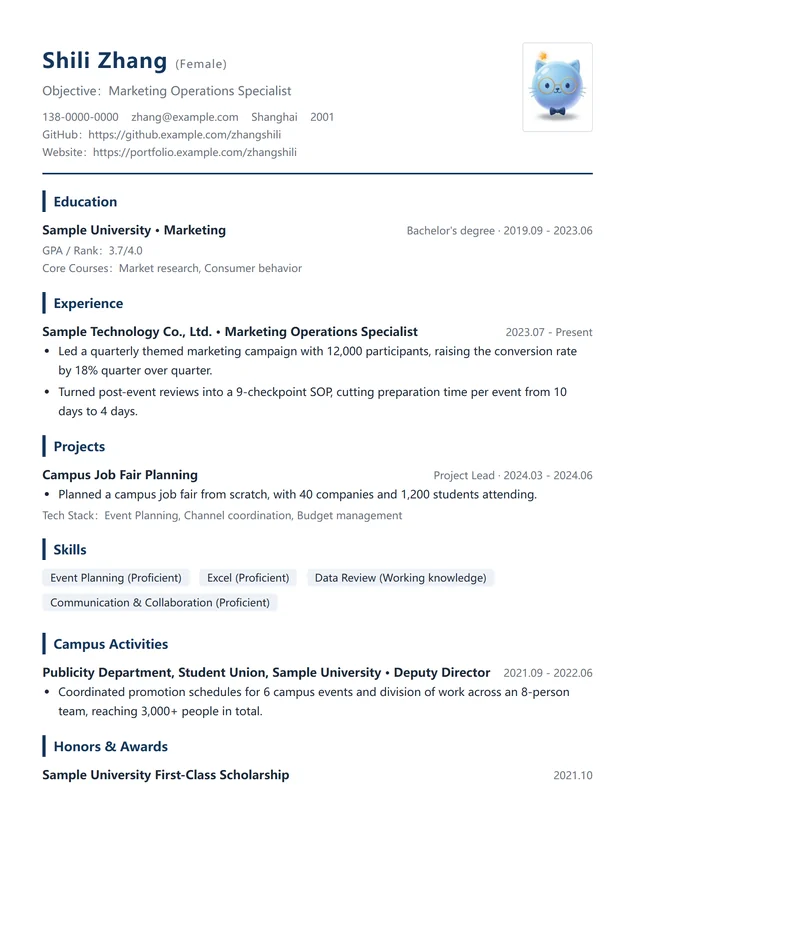
Seven export formats
| Format | Purpose | Notes |
|---|---|---|
| HTML | Look at the layout / edit again | The same artefact as the server-rendered A4, with inline styles |
| Apply directly | Downloads as is: generated on the server with the system's Chinese fonts, independent of browser printing | |
| Word | When the other side asks for docx | Reuses the same layout definitions rather than introducing a second layout engine |
| Markdown | Keep a record / take notes | Structured plain text |
| Plain text | Filling in online forms | The most practical form to paste into a job site's input box |
| JSON | Backup / migration | Lossless structure, can be imported again |
| Image (PNG) | Application platforms that demand an image | Converted page by page from the same PDF (300dpi); one page downloads directly, several are zipped. Use PDF when you need to get through machine screening (ATS) |
There is also a browser print / save as PDF entry, with a hover note: print pagination follows the browser and may differ slightly from the approximate pagination on screen.
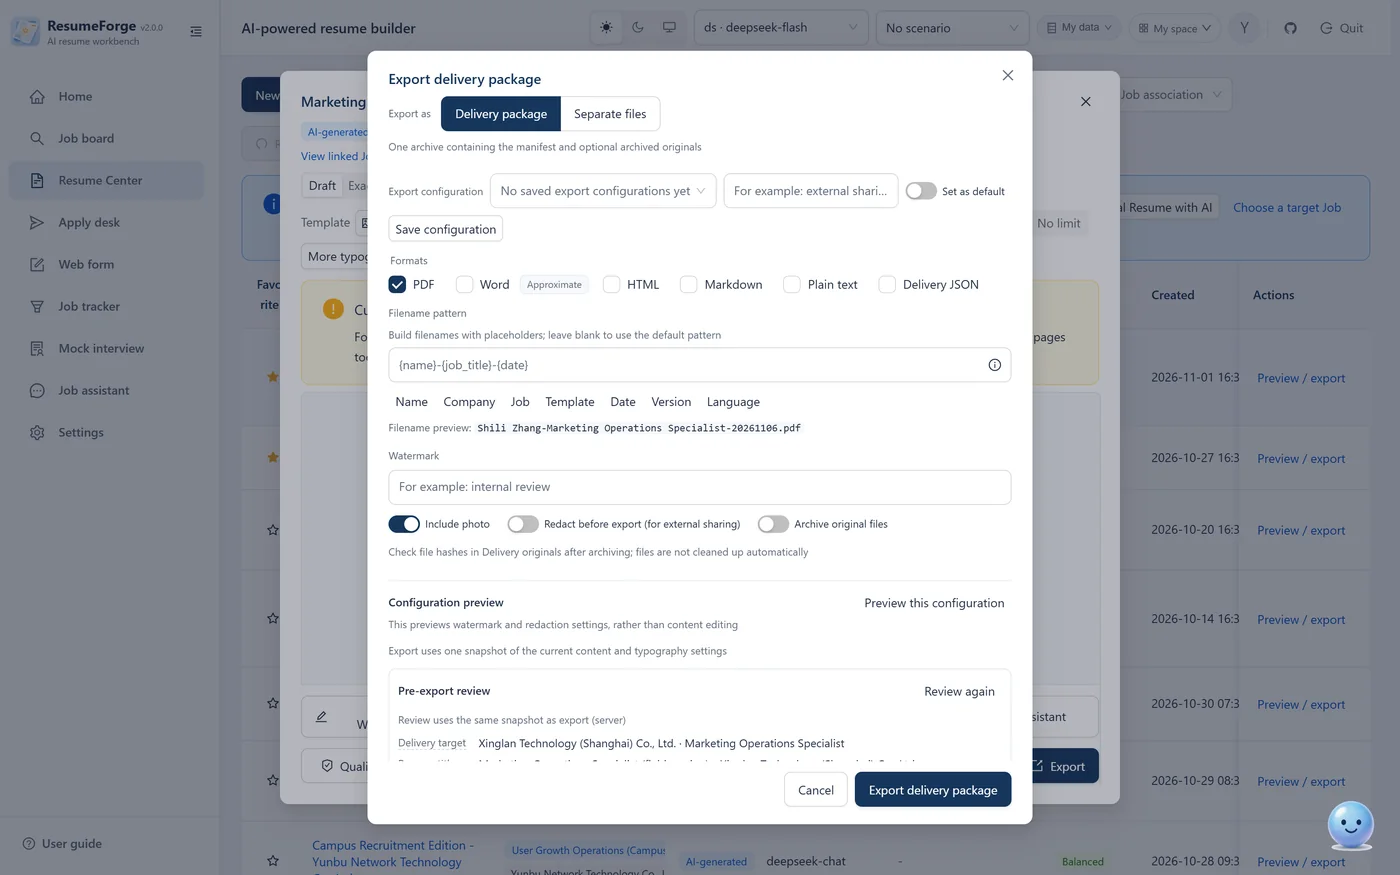
Delivery form: package or separate files
After choosing the format, choose the delivery form: package zips the chosen formats into one archive (with a manifest and optional archived originals); separate files downloads each chosen format on its own. Use separate files when you just need one PDF to send someone; use a package when you are keeping a record or delivering originals alongside.
Batch export
Select several resumes in Resume Center and choose Batch export to zip them with the same export settings. The defaults live under Settings → Appearance and interaction → Batch operations → Batch export resumes; the card shown when you start a batch applies to that batch only and leaves the defaults alone.
The length cap applies to six formats (JSON excluded)
The cap used to constrain only PDF while Word / HTML / Markdown / plain text / image exported everything (and the image is converted from the PDF, so it followed the same cap). Now the single exit renders the real PDF layout once, and when it overflows it trims whole blocks (bullet / entry / Section) from the tail and renders again, with Word converging in at most 3 rounds. A truncated response carries X-Resume-Truncated and points at the Section where export stopped where it can; PDF is trimmed by page, so it only reports "a few pages short" rather than a Section. Choosing unlimited is never reported as "trimmed to the cap" — the internal 10-page render guard is not a promise about your document.
JSON is a data deliverable: no length cap, no watermark, and it carries the full structure.
An export runs a pre-check first: if it finds overflow or unfilled placeholders it asks before doing anything, and choosing adjust first stops the whole batch rather than silently trimming the overflow and downloading.
Three fidelity points in the Word export
- Header rule: the last line of the header gets a bottom border whose weight and color come from the template parameters; the soft-accent header does not add it.
- Skill tags: rendered as run-level shading and a matching border in the same shapes as the PDF, keeping the PDF's flowing arrangement rather than forcing one per line.
- Bullet character: changed from
·to•so it no longer looks a size smaller than the body text.
Rounded corners, tag grids and per-side padding cannot be expressed in OOXML, and the export does not fake them — what you see in Word is a close approximation, not a second layout engine.
Custom watermark
An export can carry a watermark line (for example "Draft — do not distribute"). The mechanism depends on the format: a CSS overlay for HTML, a pypdf overlay for PDF, and a header for Word. Plain text and JSON have no concept of layout, so asking for a watermark there returns an explicit error instead of ignoring it.
One-click privacy redaction
With redaction on you choose the fields to mask one by one: name, phone, email, company, school, project name, product name, GitHub and personal site (9 in total). By default it masks name, phone, email, company, GitHub and personal site — every field that directly identifies you is masked by default. What gets exported is always the redacted result, never a half-redacted document with the rest in clear text.
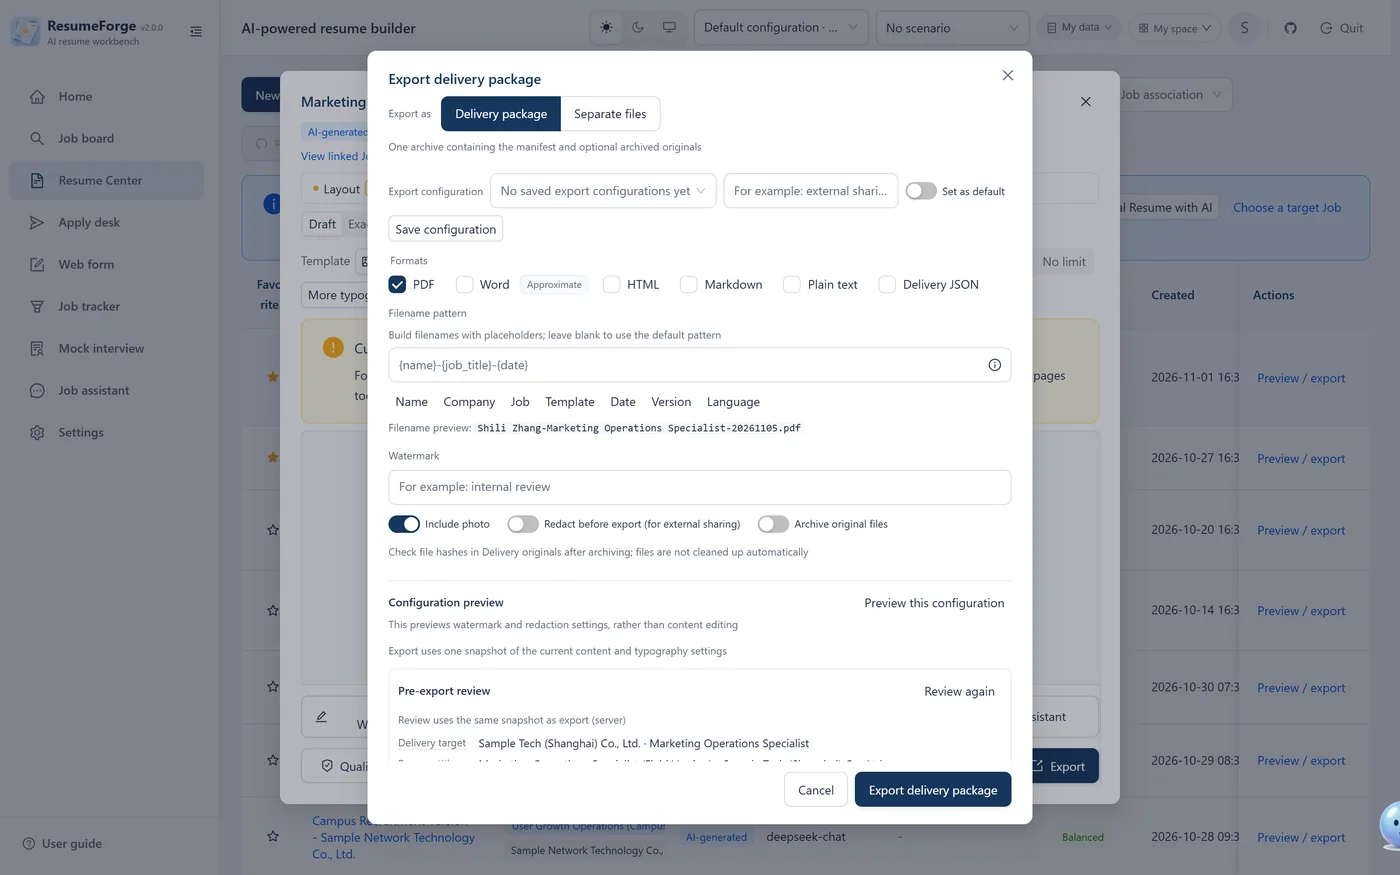
What to do when an export is blocked
If the body still contains markers such as [TODO] or [to confirm], the export is blocked and the exact location is reported. Two ways out: go back and fill those placeholders, or choose "export the draft anyway" in the dialog. The latter exists for cases like sending a draft to a friend.
Delivery archive: delete the resume, keep the record
Every apply record keeps the delivery snapshot from the moment it was made. Each record on a resume has a download archive entry:
- Export snapshot: replays the export from the archived content and the request parameters of that moment — even after the original resume is deleted you can still get that PDF / HTML / Word;
- Apply / tracker snapshot: downloads the frozen content JSON directly, as evidence of what was actually sent;
To be precise: the replayed bytes may differ from the file you downloaded originally (each HTML render gets a fresh CSP nonce). The interface says so — "regenerated from the archive" — and shows the SHA-256 fingerprint of the original artefact for comparison; it never passes the replay off as the original.
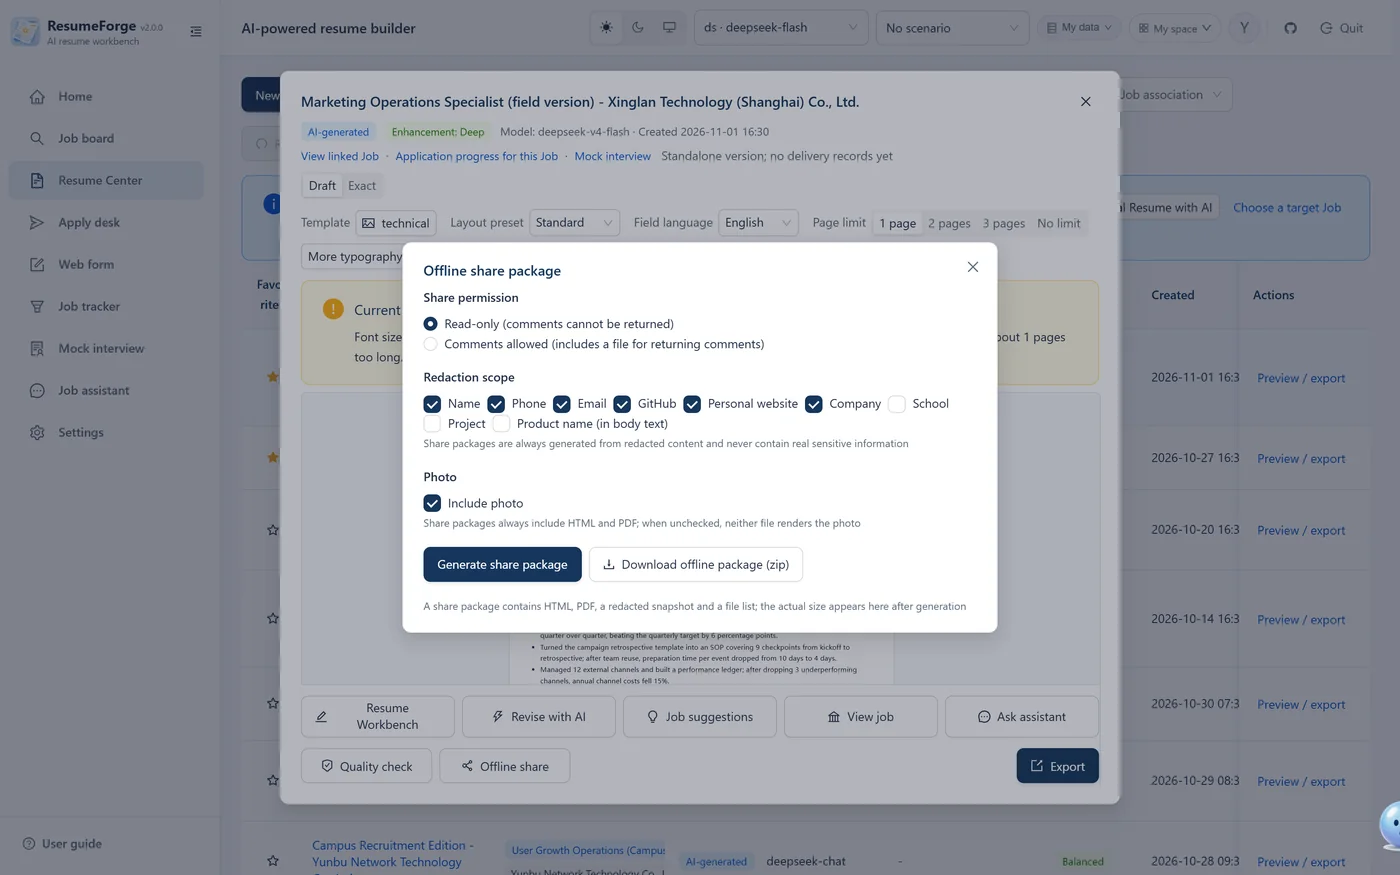
14. Automatic capture
The entry point is Apply desk → Automatic capture. Capture pulls jobs into the library in bulk but never writes straight into the Job board.
The three-step flow
- Set the conditions: at least one of keywords (up to 10) or city, plus a per-batch cap, job interval and random jitter; the site's own filters can stack on top.
- Capture: runs on a background thread, so switching pages does not interrupt it and progress is there when you come back; it can be paused, resumed and stopped. The batch status card sits inside the Automatic capture tab (between the filter conditions and this run's results) and a live strip appears while a capture runs — counters, a progress bar and the current page number.
- Pick and import: results land in “Results of this capture” first; tick the ones you want and choose “Import selected jobs” to move them to the job board, or “Import and add to the apply queue” to do both in one step. The result list shows 20 rows per page.
A process line is pinned to the top of the page: capture → pick and import → apply queue → apply records. Completed tasks say "N jobs staged, tick the ones to import below" rather than a vague "done".
Filter by the job site's own criteria
This group of filters (job type / salary / experience / education / industry / company size / funding stage) consists of the site's own parameters: the site filters before returning results, which is more accurate than re-filtering locally and saves a lot of paging. It is not the same as “my expected salary / my experience / my education”, and both can be used together. The Test whether it works button on the header checks, on a real job site, whether each condition you picked can still be selected, and reports Active / Not applied / Unrestricted per item (it first asks you to start the browser if it is not running).
The option lists are read from the site, never hardcoded. A hardcoded list silently filters wrongly once the site changes its codes — you think you filtered for a bachelor's degree while sending a different code. Lists come from three sources in descending trust: your logged-in session (the page filter bar, most accurate) → the site-wide list (an endpoint that needs no login) → a built-in snapshot (offline fallback covering only six short lists). The interface states which one is in use.
Job type has to be read from the logged-in session: in practice its options differ per account — signed in you see unlimited / full-time / part-time / internship, signed out you only get unlimited / full-time / part-time. A hardcoded list would decide on everyone's behalf what they are allowed to pick.
Before a capture starts, every code in the list just read is validated; anything that fails is not sent to the site and is reported separately as "could not be applied". An outdated code looks perfectly legal to the site, so sending it filters silently wrong — worse than not filtering at all.
Capture records
Every capture is recorded: conditions and results in reverse chronological order (staged / duplicate / failure reason), expandable to see which jobs that run captured, and you can import from there directly. Capture is an action whose process disappears when it ends; without this record you would not know the next day which keywords and which city you used.
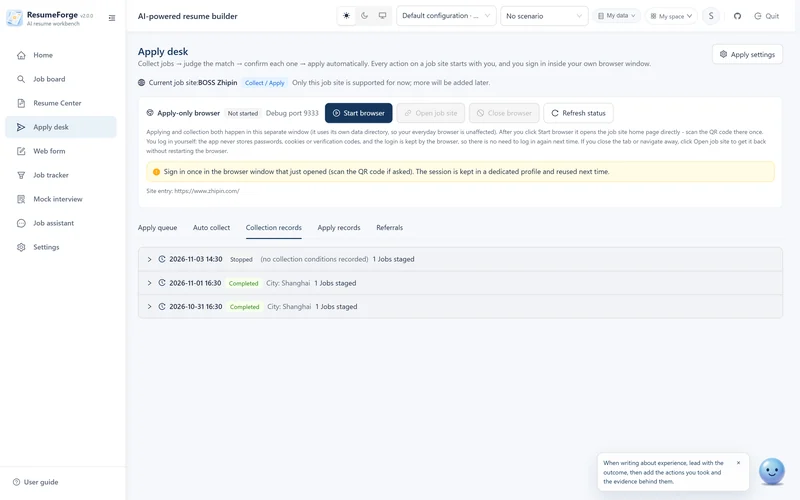
Capture criteria history
Saving conditions stores a snapshot (deduplicated, capped at 20). Next time, fill them back in with one click from the Saved conditions dropdown, or clear it.
Keep the page text captured this time
Next to Start capture there is a checkbox that is off by default: "save the raw page responses from this run (for diagnosing parsing problems)". When ticked, the responses of the search and detail endpoints are stored under backend/data/captures/<site>/. Three hard limits:
- Off by default and ticked explicitly for each capture — nothing is ever recorded silently.
- No credentials are written: URLs keep only the path, dropping query and fragment (a query can carry internal parameters or even tokens), and request headers, cookies and bodies are not recorded.
- It writes only under
backend/data/captures/: that directory is not in the repository, not in backups, and does not follow dataset switches, and nothing is ever written into the apply browser's session directory.
The quota is 30 files per capture and 2 MB per file; beyond that a log line records that saving stopped, rather than dropping files silently.
15. Apply desk
The apply desk drives the browser on your own machine. It is the module that most needs its boundaries spelled out, so here it is in the order you use it.
The dedicated apply browser
- The header names which job site it is connected to (one site for now, with more to come).
- You can choose automatic / Chrome / Edge / a custom path, and run it in a separate window.
- It shows the debug port and running state; you can open the job site, start or close the browser, and refresh the state.
- Logging in is yours to do: the app neither reads nor stores your job site credentials, and the apply browser uses its own user data directory.
Whether the browser "is running" is decided by whether the debug port answers, not by whether the app holds a process handle — a window can be open and answering while the handle went stale long ago. Ownership is a separate fact: if the app did not start this browser, it will not guess at processes by PID (to avoid closing your own browser), and Close browser returns 409 asking you to close that window yourself.
The four steps on the queue page
The queue page keeps a four-step guide at the top. It exists because users reported not knowing what to do next:
- Where jobs come from: Job board → job detail → add to the apply desk; importing from automatic capture uses the same entry point; and the Job board's selection mode can tick several jobs and add them to the queue in bulk, without a dialog per job.
- What to check here: the application recommendation; if it is unclear, run match analysis first.
- What to change if needed: click the job title for details or editing, swap the resume, edit the greeting.
- When it actually applies: only after you tick rows and click Start applying; nothing opens a job site before that. Ticking nothing means applying to the whole queue in order.
Admission gate: only jobs hosted on a job site get in
The criterion is whether a job's source or apply link maps to a registered site, and it is checked both when queueing and when starting a run:
- A job that does not qualify never enters the queue; the response explains which sites are supported and asks you to apply on the right site by hand.
- A manually entered job with a job-site apply link is allowed as usual — closer to how people actually work than insisting everything come from capture.
- If the queue holds entries whose source is unsupported (only possible for data predating the gate), they are stopped before a batch is created, naming which jobs they are and what to do (remove them from the queue), so no batch is created only to fail.
- The failure categories include a dedicated
site_unsupported("the job source does not support automatic applying"). If one ever reaches the executor, the record states the real reason instead of a vague "unknown failure". - For such a job, add to the apply desk on the job detail page is disabled with the reason written on the page, along with the way out: change the apply link to the job's address on the job site and it can be applied to automatically.
Starting a run and controlling it
- One Start applying is one batch. Batches run on a background thread, so switching pages does not interrupt them.
- Progress and the current step are shown per job (open page / fill form / greeting / upload resume / submit / verify).
- Pause, resume and stop are supported, along with a circuit breaker on consecutive failures so a run does not grind through a string of doomed jobs.
- When a batch seen running in this session reaches a terminal state, an in-app notification appears (success / failure / stopped, each with its own text and counts), and the app makes a best effort at a system desktop notification — only when permission has already been granted, never prompting for it. Clicking the notification returns to the apply desk.
- Entries skipped by a rule such as "one job per company" state why they were skipped.
Apply records
Apply records are grouped by batch: the group header shows the batch number, time, status and that batch's own counts (succeeded / failed / skipped), and expanding it lists the records inside. Filters (keyword / result) apply to records while pagination counts batches, so a batch with no matching record does not appear at all.
Every failure record carries: failure category, details, page URL and title, batch number, and attempt number. The categories are:
| Category | Meaning | What to do about it |
|---|---|---|
login_required | A login is required | Sign in again in the apply browser |
captcha_required | A captcha or security check | Handle it once by hand in the browser |
selector_invalid | The page structure changed / a selector is dead | The site was redesigned; wait for an adapter update |
greeting_missing | The greeting is missing | Add a greeting for that job |
network_timeout | Network timeout | Retry later |
file_upload_failed | Resume upload failed | Check the resume file and format |
site_unsupported | The job source does not support automatic applying | Remove it from the queue, or change the apply link to an address on the site |
unknown | Unknown failure | Judge from the page URL and details |
Editing operations in the queue
- You can change the greeting and the resume used; per-row actions fold into a More actions menu at the end of the row (edit / remove from queue). The queue is ordered newest first by import time, with no manual move up or down.
- Filter by status (Pending / Applied / Skipped) and by admission verdict at the top; filtering changes the list only — admission warnings and the scope of “Start applying” still consider all data. The verdict comes from the job's match analysis (section 6): a job that has not been analysed is marked “Not analysed” and must be confirmed once before it can be queued.
- Bulk management: besides the select-all in the page header, there is a cross-page select whole queue (everything applicable in the current filter) and Remove selected, with per-row fault tolerance and a success / failure account at the end; a counter always shows the queue total, the filtered count and the selected count.
- The queue paginates at 10 and shows a pager past the first page, matching the Job board.
- Entries with an unsupported source are marked red in the job column, their checkbox is disabled, and the top of the queue explains the situation once with two ways to handle it.
- When the backend refuses, it shows a message and offers no "add anyway" button — confirming would not help for this class of problem.
16. Web form filling
Some companies skip job boards and run their own application system (Tencent campus, ByteDance campus and the like): name, ID documents, education history, page after page, and you start over at the next company. Web form in the sidebar (right after Apply desk) automates that step.
Scope and boundary: fill, never submit
These are deliberate choices, not unfinished work:
- Values are written only into text controls. Dropdowns, radio and checkbox groups, date controls and custom pickers that only reveal a popover when clicked (including searchable dropdowns for school, major or preferred city, which look like text inputs but require picking from a list) are never filled automatically; they are listed under "not filled automatically" with the note "you need to pick this yourself" — no pretending. The reason: those values are your choices, not a line from your profile, and writing into a read-only display box often looks filled in while the submitted form stays empty.
- Passwords and captchas are never filled. Password boxes are not even read, and captchas are marked "fill this yourself".
- Fill only, never submit, never click submit for you. Filling ends there; submission is yours to click — there is no submit button anywhere in the interface.
- It does not overwrite what you already filled (unless you tick it in the preview yourself); it does not upload resume attachments for you; other people's information such as an emergency contact is listed explicitly for you to fill; and a field it cannot recognise is reported as unrecognised rather than guessed at.
- Consent checkboxes and declarations such as "no internship experience" are never set by the program, and the AI path is no exception.
The dedicated browser
- Web forms use a separate dedicated browser window, isolated from the apply desk's window and session; you can type a target URL next to the launch button to open a page directly, and the list of recorded URLs can be selected or deleted.
- Logging in is yours to do: the app neither reads nor stores job site credentials. After closing the browser by hand, click Refresh state to check.
- Browser settings in the page header and Apply desk → Apply settings are the same browser configuration (automatic / Chrome / Edge / custom path): changing it here affects the apply desk and vice versa. Naming one specific browser means only that one is looked for; if it is not installed the app says so instead of silently switching.
- The three header buttons each do one thing: start / close browser only starts and stops the process; browser settings only changes configuration; refresh state only re-checks immediately. While any of them is running the others are disabled.
Batch flow: read, verify row by row, fill
- Read the current form: the app reads the input boxes on the current tab, read-only, never writing. A read form is valid for 15 minutes, after which it says so and asks you to read again.
- Check line by line: the table lists "which field → which box on the page → what value". Values can be edited directly, rows you do not want can be unticked, rows marked "needs confirmation" mean another control is also a close match, and rows marked "conflict" mean the page already has a value and are unticked by default. Dates written into text boxes such as YYYY-MM-DD are converted to the page's own format, and missing parts are never invented.
- Fill into the page: go back to the browser and verify item by item. The result reports a success rate (fields filled / readable boxes on the page) along with how many were actually recognised and attempted.
What this page has read and how far you have filled survive a detour to add profile data: switching away or reloading the tab resumes where you were. Normal navigation and closing the controlled browser do not end the session either; only End this fill in the page header stops it and cleans up.
Smart field-by-field filling: click one, fill one
Besides reading a whole page, there is a mode closer to filling by hand: turn on Smart field-by-field filling and go back to the browser window. Click any text, email or textarea and a card pops up next to it saying which field it is and what the value is; nothing is written until you click Fill. It starts automatically with the first page when the browser launches or the target page opens. For dropdowns and date controls the panel says plainly "you need to pick this yourself"; when the app cannot recognise a field, click Pick another item and choose from all your profile data. Remember this stores the current field and value in the web form profile (see the next section).
Ask the model for help when a field is unrecognised
Field matching is a general rule set, not hard-coded per company, so fields such as “supervisor name” or “research direction” may not be recognised. With AI assistance for unmatched fields switched on, those boxes are sent to your configured model once: only the page text and the field names are sent, never your profile values; the model returns a field name only and takes no part in choosing the value, which is decided locally, so it cannot invent one. Rows the model suggests are marked “AI suggestion” and left unchecked by default. A failing model does not block filling; up to 40 unmatched controls are handled per run, and the rest stay under “not recognised”, stated plainly.
Relaxed mode (off by default)
The fill-but-do-not-click boundary stays the default. Only after switching it on explicitly in two places — the top of the Web form page or Settings → Assistant and AI behaviour — does the app attempt to click on your behalf for choice controls (custom dropdowns and popover pickers, native selects, factual radio and checkboxes) when a profile value matches:
- Strict option resolution plus read-back verification: options are resolved exact → alias → contains (pure numbers are never guessed), and after clicking the value is read back and compared; only a match counts as filled, and a failure is reported as "could not select: reason". Dependent dropdowns are written in DOM order (province before city).
- Consent and declarations are never checked silently: in the batch preview they appear as "needs your confirmation" rows (unticked, with a faint warning background, clicked only after you tick them), and the live panel offers a "tick this for me: {field}" button, where pressing it counts as your own confirmation.
- Date pickers and file uploads are never done for you, under any setting.
- The switch is stored in local settings, and both places warn before it is turned on: a wrong choice is possible, so check the result after filling.
What the app learns while filling
Some fields only come to mind when you are filling in a particular company ("where did you hear about us", "referral code"). After a fill, if any field written in that round did not exist in ResumeForge before, a summary asks whether to remember it and fill it automatically next time; in Smart field-by-field mode each card also has Remember this for the same purpose. Remembered items are managed in three tiers — general / scenario / this time (older "scenario / this time" flags are normalised to general on read); anything the AI recognised is marked "AI-recognised" so you treat it with a little more suspicion; fields outside the list are stored as custom fields. It only writes to the web form profile and never touches My Profile — resume data is edited in My Profile yourself.
Fill records
The fill records section at the bottom of the page keeps one row per fill: time, page address and title, which field each box was recognised as, what value was finally written, and how many succeeded / await confirmation / failed, expandable into per-field detail and a page snapshot. Fill page writes one row each time; Smart field-by-field rolls a whole session into one. Once there are many, the list paginates at 10. Rows can be deleted individually, which sends them to the trash where they can be restored. Note that records contain real values (ID numbers, phone numbers, relatives), they stay on this machine, never enter a share package or a resume export, and the assistant cannot read them. Most of the values used come from the web form profile in section 17, which is also where Remember this stores what it learns.
Redacted diagnostic export
Export diagnostics in the page header downloads a redacted JSON file: app version, request id, control counts, fill results and frontend errors. It contains no resume values, no actual form values, no passwords, cookies or API keys. When you report a problem, please attach this file together with a screenshot.
17. Web form profile
In My Profile, switch to the Web form profile tab. A company application form asks far more than a resume does, and much of it never appears on a resume at all — student ID, study mode, class rank and cohort size, where your file is held and the report recipient, emergency contact, parents' employers, party joining date, height and eyesight, availability, where you heard about the job, referral code. Putting those into resume data would pollute the resume, so they live somewhere else.
- Stored separately from resume data: country / region, hometown, identity documents, date of birth, phone country code, expected salary, target industry, supervisor, research direction and family information are managed in their own area; fields that belong to resume data, such as QQ and WeChat IDs or CET scores, are not duplicated here.
- Generation does not read this area: it exists only for web form filling. The assistant cannot read it either; it stays on this machine and enters neither share packages nor resume exports.
- Grouped management: student status and records, languages and certificates, family and emergency contacts, party and youth league information, physical condition, intentions and availability, other notes. The read view shows only what you have filled; an entirely empty group does not appear.
- Where learned fields land: fields learned through Remember this in web form filling, plus custom fields, are stored in this area with a source marker, and can be renamed, cleared or deleted.
Editing and saving work the same way as resume data: click Edit profile, switch to the Web form profile tab and fill it in; Save all profile data submits both together. You can also add a custom field by typing its name at the bottom of a card, and it becomes searchable under Pick another item afterwards.
This page went through a round of editing responsiveness work: each record card inside a repeating block (education, internships and so on) is cached independently, so editing one no longer re-renders every sibling; search by field name or content is debounced and works inside repeating blocks too — it matches group names, field labels and filled values, hides groups with no match entirely, and only looks at content that is already filled, so searching a field name does not drag every empty record into view; the "only filled" toggle applies to repeating blocks as well, and with it on, records inside a group that are entirely empty are not rendered.
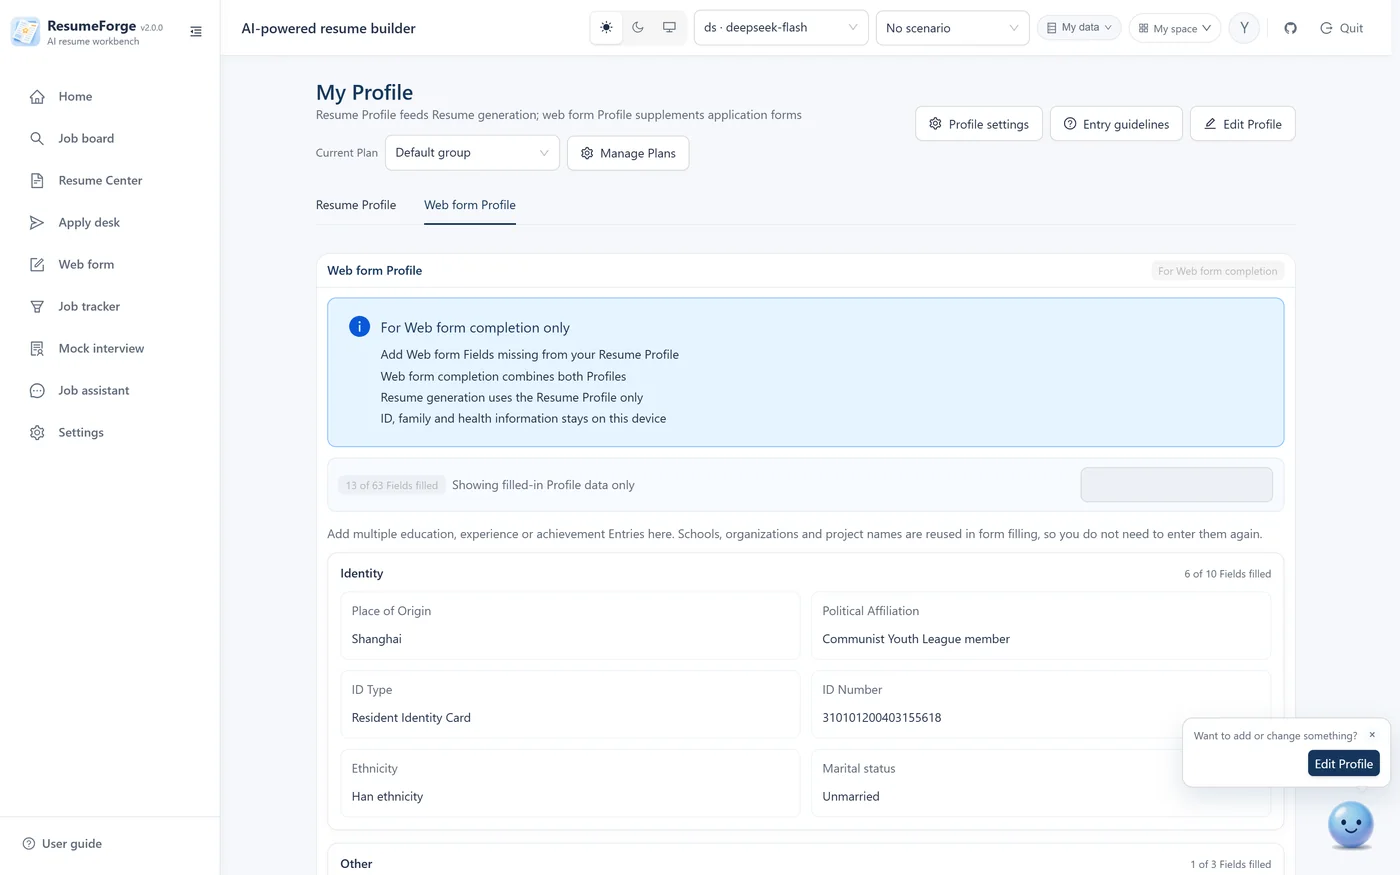
18. Job tracker
The sidebar places this after Web form. The apply desk records actions (this job was submitted, that one failed); the job tracker records outcomes (how far the company has taken it). One record per company per role.
Statuses and how they move
Statuses run applied → screening → assessment/test → interview → offer, plus two that do not advance: closed (including rejections) and to confirm. Two hard rules share one implementation across the interface and the API:
- Status only moves forward, rejections aside: pasting a three-month-old "application received" out of order will not push a record that is already interviewing back.
- An ordinary acknowledgement only means "applied": "thanks for applying" cannot be read as an interview or an offer. Anything unrecognised becomes "to confirm" for you to judge. These two rules are what keep the funnel to a single definition.
Entering and updating
- Automatic records: a job applied to successfully by the apply desk gets an "applied" record automatically (using the snapshot fields on the entry, so it survives the job being deleted).
- Add manually: fill in company, role, status, application date, next step and notes directly.
- Import from a notification: paste an email, SMS or in-app notice, or attach a screenshot or pdf/docx. The result is previewed before anything is confirmed — every row says whether it will be created, updated or left unchanged, and why. The extraction endpoint only computes and never writes; the database is touched only after you confirm, and the preview and the execution use the same merge plan.
- Records merge on company + role: one record per combination.
List and export
- The five cards at the top are Total, In progress, Applied this month, Offers and Closed; below them sits a five-stage funnel (Applied / Screening / Assessment / Interview / Offer), and each stage is clickable to filter. The search box looks across company, job, note and next step.
- Each row shows the application date, the status date, the source (recorded by the apply desk / added manually / imported from a notification) and the evidence (for example "19 Sep, first-round feedback email received").
- Export CSV / JSON: CSV includes a BOM so Excel opens it without garbled characters.
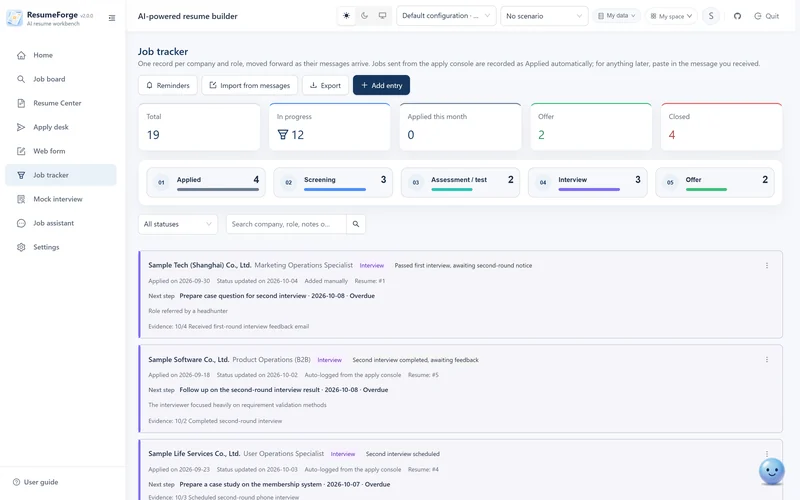
19. Calendar reminders
Reminders are not just a panel inside the job tracker — the home page shows upcoming ones too.
Types and urgency
- Types: interview, assessment deadline, HR reply, other.
- Urgency colors: overdue / within 24 hours / within 3 days / further out — four bands that show at a glance what is most pressing.
- Linked to: optionally a tracker entry, a job or a resume — all three are optional (open it to see the linked item and the note).
List and month view
Two views, and your preference is remembered. In the month view, clicking any day opens that day's full schedule: title, type, status, time and notes; a day with nothing scheduled says so explicitly. The detail is built into the component, so the home page and the tracker page cannot drift apart.
Popup reminders when the app opens
Settings → Updates and help has a "pop up reminders when the app opens" switch (on by default). Turn it off and startup no longer shows upcoming reminders; you check the page yourself.
20. Referrals
Records referrals that came through people you know: referrer name, contact, relationship, their role, channel (colleague / friend / alumnus / other), referral code and note images (a screenshot of the referral poster, for instance).
- The list is color-coded by status: Contacted / Submitted / Closed / Invalid, so you can see at a glance what is still live.
- Status can move to submitted or closed; click a card for details — contact details, referral code and note images are in the drawer.
- The header shows the referral conversion rate, defined by the linked tracker record: only reaching interview or beyond counts as converted. The write path does not accept a hand-entered "converted", so a self-declared success cannot inflate the number.
21. Job analytics
The Analytics page in the sidebar summarises an overview plus four themes. The trend chart's range can be 1 / 3 / 6 months or 1 year.
Overview and the four themes
| Block | What it reads |
|---|---|
| Overview metrics | Effective applications, interviews reached, offer rate, and the five-stage funnel. |
| Conversion and stalls | How many are in progress, how many have not been updated for over 7 days, and how many have no next step. This metric is deliberately not called "interviews stuck" — the last-updated timestamp is refreshed by any edit, so it cannot prove the interviewer went quiet. |
| Time and rhythm | Monthly trend, applications by weekday, additions in the last 7 / 30 days, and reminders by the four urgency bands. |
| Channels and destinations | Referral conversion and referral status distribution, the companies applied to most (merged by company), and record sources. |
| Resumes and health | Number of resumes, how many carry consistency warnings and how many still have [to add] markers, unconfirmed claims, and the link coverage between applications and resumes. |
Honest charts: no data means no zero axis
This is the most important design decision on the page:
- When records have no application date, the page says "N records have no date and are not counted" instead of letting them vanish.
- When a chart's input is entirely empty it renders an explicit empty state and draws no zero axis — a chart of zeros reads as "I really sent nothing these months".
- Metrics that are deliberately not offered come with the reason rather than an invented number: average days from applied to interview, stage drop-off rates and interview pass rates (the database only holds a current status plus one status date, with no status history table, so they cannot be computed); distribution by industry (no such field anywhere); conversion by job type or per resume (there is no linking entry point in the capture UI, so it is structurally empty). For the last one the link coverage is shown, making the gap visible.
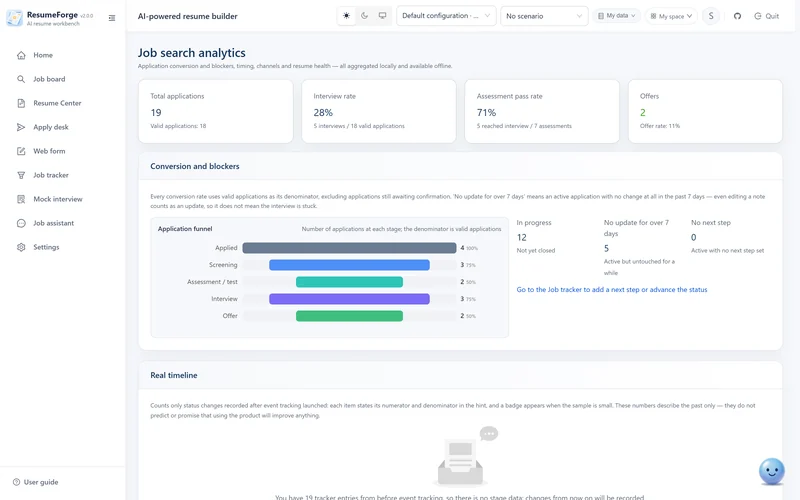
22. Mock interview
The Mock interview page has four tabs: mock interview, question bank, interview experiences and interview review (the last two are in the next section). This section covers the interview itself.
Starting an interview
- Both the linked job and the linked resume are required: the interview only starts when both are chosen, and the endpoint returns 422 if either is missing. The interviewer only sees those two materials; nothing else enters the interview.
- Two ways to supply material: for both the job and the resume you can pick an existing record or import a file (image / PDF / TXT / Word / Markdown). An imported file only supplies the text for this interview and is never written into your job or resume library.
- Type: technical / project deep dive / behavioural (STAR) / HR / general / case analysis / English interview / stress interview. The default is general — technical is only one of eight, and making it the default would force every non-technical candidate to change it first.
- Difficulty: junior / intermediate / senior.
- Interviewer style: rigorous professional / warm and guiding / relentless follow-up / stress questioning.
- Rounds: 3–12, 6 by default; or choose “Auto (the AI decides when to wrap up)”.
- Timer: time spent is tracked during the interview and shown in the detail afterwards.
- Interviewer persona and focus areas may be left empty, in which case the interview uses the general focus for its type.
- The interviewer is Jane: the middle member of the “resume” mascot family, a pale-blue glossy round cat (gold-rimmed glasses and a navy bow tie), introduced at the top of the interviewer settings card; the four interviewer styles each have a default expression, and she switches to an adjusting-her-glasses thinking face while waiting for the next question.
Answering round by round
The interviewer asks, you answer, and the interviewer comments on the previous answer, probes further and then moves to the next round. Every interviewer message carries Jane's avatar. Each round shows the current progress (round N of M). You can stop at any point.
Answering the last question does not close the session immediately. When the rounds run out, the interviewer first comments on the final answer and says a closing line ("we will be in touch"), posted as one more interviewer message, and only then does the decision card appear: keep probing, or finish and generate the report. Q&A in the probing area does not count towards the final report; if that closing call fails, no empty message is written and the interface substitutes a local fallback line.
The report afterwards
After all rounds finish, or after you end it manually, a report is generated:
- Total score (0–100);
- Dimension scores, each with a comment, for example "professional ability 80: the path from campaign planning to conversion analysis was complete, and member segmentation was a plus";
- Strengths and suggestions lists;
- A summary paragraph.
If report generation fails you do not get an empty shell: the failure reason is stated and the interface treats it as having no report. An interview record can be saved to the material library in one click for later review.
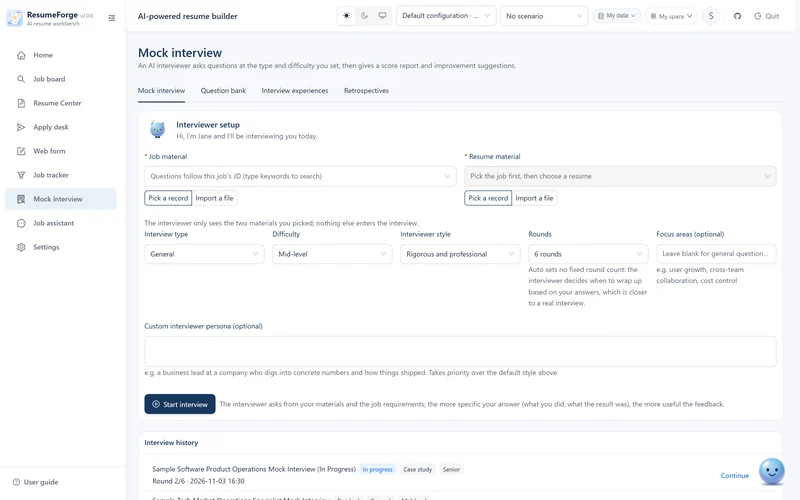
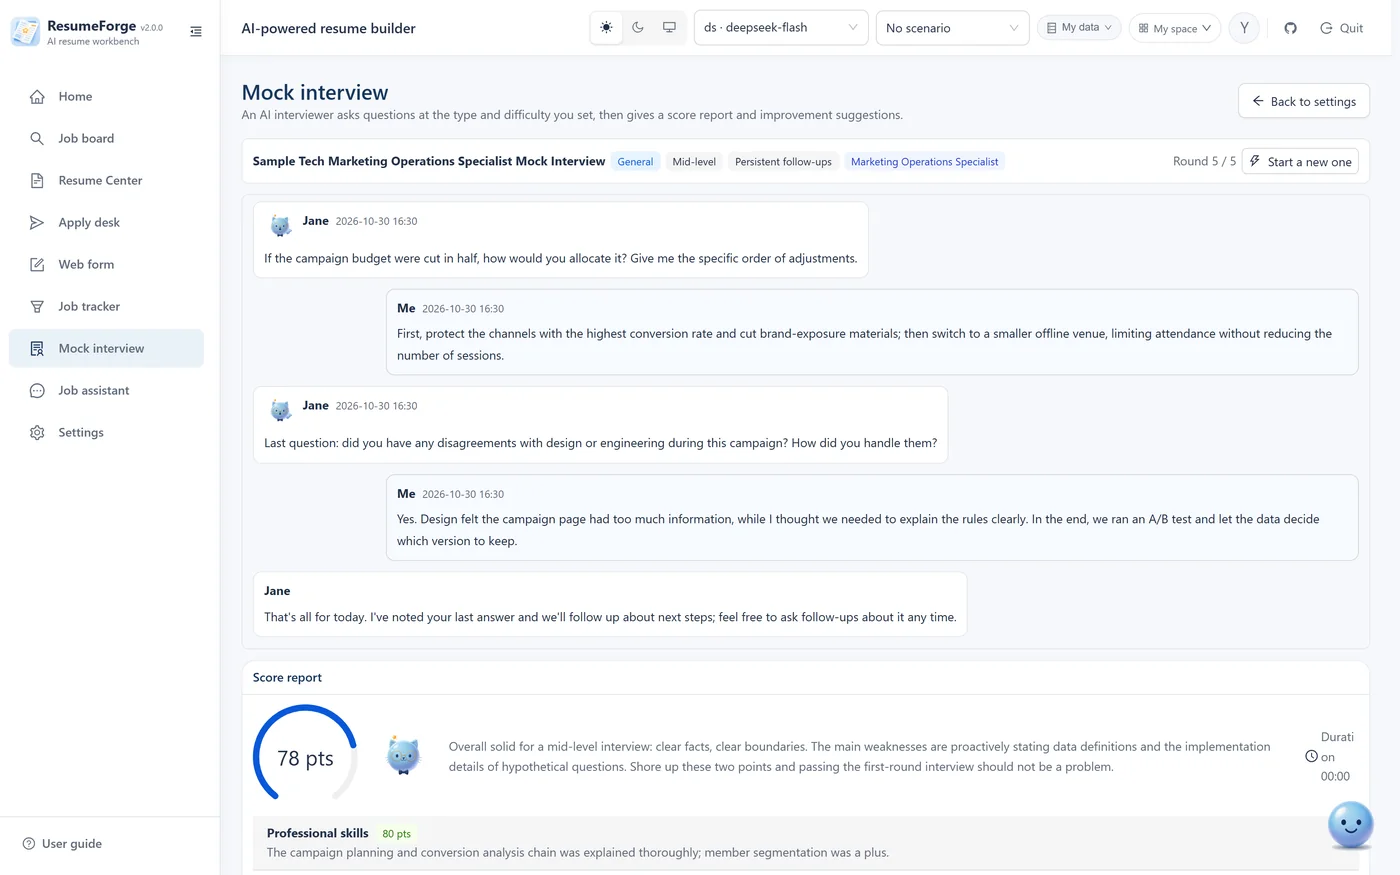
23. Question bank and interview review
Personal question bank
Questions are generated from the linked job and your profile in three kinds: basics, project deep dive and questions for HR. Every question comes with:
- What the question is testing;
- A one-line answering hint (where the answer should land);
- An optional detailed reference answer: generate one per question to get body text, key points and a sentence you can reuse.
Results are written to history automatically, with no save button. Opening one from history gives exactly the interaction you had when it was generated — reference answers open, extra questions can be generated, and new results are written back to the same history row. Older plain-text history rows stay readable with a "view only" note instead of breaking.
Every question lets you write your own answer first; then AI can score it, explain it and suggest improvements against what that question is testing. The score covers only what you wrote: it does not add facts for you and cannot replace your own judgement.
Interview experiences
Capture interview experience: company, job, round type, difficulty, date, source (self / peer / public), question list, review text and tags. Searchable by company, job and tag. Click a card to see the detail: the review and the full question list open in a drawer.
Interview review
Enter the questions you actually met in a real interview and you get:
- An answering framework: groups several questions under one point of assessment and sets the order to answer them;
- Key points: what the answer must contain;
- Likely follow-ups;
- Common pitfalls: which phrasings invite a grilling;
- Reverse-optimising the resume: turns the weaknesses the interview exposed and the frequent follow-ups into concrete resume edits (a list of suggestions only — your text is never changed for you).
Review results are saved to history as soon as they are generated, can be opened again, and can be deleted (into the trash).
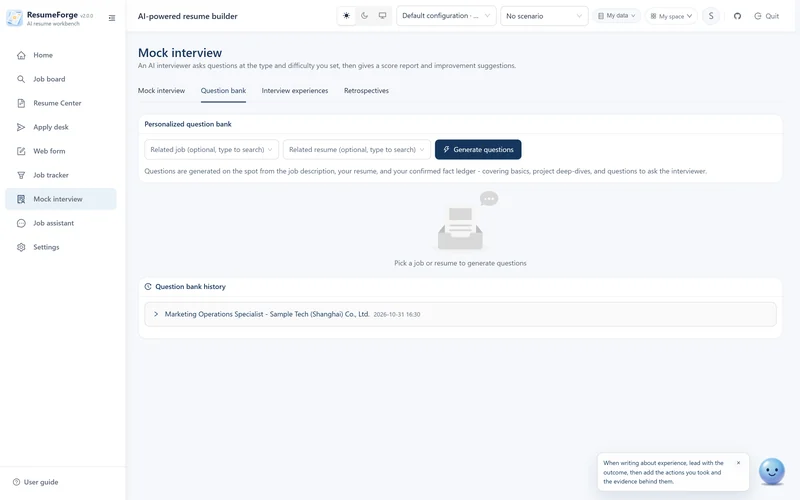
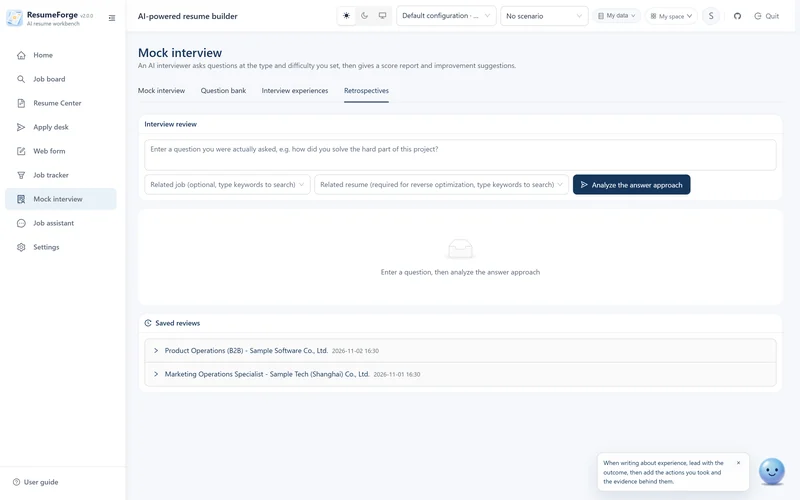
24. Interview deep dive
The entry point is the Start deep dive button on the Fact ledger page. It stress-tests the ledger's confirmed entries one by one, answering a single question: can I actually explain this claim, and where does it still not hold up.
Three deliberate design choices
- The rubric is locked before the question is asked. Each question records, at generation time, what it will verify, which evidence must be heard, when to follow up and when it may stop — and that does not loosen just because an answer sounded fluent. It is the only defence against moving the bar afterwards, and the fundamental difference from "giving a score".
- Evidence status replaces a score. There are only five verdicts: verified / partially verified / unverified / contradictory / not covered. No total score appears in the interface or the API.
- No inference. The model may only assign a status based on what you actually said; claiming "that counts as a pass" while listing no evidence is never marked verified.
How each follow-up round is decided
Follow-up types are chosen by the gap rather than walked through mechanically: background / responsibility / structure / implementation / decisions / alternatives / failure and diagnosis / metric definitions / cost / retrospective. Explain it clearly and it moves to the next claim; if not, it keeps probing the same gap (with a depth limit).
Two feedback modes
- Realistic mode (default): no verdict after each question, only a full review at the end. Announcing the verdict makes people answer to the rubric instead of like a real interview.
- Training mode: a short piece of feedback after each question, useful for a first attempt.
The verdict itself is recorded honestly in both modes.
Review and re-practice
- At the end you get a list of what to shore up, with every action falling into one of three kinds: add facts / add knowledge / soften the claim.
- The re-practice queue only takes claims that were partially verified, unverified or contradictory.
- Re-practice never repeats the original question — it produces a variant, a counterfactual, a failure case, an evidence question or a compressed-expression question. Reciting last time's answer is not knowing it.
- The assistant can read deep-dive records to help you review (
list_drill_sessions/get_drill_report), but cannot start a new deep dive: the rubric has to be locked against the claim first, and you have to answer round by round yourself.
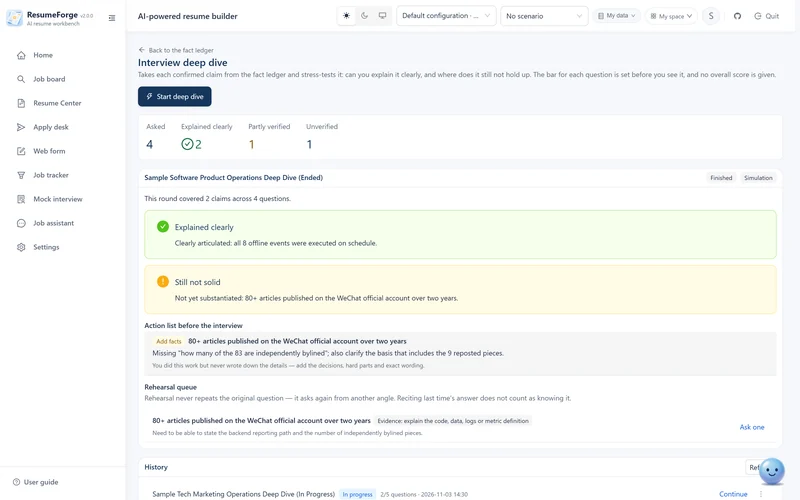
25. Job assistant
Streaming Q&A with the model configured in Settings, with conversation history stored locally.
Opening the page starts a new conversation: it does not reopen your last one and does not create an empty record either — a conversation exists only once you send the first message. Past conversations are in the left-hand list, one click away; when an entry point such as Ask the assistant jumps here with a question, the question is only pre-filled, never sent automatically.
You decide the context
- Linked job / resume: ticking these brings that content into the answer as context.
- Reads a redacted profile by default: the assistant loads the profile from the current dataset automatically but removes name, phone, email and photo before sending anything to the model; jobs and resumes can still be linked when needed, with no switch to turn on by hand.
- Attachments: text or images can be uploaded and take part in the answer.
- Web search: switched on when needed; sources and how many pages are fetched are configured in Settings, and multiple sources are queried concurrently then merged and deduplicated.
- Thinking effort: several levels. With it on, replies show a collapsed thinking panel that can be expanded during streaming and revisited in history. When there is no thinking content the panel is not rendered at all.
- Sources are clickable: with web search on, the
[source N]markers in the text jump to the original. Numbering is globally stable (automatic pre-search and every tool search share one counter, persisted into the message), so source N the model saw is source N you open. When the mapping is missing or a number is out of range it degrades to plain text — better unclickable than wrong.
Answers are aware of local time
Before every answer the assistant receives your local time and day of week, so it can give advice that fits the hour — a late-night or early-morning reminder to get some sleep, without repeating itself mechanically. The greeting on the main page and in the floating card is time-aware too: open it late at night and it adds "finish this one and get some sleep".
What it can read and what it can change
The assistant now has 71 tools (67 by default, plus 4 in relaxed mode). Read tools cover jobs, resumes, the fact ledger, the material library, the knowledge base, reminders, referrals, interview notes, question-bank history, review history, deep-dive records, the analytics dashboard, share packages, AI job-comparison records (batch time, jobs and verdicts — no scores, percentages or score-derived rankings are returned), application records (by batch, with failure categories and actionable diagnostics, so “why did the last application fail” finally has an answer), the file-copy list (metadata only: which files were stored, their type and size, never the contents), plus web-form fill records and past page URLs, and queue state on the apply desk. Write tools cover creating or updating knowledge notes, adding reminders, marking reminders done or dismissed, favoriting or unfavoriting resumes and writing a note (content and layout untouched), adding interview notes, adding referrals (status defaults to Contacted; full editing stays on the apply desk), reading, creating and updating tracker entries, and creating or updating layout presets and listing them in the template workbench. For deletion the assistant only explains where the entry lives and leaves the action to you: it has no delete tool.
The assistant's capability map is maintained alongside the features: the web-form entry states the “fill, never click” rule together with the relaxed-mode exceptions and their boundaries, and the dataset entry matches the actual backup wording — the boundary stated on the map is the real boundary. Its edits to favorites and notes, application records, layout-preset lists and reminder flags all appear with their Chinese names on the “What the assistant did” card.
Its ground rules sit at the top of the system prompt: say you do not know when you do not know; write data only when explicitly asked; anything about the user's data must be looked up with a tool before answering; never make things up.
It does not start captures or applications for you. Both reach external sites and represent an action you take towards a company, so they must be clicked on the page. The assistant only reports capture results and queue status accurately.
It has no delete capability at all. That is a product boundary, not a missing feature — handing delete rights to a model that can misread instructions costs far more than it gains. It also cannot confirm ledger entries for you and cannot generate a full HTML style template (models writing long HTML make mistakes, and the result is sanitised before saving, so users would get something that looked generated but was not right).
The assistant's relaxed mode (off by default)
Settings → Assistant and AI behaviour has a relaxed mode switch that is off by default, and turning it on states exactly what it unlocks: the assistant may read your full profile (name, phone, email and other identifying fields), the real values written by web form filling, and past conversations — all of which are sent to the model provider you configured along with your question. With it off nothing changes: you get redacted views only, and the four sensitive tools are not offered at all. In either mode, credentials such as API keys, global configuration and the image content of resume photos are never sent, and there is never a delete tool.
The floating orb: the assistant from any page
The floating orb card under Settings → Assistant and AI behaviour controls the global assistant entry point and is on by default. With it on, every page keeps a pale blue orb: single click opens the assistant, double click opens the apply clipboard (hovering explains both), it tucks itself against the edge when idle with a peeking pose, and it snaps to any of the four edges. It sits above dialogs, so it stays clickable while any modal or drawer is open; the clipboard card from a double click appears next to the orb rather than in a screen corner; and while the My Profile form has unsaved changes, Save profile / Cancel float above the orb so you do not have to scroll back to the top.
Toutou clipboard: double-click the orb
Double-click the floating orb to open the Toutou clipboard; a single click still opens the assistant (hovering explains both). It solves “a block of text I paste ten times a day”: save the text you keep pasting as a snippet, and copy it in one click when you need it.
Click Add snippet to create one; the name may be left blank, in which case the first 20 characters of the content are used. Snippets can be edited or deleted at any time, and Copy pastes the saved text exactly as written. The limits are 50 snippets at most, 60 characters for a name and 4000 for the content — at the limit the button states it plainly (“Snippet limit reached (50)” or “Reached the 4000-character limit”) instead of refusing without a word.
These snippets live only in this browser (localStorage): they are not uploaded, not included in dataset backups, and take no part in resume generation or web-form filling.
Managing conversations
- Conversations can be renamed, pinned, favorited, shared by link, continued in a new conversation, moved into a group, archived and deleted (into the trash).
- Export as Markdown, or save to the material library in one click.
- Messages carry a timestamp, can be quoted in a follow-up, deleted individually or deleted in bulk after selecting several.
- A built-in onboarding conversation explains what it can do the first time you open it.
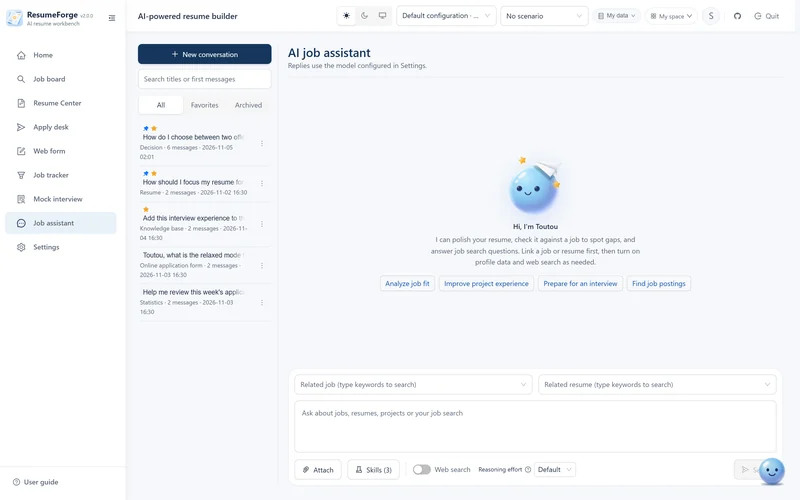
26. Workbench: Skills
Workbench → Skills is where you pin down preferences you keep repeating. A skill has two parts:
- The prompt: constrains the assistant's style and role, for example "you are a strict interviewer, always probe the basis of a number first".
- Knowledge files (optional): reference content carried by a skill, read only when needed so it does not occupy context permanently. Limits: 200,000 characters per file, 60,000 in total, at most 50 files.
Create, import and enable
- New skill: fill in name, description and prompt, and add knowledge files if you want.
- Import: a single
.mdfile or a.zipskill package (files can also be dragged into the matching area). - Enable: the list shows how many knowledge files each skill carries and whether it is on or off.
- Tick the switches on the assistant page: which skills are enabled at any moment is decided in the conversation page.
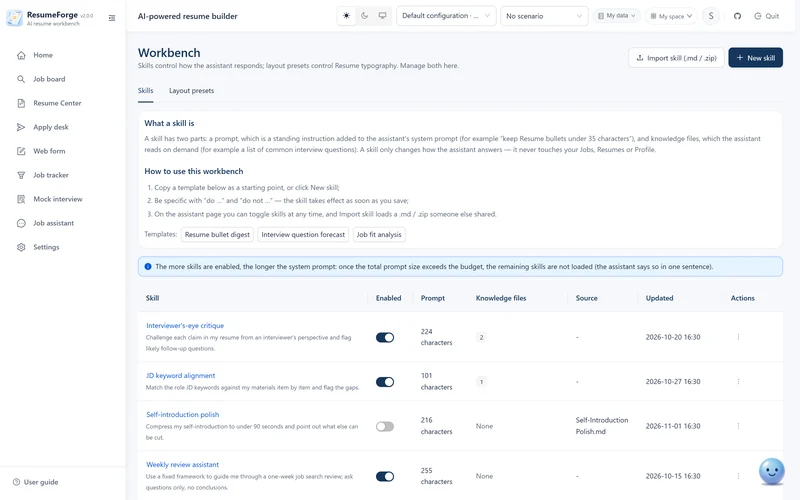
27. Template workbench: layout presets
The workbench → Layout tab manages layout presets: a set of typographic parameters that sits on top of any template. It does not decide what the resume looks like — that is the template's job, and templates are chosen in the builder.
| Template | Layout preset | |
|---|---|---|
| What it governs | What the resume looks like: typeface, structure, headings and color bar | A set of typographic parameters: accent color, body color, muted text color, rule color, type scale (0.35–1.16), line height (1.2–2.2), margins (0–26mm) and section spacing (0.6–2.2) |
| Where it comes from | Six built-in templates ship with the app and cannot be created | Four built-in presets, or create your own |
| Where it is used | Builder left column → Template → Choose a resume template | Builder left column → Layout, or manage them on this page |
Built-in and custom layout presets
The top of the page is a read-only row of built-in presets: Standard / Compact / Spacious / Single spacing. They are always available and can be neither renamed nor deleted.
- Custom presets: “New preset” creates one; name it, set the parameters and choose “Save preset”. Rows can be edited or deleted inline, and “Ask the assistant to change this template” is available too.
- Where to pick it: custom presets appear alongside built-in ones in the Layout dropdown in the builder's left column; “Follow template” uses the template's own parameters.
- Parameters only, never content: switching presets does not touch your text and does not change the section order.
- Custom templates were retired (November 2026): writing HTML, importing HTML or copying a built-in template and editing it is no longer supported; custom templates already used by existing resumes still render as before, they simply cannot be created any more.
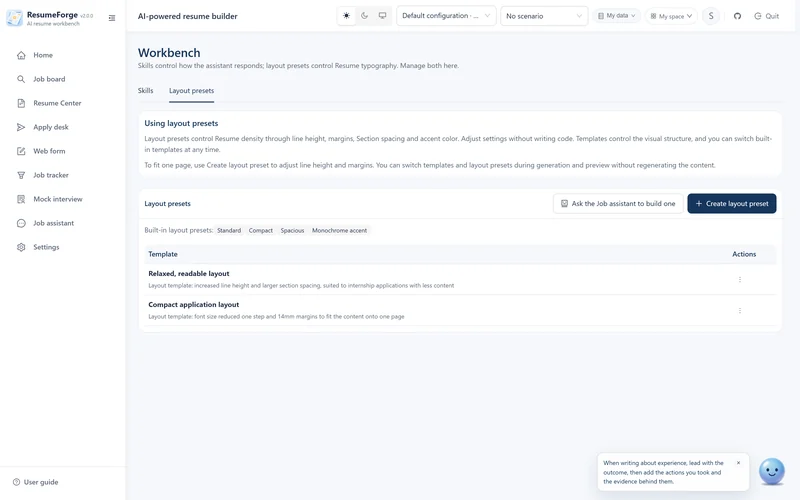
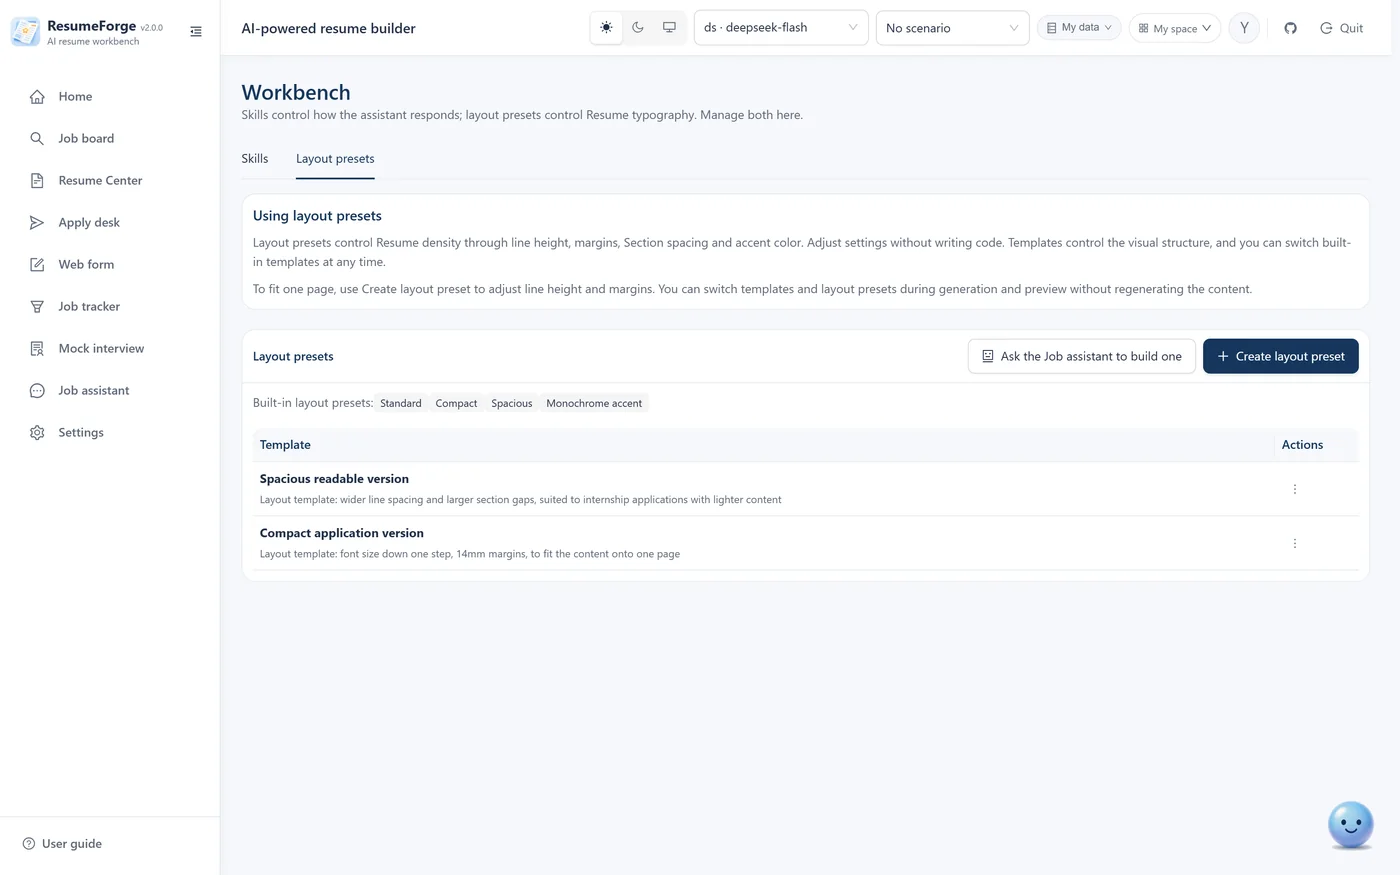
Choosing a template (in the builder)
The Template control in the builder's left column opens “Choose a resume template”: each of the six built-in templates renders a real preview, switchable between small / standard / large type sizes, and “Use this template” applies it. The preview always uses built-in sample content — it answers “what does this template look like”, not “what does my content look like”; for your own content, the right-hand column is always a live preview.
- Template and preset change independently: switching templates keeps the preset you tuned, unless you explicitly choose “Use template defaults”.
Try and compare: two templates side by side
When you cannot tell which template suits this content better, use Try and compare in the template gallery: it shows two templates side by side with identical text and typography settings, so the only difference is the template itself. A single template card also has Try template, to try that one alone.
Preview content can be “Sample content” or “My content”. The sample only answers “what does this template look like” and does not measure your length; “My content” lays the current content out for real and measures the pages, reporting “Current settings need approximately N pages (limit: M pages)” and saying plainly that export will be cut down to the limit when it goes over. A resume that has never been saved cannot be measured — you are asked to save the current content first, instead of being handed an estimate.
Layout overrides, pick one of two: Keep current layout overrides, so the settings you tuned by hand — line spacing, colour and the like — stay active; or Use template defaults. The latter is not a tweak: it clears every layout setting (font size, line spacing, colours, page margins and the entry-level overrides), so before you click it confirms that “using template defaults clears every layout setting”, and you can still undo once before saving.
The trial itself is read-only: leaving it changes neither the original template nor its settings; only Use this template writes anything, and it leaves a history step behind.
Let the assistant draft a layout preset
The workbench → Layout tab offers “Ask the assistant to build one” (and “Ask the assistant to change this template” on each custom preset row). The jump pre-fills the question on the assistant page — pre-filled only, never sent automatically, so you can edit it first. The assistant can create or change layout presets only, not templates.
28. Material library and knowledge base
The two modules look alike but divide the work: the material library holds loose material that is not yet organized, while the knowledge base holds written notes you want to read again.
| Material library | Knowledge base | |
|---|---|---|
| What goes in it | Certificates, work samples, links, notes, internship material, campus material | Interview experiences, resume tips, job-search strategy, interview Q&A, company information, industry knowledge |
| Fields | Title, category, body, URL, attachments, notes | Title, category, tags, Markdown body |
| Typical use | Where did I put that scanned certificate | This lesson I want to read again |
The file copy library
The material library gained a My files tab: every file stored in ResumeForge — material-library attachments, resume photos, job-note images, candidate-job screenshots, assistant attachments — keeps a copy here for browsing. Images and PDFs preview inline; other types open with the system handler in one click. Copies live in the application data directory under user_files/, de-duplicated by content fingerprint (the same content is stored once); they are backfilled idempotently at startup and when switching datasets, and rebuilt automatically when a dataset is switched or migrated (the data inventory in section 31 lists this directory too). The assistant can query the copy list as well (metadata only, never file contents).
Operations they share
- Search: matches title, body or note.
- Filter by category and tag.
- Click a card for details: the right-hand drawer shows the full body, the note and the attachment list or text, with follow-up actions such as edit. Cards use
role="button"rather than a<button>element (they contain edit and delete buttons, and a button inside a button is invalid HTML), and clicks skip inner interactive elements — otherwise clicking Delete would also open the detail. Enter and space work too. - Deletion goes to the trash and can be undone.
- The assistant can search them: it reads the material library and knowledge base and can create or update knowledge base notes, but never delete.
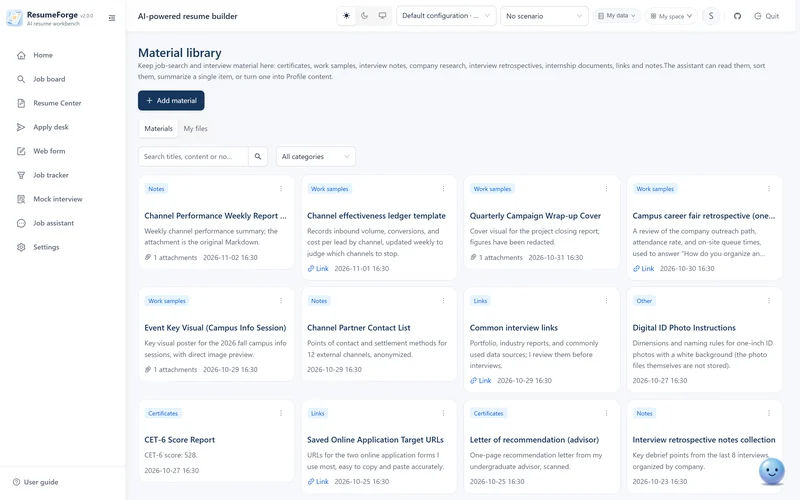
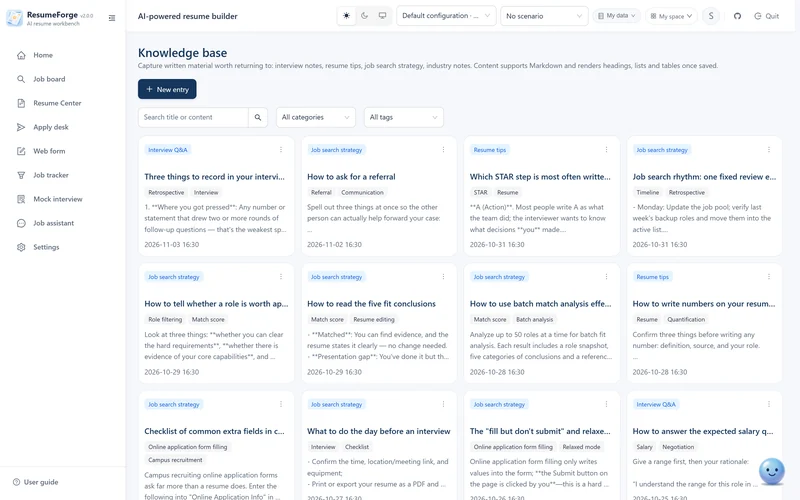
29. Trash
22 kinds of content do not disappear when deleted; they go to the trash first: jobs, candidate jobs, resume records, application records (tracker progress and apply details count as two kinds with the same label in the UI), fact ledger, material-library items, assistant conversations, interview notes, referrals, reminders, share packages, question-bank history, review history, knowledge notes, web-form fill records, expression assets, glossary terms, profile plans (groups), custom sections, custom fields and profile entries.
How to use it
- 22 kinds of content are mixed into one table with a type tag and a deletion time — what you are usually looking for is “the one I deleted a few days ago”, and a title without a time would force you to open them one by one.
- Filter by type, with a count per type.
- Restore takes one click (a safe operation, no second confirmation); delete permanently and empty both ask for confirmation, and the wording states the consequence: "will be permanently deleted and cannot be restored".
- The success message reads “Moved to trash; restore it from Trash” — wording it as “Deleted” would suggest the content is gone, when it is in fact still waiting there.
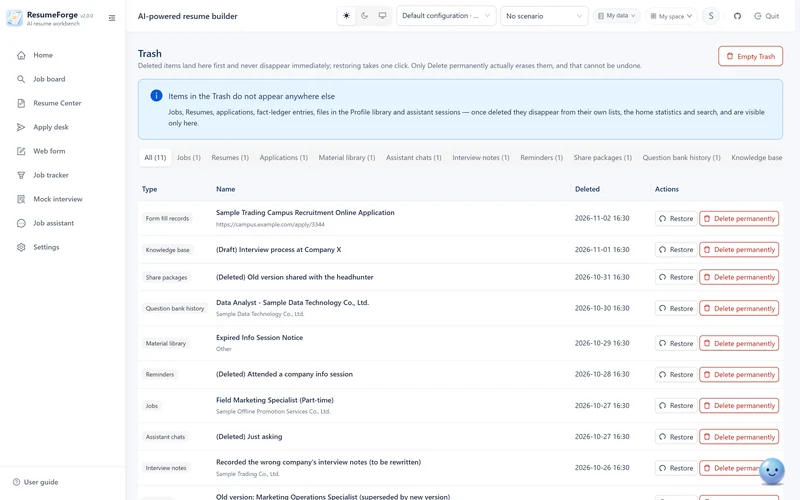
Upgrading never "sends your old data to the trash". When a deleted_at column was added to six tables, the new column had to be NULL for existing rows — defaulting it to a timestamp would put every historical record in the trash on upgrade, looking exactly like "all my data was deleted". A dedicated test pins this down.
30. Global search
Global search opens with Ctrl / ⌘ + K (available on any page; the header no longer carries a magnifier, and the home page has its own search card). It opens a panel in the top-right corner covering 8 kinds of content: jobs, resumes, referrals, reminders, interview notes, fact ledger, material library and profile entries. Type a keyword and press Enter. Hidden or private profile fields never appear in results.
Its value is that you do not have to remember which module something lives in: what you remember is usually a sentence from a note or a body of text, not the title, so a search box that only looks at titles is barely a search box.
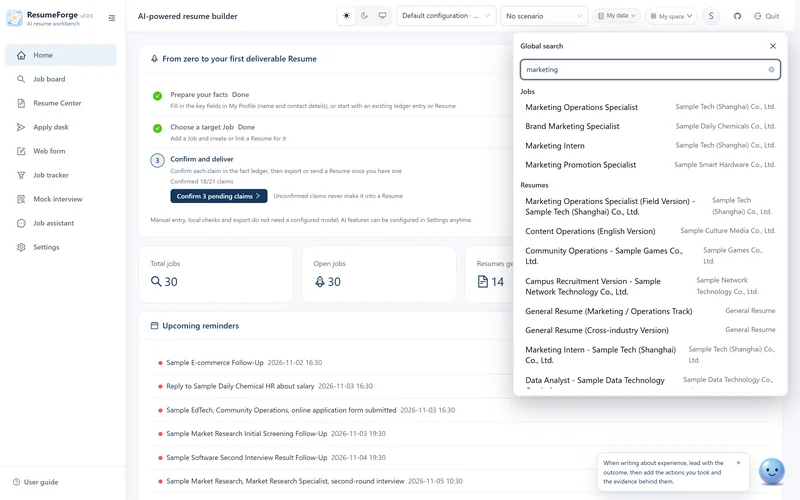
31. Data, backup and privacy
Where your data lives
In the portable bundle or source form these paths sit under backend/data/ in the project directory; the Windows desktop installer keeps everything under %APPDATA%\ResumeForge\data (the relative paths shown in the app match this).
- The main database:
backend/data/resume_forge.db(SQLite) holding jobs, profile, photos, resumes, the ledger, conversations, reminders and referrals. - Several datasets:
backend/data/datasets/, one database file per dataset. - Apply browser session:
backend/data/browser-profile/(a separate directory whose contents the app never reads). - Captured page text (only when ticked):
backend/data/captures/. - The file copy library:
backend/data/user_files/, a mirrored copy of stored content such as material library attachments and photos, deduplicated by content fingerprint. - Automatic backups:
backend/data/auto-backups/(snapshots on an interval, keeping the most recent 5 by default and configurable in settings; rotated snapshots go to.trashfirst rather than disappearing). - Backups:
backend/data/backups/(some repair scripts copy the whole database before writing).
Where exported files are saved
Settings → Data and export has a “Where generated content is saved” card (pick-only): “Choose folder” opens the native folder dialog and saves immediately. Left empty, files go only to the browser's default download folder; once set, exporting a resume also writes a copy to that folder. If the folder is missing or not writable, the reason is explained in place as soon as you save.
Datasets: several sets of data and backups
- New empty dataset: start one from scratch.
- Export: export the one currently in preview.
- Export all datasets: appears when there is more than one, and packs the current dataset plus every other into a single package.
- Import backup as a new dataset: the list gains one more entry; click Switch to move the app onto it and the page reloads automatically. A restored dataset gets a brand-new identity — reusing the id from the package would overwrite the copy already on this machine, irreversibly.
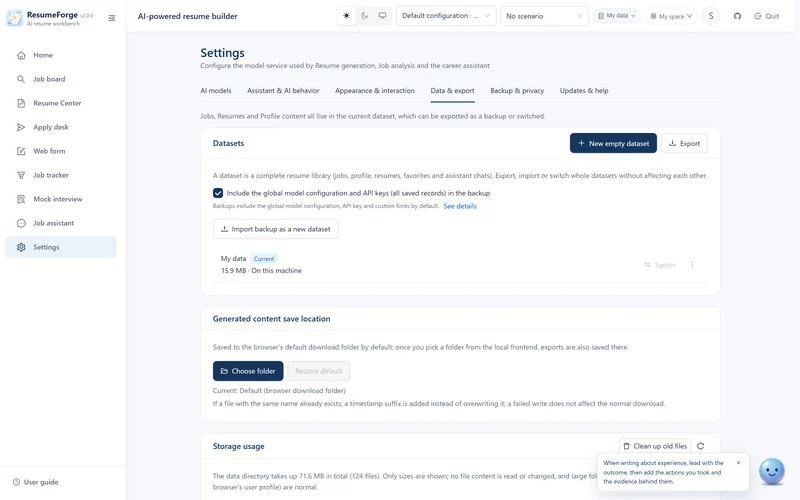
The format number follows the content. Exports are currently format 4 (a set of datasets); including the global model configuration makes it 5; adding global assets such as fonts makes it 6. The current app reads up to 6, and an older build refuses a newer format ("upgrade the app before importing") instead of quietly restoring part of it — letting it through would make people believe the restore worked.
Import restores dataset by dataset: each dataset is validated and written on its own, a failing one is reported and listed separately while the rest still import, and only when every sub-package fails does the whole import abort (nothing has been written at that point). Seeing “1 failed” means the other datasets really were imported.
Paths inside a package are not trusted: a file entry is accepted only in the shape datasets/<valid id>.db; anything pointing at the main database member or containing .. is rejected.
What leaves this machine
| Action | Reaches the network | What is sent |
|---|---|---|
| AI resume generation / requirement reading / match analysis (five verdicts) | Yes | The job JD, relevant profile fields, and the confirmed entries in the ledger |
| The four writing enhancers / the parts of the quality check that need a model | Yes | The text you want transformed plus the necessary context |
| Assistant conversations | Yes (plus search requests when web search is on) | Your question plus the context you chose to link |
| Mock interviews / question bank / review / interview deep dive | Yes | The relevant parts of the job and profile, and your answers |
| Automatic capture / apply desk | Yes | Search and apply requests to the job site (issued from your machine) |
| Local profile management / job management / writing by hand / layout rendering / export | No | — |
| Photos | No | Photos are never sent to the model; they are written into files only at export time |
Two boundaries worth stating: during document extraction the text is extracted locally and the original file is neither uploaded nor stored; dataset export includes the model API key by default — the switch “Include global model configuration and API key in backup (all saved records)” is on by default, and clearing it keeps the key out of the package. When included, the key travels in its on-disk form: on Windows that is DPAPI ciphertext (bound to the current user and machine, and treated as unconfigured if another machine cannot decrypt it), never decrypted plaintext. The server listens on the loopback address only (127.0.0.1) and is not exposed.
Preview before sending, and model usage
The location is Settings → the AI model page → Outbound data and usage. The two cards answer two questions: what exactly went out this time, and how much it all cost.
Preview before sending lists what is about to leave: the target service, the profile categories, the attachment types, the excluded Fields, whether webpage text will be fetched, and the text to send itself, with its character count. When the text is long only the beginning is shown here, but the full content is what goes out. The preview is kept only while it is open and is never written to local storage or logs; when a potential secret is detected you are asked to remove it first (“Remove secrets before sending”), and data is sent only after you approve.
Model usage tracks call counts and tokens only and saves no prompts and no text — it is a ledger, not a request log. Read it by task (resume generation, resume revision, job reading, the job assistant…), by model or by dataset; each record carries the duration, the retry count and the finish reason (completed normally / length limit reached / canceled by user / call failed / budget exhausted / tool calls). Two rules to remember: a token count that cannot be read shows as unknown, never as 0; and with no pricing configured it does not estimate a cost rather than costing it at zero. The estimate is only for a sense of spend — your provider's invoice is authoritative (see “Usage and cost estimate” in section 2).
32. Upgrade and rollback
Checking for updates in Settings (Windows)
On Windows you can check for a new version in Settings: when one exists it shows the version number, offers progress, and can download in the background while you keep using the app. When the download finishes, Restart and install overwrites the program files in place and restarts automatically.
The whole update keeps the program files separate from your data directory (data/, .env, runtime/), and takes a full package snapshot (database, attachments, fonts, global model configuration) before overwriting program files, continuing only once the snapshot is verified restorable. A normal version update does not lose jobs, resumes, conversations or settings. macOS currently uses a manual flow: download the new archive and run update.command in the project directory to replace the program files.
Going from 1.x to 2.0 is a deliberate exception. 2.0 starts from a fresh library: on first launch the old database is archived as a whole package to backend/data/legacy-archive/<timestamp>/ (database file, datasets and an ARCHIVE-README.txt), and only after the archive is verified readable is the old database moved aside and an empty one created. The old data is not deleted, but it is not migrated into 2.0 either: the new library starts empty. When you need the old data, open the archive with 1.0.2.
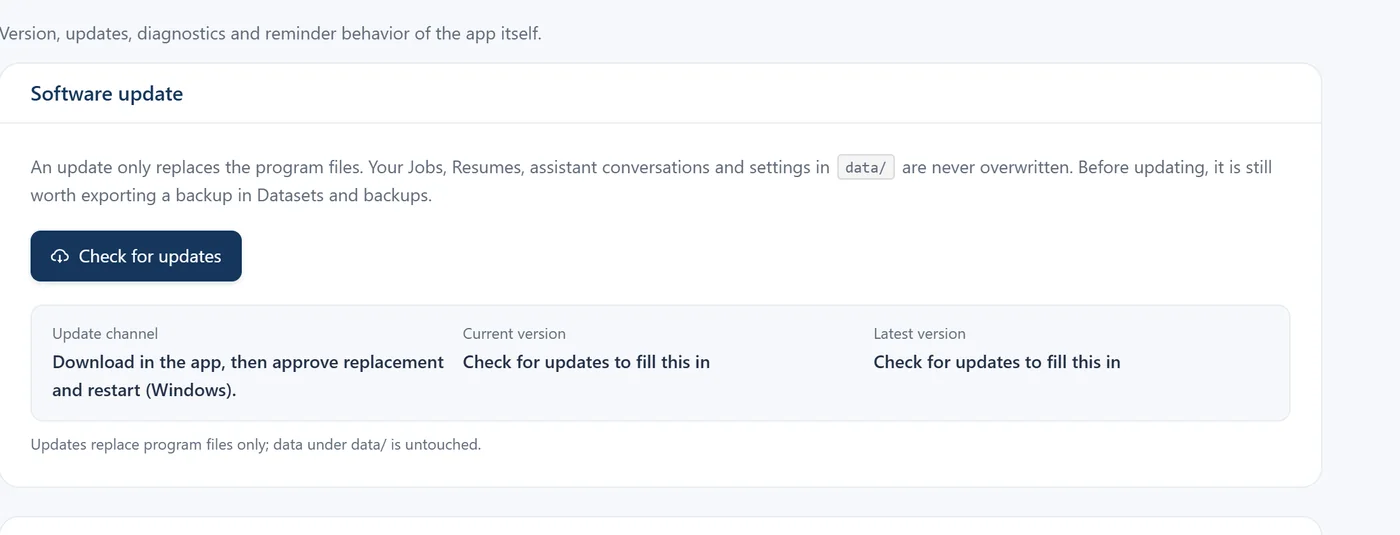
From 1.x to 2.0: archive the whole package, start from a new database
-
Make a 1.x backup first
In 1.0.2, use Settings → Data → Export all datasets and keep that package together with
legacy-archive/. 2.0 does not import 1.x backup packages; they need 1.0.2 to open them. -
Launch 2.0
When the startup gate finds the old database shape it archives, verifies, creates an empty database and migrates. If any step fails, startup aborts and the original database stays exactly as it was (not moved, not replaced), so there is no "upgrade died halfway and the data is gone".
-
When you need to roll back
Open the database file inside the archive directory with 1.0.2, or restore from the backup package you made in step 1. A package exported by 2.0 imports into 2.0 normally, but 1.0.2 rejects it as "from a newer version" — a rejection pointing the right way.
Updating with the update script
On Windows run update.cmd in the project directory; on macOS run update.command. It fetches the new version and replaces only the program files, keeping data/, .env, runtime/, the virtual environment and the frontend dependencies. Structural changes after 2.0 are handled by the baseline migration at startup; 2.0 does not import backup packages exported by 1.x, so open those in 1.0.2. On macOS, double-click stop.command first.
Updating with Git
git pull
# when dependencies changed
cd backend && .venv\Scripts\python.exe -m pip install -r requirements.txt
cd frontend && npm install
Things to watch when rolling back
- Rolling back the program files does not roll back the database schema. If the newer version ran a migration that added tables or columns, those remain after going back — usually harmless (the old version ignores them) but they do not disappear by themselves.
- The reverse case matters more: a backup package in a newer format is explicitly refused by an older version rather than partly restored. Seeing "upgrade the app before importing" means the package contains something the older version cannot read.
- Running Export all datasets once before upgrading is the cheapest insurance.
Uninstalling
Run uninstall.cmd. Data is kept by default (data/ and .env); confirm the prompt if you want it removed as well.
33. Troubleshooting
I do not know GitHub, downloads are slow, and I cannot tell which file to take
Hand the link or the archive to an AI: give the repository link you see, or the zip you already downloaded, to any assistant (ChatGPT, DeepSeek, Doubao, Claude all work) and ask it to walk you through downloading, unzipping and which file to double-click.
You do not have to work out which file on the Releases page is the installer — just ask "which of these should I download". The same explanation is in three steps to get started.
macOS says "cannot be opened because Apple cannot check it for malicious software"
This is the system's download quarantine, not a problem with the program. In Finder, right-click start.command → Open and click Open once more in the dialog — once is enough. Alternatively run xattr -dr com.apple.quarantine . in the project directory from a terminal. Full details in section 1.
Double-clicking start.command on macOS does nothing at all
Some unzip tools drop the executable bit. Open Terminal, change into the project directory and run bash start.command; it does exactly what a double click would.
Check for updates reports GitHub returned HTTP 403
A 403 is usually not a problem with the repository but GitHub rate-limiting anonymous API calls (60 per hour per IP),
or a network that blocks api.github.com — and from inside the app the two look identical.
Since v0.12.0 this path has a fallback: when the primary call fails it reads the latest version number a different way (following the redirect of the releases page, without touching the API domain), so in most cases you still see "you are on the latest version" or "a new version is available" rather than a bare error. That fallback cannot retrieve release notes or installer URLs, so in that case it tells you to download from the Releases page.
If both paths fail, the message explains why each one failed and suggests trying again later (rate limits usually reset by the hour).
After double-clicking start.cmd the page never opens
Read the last few lines in the launcher window. Common causes: first-run dependencies are still installing (usually a few minutes); the port is taken (use -BackendPort 8010); a blocked network prevents dependency installation (the message gives a mirror command). Visit http://127.0.0.1:8005/api/health manually: if it returns {"status":"ok"} the backend is fine and the problem is in the frontend.
It says the Python version is not supported
Python 3.14 is not supported yet. The one-click launcher prepares a 3.12 for you automatically; when starting manually, create the virtual environment with Python 3.11–3.13 (3.12 recommended).
Connecting to a custom model fails
Check in order: does the base URL match the protocol (native Anthropic is https://api.anthropic.com, while an OpenAI-compatible layer includes /v1); is the model name in the List available models result; is the API key valid; is a proxy blocking it. After changing settings, click Test connection — the interface echoes the server's raw error, which is far more useful than the word "failed".
It says the current model does not support image input
The model you chose has no multimodal support. Switch to one that accepts images, or type the text from the screenshot into the box — the local rules still parse part of the fields from plain text.
Uploading an image says the content does not match the extension
The file is neither an image nor named like one, so the extraction request was rejected. Check whether the file is damaged, or use the right file.
An uploaded document produces no content
Most likely a scanned PDF (pages are images with no text layer). Text cannot be extracted from that locally; paste it as an image instead, or run OCR somewhere else first.
Extracted fields are not accurate
Extraction is a draft, not a result. Check dates, numbers and full company names line by line, especially when they came from a long screenshot or a complex layout.
An AI feature says no model is configured, or the output stops mid-way
Not configured: go to Settings → AI model, fill it in and test the connection. Output stopping mid-way: usually network or provider rate limits, so retry; generation tasks can be cancelled and restarted without leaving a half-written resume.
If I close the dialog during generation, does the task stop?
No. Generation is a background task: closing the dialog lets it keep running, and when it finishes a notification pops up and the preview opens. To check progress, look at the task status under that entry in Resume Center.
The export is blocked and mentions a [TODO] marker
This is by design, not a fault. Go back and fill the placeholders, or choose "export the draft anyway" in the dialog. Only these four forms are caught: [to add…], [to confirm], [to be completed] and [to verify] — ordinary prose such as "further explanation to be added" is not affected.
Browser printing gives a different page count than the screen
The pages on screen are an approximation split at A4 height; browser printing is authoritative. Browsers do not expose the real printed page count to JavaScript, so the app cannot compute it and says so honestly. For an exact match, use Export PDF (server-side) rather than browser printing.
Automatic capture finds nothing
Look at the failure reason for that run under capture records. Common ones: the keyword was too narrow or the city wrong; the site's filter conditions failed validation (reported separately as "could not be applied"); a login is required (sign in once in the apply browser). Results also land under this run's results — remember to tick and import them there.
The apply desk keeps failing
Look at the failure category on each record. Login or captcha: handle it once by hand in the apply browser. A dead selector means the site changed and an adapter update is needed. Unsupported source: change the apply link to the job's address on the job site.
I clicked "close browser" but the window is still open
That browser was not started by this run, and the app only closes handles it owns; it never guesses at processes by PID (to avoid closing your own browser). Just close that window yourself.
The data looks empty after opening
Most likely you switched to another dataset by accident. The one marked "current" under Settings → Data and export is the one in use; switch back.
The charts on the analytics page are empty
The chart shows an empty state rather than a zero axis — that is the honest definition at work: with nothing to draw, it does not draw a chart of zeros. Read the note on the page; it usually names the missing fields (most often the application date).
The assistant sometimes says it does not know
That is exactly what its ground rules require: say you do not know instead of inventing something. If you think it should know, check whether the relevant content is in the system (rephrase, or explicitly ask it to look in a particular module).
34. Interface details and shortcuts
Keyboard
| Key | Effect |
|---|---|
| Ctrl + V | Paste a screenshot into the extraction area |
| Enter / Space | Open the detail drawer on a list card (clickable cards show a focus ring) |
| Right click | The action menu on an apply queue row (edit / remove from queue) |
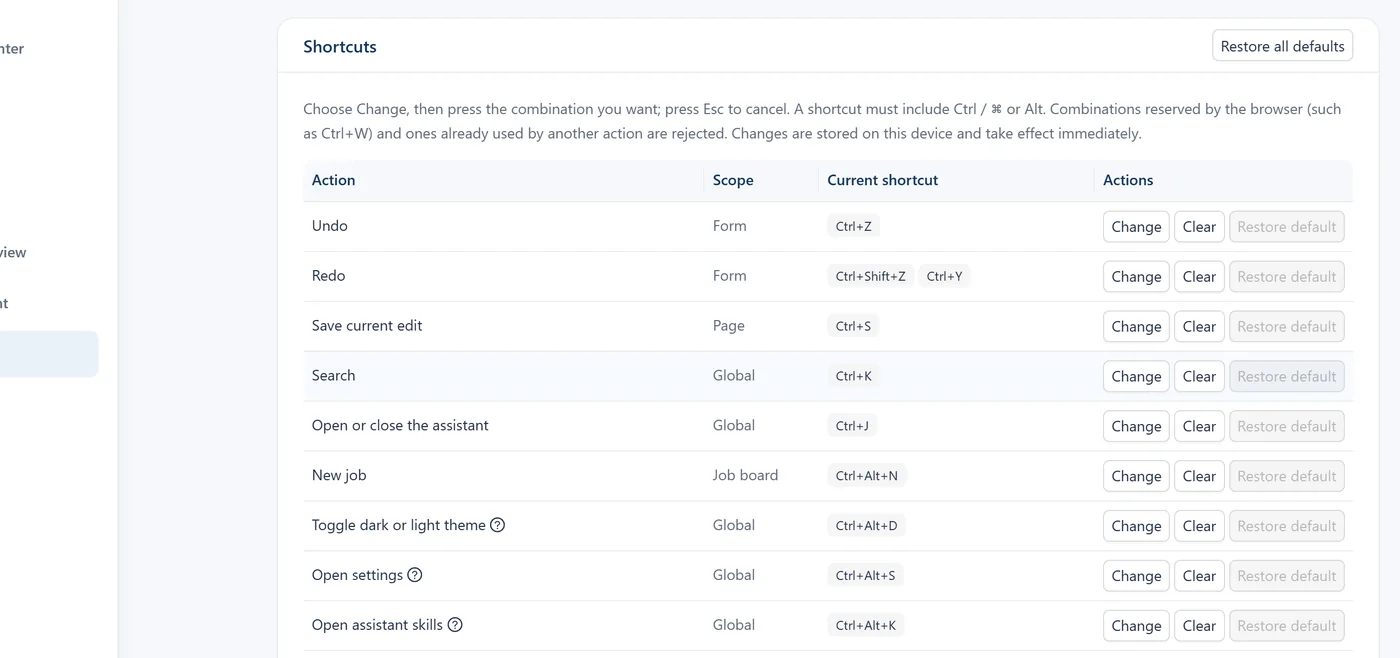
A few details that are the same everywhere
- Date fields are all calendar pickers (application date, posting date, verification date, referral submission date and so on), so no format has to be typed.
- Lists and cards open details with one click: referrals, material library, interview experiences, reminders, knowledge base, apply queue and apply records all use the same drawer, with consistent layout and closing behaviour.
- Every label whose meaning is not obvious has a hover explanation (polish level, source markers, status labels and so on).
- Scrollbars are styled consistently: appearance only, never size semantics — scrollbars still appear when needed and never vanish because of styling (which would make "can this scroll" impossible to judge).
- In-app notifications: batch completion, successful saves and similar events arrive as notifications that also say where to go next.
- The sidebar order is the real order of use: Home → Job board → Resume centre → Apply desk → Web form → Tracker → Mock interview → Assistant → Settings. There are no group headings — the sidebar is only 200px wide, and headings would push the menu onto two screens. The bottom-left of the sidebar holds only “User guide”; the GitHub repository sits in the top-right of the header, next to “Exit”, and opens the repository in one click.
- The left navigation can be collapsed to give the content more width, and the collapsed state is remembered; the interface switches between Chinese and English (Settings → Appearance and interaction → Language), and in English the enum values and backend-supplied labels go through the same translation set.
- One dialog skin: dialogs are vertically centred with the same radius, shadow and padding everywhere, long content scrolls inside the dialog, and the footer no longer sits against the bottom edge of the screen.
- Two loading components: block content uses skeletons and smaller areas use the shared loading block, so loading looks the same everywhere.
- Inputs no longer show a 0/4000 counter: at the limit a single red line says "N characters maximum", and the interface is quieter the rest of the time.
Bulk select and bulk delete
To clear a run of entries at once you do not have to click through them one by one. In the resume centre, job board, candidate jobs, assistant conversations and messages, past interviews, deep-dive history, question-bank history, calendar reminders, web-form fill records and the trash, every entry has Select multiple in its right-click menu; once in tick mode, choose several and delete them with one shared confirmation. Assistant messages work the same way: right-click any message to enter selection mode, then click Delete selected.
Deletions all go to the trash and can all be restored — so the confirmation asks “should these be moved away”, not “should these be erased for good”. The trash's right-click menu adds two more: restore and delete permanently, and only the second cannot be undone (see section 29).
Ticking is a temporary state: Exit selection mode returns to the ordinary list, and that list's inline actions are exactly as they always were.
For development and troubleshooting
- With
npm run devrunning locally, holding Alt + Shift and clicking an element jumps to the matching source line in VS Code (development only). - The screenshots and animations were captured by scripts from a really running instance; the scripts live under
tools/in the site repository:seed_demo_full.py(build the demo data),capture_shots.py(capture) andbuild_images.py(produce the deployed images).
Still stuck?
If the documentation does not cover your problem, please open an issue on GitHub. The repository also has more technical documents: architecture, prompt inventory, and notes on upgrading and data safety.